10 Simple Steps to Prepare Pumpkin Seeds
Many people love the idea of snacking on fresh, homemade pumpkin seeds but feel overwhelmed by the process of preparing them. You’re not alone—getting that perfect crunch and flavor can seem tricky at first.
Luckily, with a few simple steps, you can turn raw pumpkin seeds into a delicious treat you’ll enjoy.
To prepare pumpkin seeds, start by scooping them out of the pumpkin and rinsing off the pulp and strings under cold water. Soak stubborn bits if needed, then dry the seeds thoroughly using a towel.
Choose your favorite seasonings or flavor variations, then spread the seeds evenly on a baking sheet. Roast at 350°F for about 15-20 minutes, stirring halfway.
Allow them to cool completely before storing in airtight containers.
Want to perfect your technique and discover tasty ideas? Keep going for all the details.
Key Takeaways
- Scoop the seeds out of the pumpkin and rinse them under cold water to wash away the pulp and strings.
- If some bits are stubborn, soak the seeds in water for 10-15 minutes, then drain and dry them thoroughly.
- Spread the seeds evenly on a towel so they can dry completely before roasting.
- Toss the seeds with your favorite seasonings or just sprinkle them with salt—whatever you prefer!
- Roast in a preheated oven at 350°F for 15-20 minutes, stirring now and then until they’re crispy.
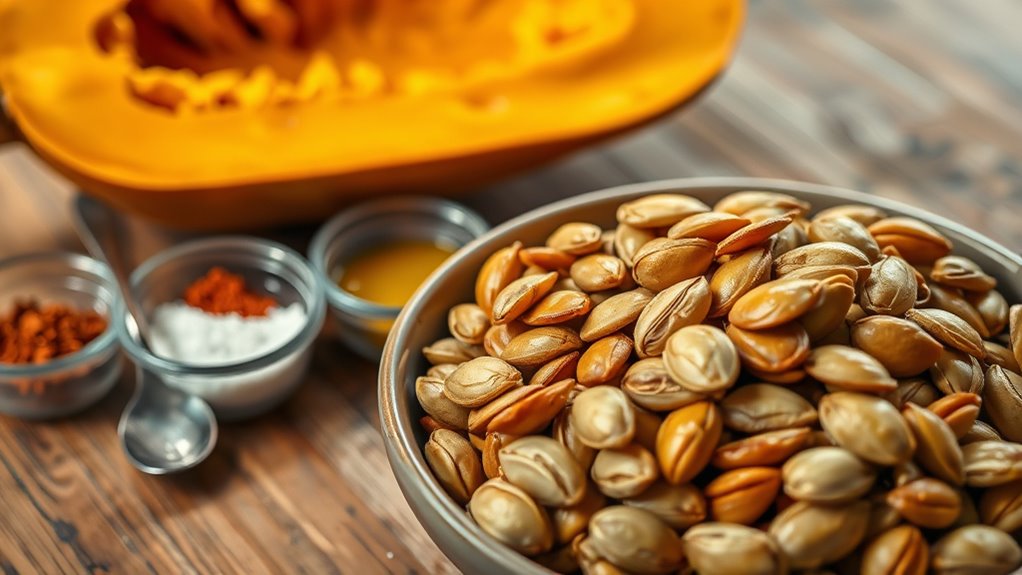
How to Clean Pumpkin Seeds for Roasting
To clean pumpkin seeds for roasting, start by scooping them out of the pumpkin and placing them in a bowl. Proper cleaning techniques are key to preparing great seeds.
First, rinse the seeds under cold water to remove pumpkin pulp or strings. Use your hands or a colander to gently agitate, loosening any remaining bits.
Rinse seeds under cold water, gently agitating to remove pulp and strings for clean, crispy roasted seeds.
For stubborn bits, soak the seeds in water for 10-15 minutes. This makes it easier to separate the seeds from the debris.
After soaking, drain the seeds and spread them out on a towel to dry thoroughly. Removing excess moisture ensures they roast evenly and get crispy.
Don’t rush this step—well-dried seeds give better flavor and crunch. Patience and thorough cleaning are essential for tasty, clean pumpkin seeds ready for seasoning or baking.
Choosing the Best Seasonings for Pumpkin Seeds
Picking the right seasonings can really turn your pumpkin seeds into a tasty treat. You could go for the classic salt and pepper — always a good choice — or try something a bit more adventurous, like spicy chili powder or sweet cinnamon. It’s all about what flavors you enjoy most. Just think about your favorites and experiment a bit to find the perfect seasoning combo for your seeds!
Flavor Pairing Options
Selecting the right seasonings can elevate your pumpkin seeds from simple snack to flavorful treat. For bold flavors, try spicy blends or savory mixes that pack a punch.
If you prefer a touch of sweetness, add sweet toppings like sugar or honey, complemented by nutty flavors for richness. Herbal infusions, such as rosemary or thyme, create a fresh, aromatic profile, while citrus zest adds brightness and a tangy contrast.
Investigate global spices like paprika, cumin, or curry powder for an exotic twist. For a more refined experience, experiment with gourmet twists by combining different seasonings, balancing heat, sweetness, and earthiness.
The key is to match seasonings to your taste preferences, creating a unique flavor profile that makes your pumpkin seeds irresistible.
Popular Seasoning Choices
Regarding seasoning pumpkin seeds, some choices stand out as timeless favorites that appeal to a wide range of tastes. Spicy blends add heat and excitement, while sweet toppings create a delightful contrast. Herbal infusions bring fresh, aromatic flavors, and savory twists enhance their natural nuttiness.
For extra crunch, consider adding crunchy toppings like sea salt or toasted spices. Gourmet options, such as smoked paprika or truffle salt, elevate your snack to a new level. International flavors like curry or chili lime introduce bold, exotic notes.
Kid-friendly seasonings, including cinnamon or mild cheese powders, make these seeds fun and appealing to little ones. Whether you prefer classic or adventurous flavors, these popular choices let you customize your pumpkin seeds for any craving.
How to Roast Pumpkin Seeds to Perfection
Want to roast pumpkin seeds to perfection? It all starts with choosing fresh, high-quality seeds. That way, you’ll get the best flavor and crunch in the end.
Once you have your seeds, spread them out evenly on a baking sheet. It’s important to give them plenty of space so they roast evenly. Then, pop them in the oven and roast at the right temperature—usually around 350°F (175°C). Keep an eye on them and check frequently, because they can go from perfect to burnt pretty quickly.
Paying attention to these little details makes all the difference. When you do, you’ll end up with crispy, flavorful pumpkin seeds that are just right every time.
Choosing Fresh Pumpkin Seeds
Before roasting pumpkin seeds, it’s essential to start with fresh, high-quality ones. Your choice of pumpkin variety impacts flavor, so pick seeds from pumpkins that look healthy and vibrant.
To guarantee seed freshness, look for these indicators: The seeds feel firm and plump, not shriveled or dry. They should have a clean, nutty smell, not musty or sour.
Check that the shells are intact without cracks or mold. The seeds should be light-colored and shiny, which indicates they were harvested recently.
Perfect Roasting Techniques
Once you’ve picked out fresh, high-quality pumpkin seeds, the next step is roasting them to bring out their best flavor and crunch. You can do this in the oven or on the stovetop, whichever you prefer.
Preheat your oven to 350°F (175°C). Spread the seeds in a single layer on a baking sheet. Roast for 15-20 minutes, stirring occasionally, until they turn golden brown.
For extra flavor, try seasoning the seeds beforehand. You can use salt, spices, or even sweet coatings. Just toss the seeds in your preferred seasoning before roasting.
Keep a close eye on them so they don’t burn. Once they’re crispy and fragrant, remove them from the oven.
Let the seeds cool slightly before enjoying. These simple techniques help ensure your pumpkin seeds turn out evenly roasted, flavorful, and perfectly crunchy every time.
How Long Should You Roast Pumpkin Seeds?
Roasting pumpkin seeds just right guarantees they turn out crispy and flavorful without burning. The key is the roasting time at the ideal temperature, usually around 350°F (175°C). Typically, you should roast your seeds for 15-20 minutes, but keep a close eye to prevent overcooking.
Roast pumpkin seeds at 350°F for 15-20 minutes until golden and crispy.
Here’s what to take into account: Check after 15 minutes—your seeds should be golden and fragrant. Stir or shake the pan halfway through to guarantee even roasting.
Keep a timer handy to avoid overdoing it. Remove once they’re crispy and no longer chewy, usually around the 20-minute mark.
Adjust the roasting time slightly based on your oven and seed size. Remember, the perfect roasted pumpkin seed balances crispy texture with a delicious flavor, achieved through the right roasting time at the ideal temperature.
Tips for Storing Pumpkin Seeds Freshly
Want to keep your pumpkin seeds fresh and tasty? The key is making sure they’re properly dried first—give them enough time to dry completely before you store them. That way, they won’t get moldy or spoil quickly.
And don’t forget about the storage containers! Airtight jars or bags are your best bet. They keep moisture out and stop pests from getting in, helping your seeds stay fresh longer. Just follow these simple tips, and your pumpkin seeds will stay delicious and flavorful for quite a while!
Proper Drying Techniques
Proper drying is essential to preserve pumpkin seeds and prevent mold or spoilage. Effective drying methods keep your seeds fresh and crunchier for longer. Focus on controlling moisture to prevent dampness that can lead to spoilage.
Spread seeds in a single layer on a towel or drying rack to promote even airflow. Use a well-ventilated area with low humidity to avoid moisture buildup. Turn or stir the seeds regularly to help them dry evenly.
Wait until the seeds are completely dry and hard before storing. This ensures no residual moisture remains, which helps keep your seeds fresh and prevents mold.
Airtight Storage Methods
Once your pumpkin seeds are fully dried, storing them in airtight containers is key to keeping their freshness and crunch. Use vacuum sealing if you want the longest shelf life and better moisture control, especially for long-term storage.
Glass jars with tight-fitting lids are great for smaller portions and help keep out air. Silicone bags are flexible, resealable, and also help prevent moisture from getting in. Don’t forget to label your containers with the date so you can track how fresh they are.
For extended storage, consider freezing your seeds to preserve their flavor and texture. Storing seeds in portion sizes means you won’t expose all of them to air each time you open a container. Proper airtight methods keep your pumpkin seeds crunchy, fresh, and flavorful for weeks or even months.
Creative Flavor Variations for Pumpkin Seeds
Exploring creative flavor variations can turn plain pumpkin seeds into a snack everyone will love. Imagine biting into seeds coated with bold, exciting tastes.
For a perfect blend, try these options:
- Sweet and savory: Mix honey, soy sauce, and a sprinkle of sea salt for a caramelized, irresistible crunch.
- Spicy and nutty: Toss seeds in chili powder, cumin, and a dash of cayenne for a fiery, flavorful kick.
- Garlic and herb: Combine olive oil, garlic powder, and rosemary for a fragrant, savory treat.
- Cinnamon and sugar: Coat with cinnamon and a touch of brown sugar for a warm, sweet snack.
These variations let you customize your pumpkin seeds, making them more than just a snack—they become a flavorful experience. Whether you like spicy, sweet, or savory, experimenting with flavors keeps your snack game exciting and delicious.
Troubleshooting Common Pumpkin Seed Roasting Problems
Even with the best flavoring techniques, roasting pumpkin seeds can sometimes lead to unexpected results. Burnt seeds happen if you leave them in the oven too long or at too high a temperature.
Uneven roasting occurs when seeds are spread unevenly or the oven has hot spots, causing some seeds to be overcooked while others stay undercooked. A soggy texture often means there’s too much moisture, which can happen if you don’t dry the seeds thoroughly or use too much oil.
Flavor imbalance can happen from over-seasoning or if ingredients aren’t mixed well, leading to clumps. Cooling issues may cause condensation, which affects how crunchy the seeds stay. To avoid these problems, keep an eye on the roasting time, stir the seeds during cooking, and spread them evenly.
Using ingredient substitutions wisely and controlling moisture levels can help prevent sogginess or burnt seeds. Proper timing and temperature control will give you evenly roasted, crunchy pumpkin seeds every time.
Nutritional Benefits of Homemade Pumpkin Seeds
Homemade pumpkin seeds are a nutrient-dense snack that offers many health benefits. Their high nutrient content makes them a powerful addition to your diet. Eating them regularly can support your heart health and give you a natural energy boost.
These seeds are a great source of protein, helping you build and repair tissues. Their antioxidant properties protect your cells from damage. Plus, pumpkin seeds promote good digestion and support gut health.
Pumpkin seeds boost protein intake, protect cells with antioxidants, and support healthy digestion and gut health.
They also help with weight management by curbing hunger and providing satisfying nutrients. Incorporating them into your diet can truly boost your overall wellness.
Here are four reasons you’ll love them:
- Boost your mood and mental clarity naturally.
- Strengthen your heart and protect against cardiovascular issues.
- Support your digestion with fiber and healthy fats.
- Raise your energy levels and stay active longer.
How to Use Pumpkin Seeds in Fall Recipes
As fall arrives, pumpkin seeds become a versatile ingredient that can elevate your seasonal recipes. You can sprinkle them on pumpkin soup for added crunch and nutty flavor or toss them into autumn salads for texture and protein.
Incorporate pumpkin seeds into your homemade pumpkin granola for a nutritious breakfast or snack. They make excellent crunchy toppings for yogurt or oatmeal, giving your healthy munchies a boost.
For a festive touch, mix seeds into seasonal snacks or combine them with pumpkin spice for a warm, cozy flavor profile. You can also roast pumpkin seeds with seasonings to create crunchy toppings for casseroles or roasted vegetables.
These seeds add a delightful texture and a subtle earthiness that perfectly complements fall ingredients. Whether used as a garnish or mixed into recipes, pumpkin seeds bring a satisfying crunch that celebrates the flavors of the season.
FAQs About Preparing and Roasting Pumpkin Seeds
Are you wondering how to prepare and roast pumpkin seeds perfectly? If so, you’ll love learning about their benefits and their rich pumpkin seed history. To start, consider these common questions:
Discover tips on roasting pumpkin seeds and their health benefits.
- How do I clean pumpkin seeds? Rinse thoroughly to remove pulp and dry well to ensure they turn out crispy.
- What’s the best roasting method? Toss the seeds with oil and seasoning, then bake at 350°F until golden.
- How long should I roast them? Usually, 15-20 minutes, stirring occasionally, for even roasting.
- Are pumpkin seed benefits worth it? Absolutely! They’re full of nutrients, healthy fats, and antioxidants that boost your health.
Frequently Asked Questions
Can I Roast Pumpkin Seeds Without Oil?
Yes, you can roast pumpkin seeds without oil. For healthy pumpkin seed preparation, rinse and dry the seeds thoroughly.
Spread them on a baking sheet and season with your favorite herbs or spices if you’d like. Roasting without oil still boosts their flavor and crunch.
Plus, it offers health benefits like healthy fats, fiber, and minerals. Just keep an eye on them to prevent burning, and enjoy a nutritious, oil-free snack.
How Do I Prevent Pumpkin Seeds From Burning?
To prevent pumpkin seeds from burning, keep a close eye on your roasting temperature. Set your oven to a moderate heat, around 350°F (175°C), so they don’t scorch.
Make sure to stir or shake the seeds halfway through roasting. This helps ensure they’re evenly exposed to the heat and prevents any spots from burning.
Controlling the roasting temperature and keeping a watchful eye on your seeds is key. That way, they stay crispy and avoid turning dark or bitter.
Are Raw Pumpkin Seeds Safe to Eat?
Yes, raw pumpkin seeds are safe to eat, but it’s good to be aware of their nutritional benefits and potential allergies. They’re packed with magnesium, zinc, and healthy fats, making them a healthy snack.
However, some people might experience allergic reactions. So, if you have nut or seed allergies, it’s best to proceed with caution.
Eating them raw is fine, but roasting or boiling can improve their flavor and digestibility.
What Is the Best Storage Method for Roasted Seeds?
They say “a stitch in time saves nine,” and the same applies to storing roasted pumpkin seeds. To keep them fresh, use the best containers like airtight jars or resealable bags.
Store them in a cool, dark place for up to two weeks to enjoy the crunch and flavor. For longer storage, refrigeration or freezing can keep them fresh for several months.
Can I Use Pumpkin Seeds for Baking Recipes?
Yes, you can definitely use pumpkin seeds for baking recipes. They add a delightful crunch and a nutty flavor, making your baked goods like bread, muffins, or cookies even better.
Pumpkin seed benefits include being rich in magnesium, zinc, and healthy fats. For the best results, use roasted or raw seeds, depending on your preference.
Try chopping the seeds or sprinkling them on top of your baked items for extra texture and nutrition. Your treats will turn out both tasty and nutritious!
Conclusion
With these simple steps, you’ll turn plain pumpkin seeds into crispy, flavorful treats. From cleaning to seasoning, roasting to storing, each step flows into the next, making the process easy and enjoyable.
As you get the hang of preparing pumpkin seeds, you’ll love the crunch and taste. Plus, you’ll benefit from their nutrition.
Welcome each step with confidence, and soon pumpkin seeds will become your go-to snack—crisp, tasty, and always satisfying.