10 Simple Steps to Save Tomato Seeds for Next Season
Gardening enthusiasts often dream of growing their own tomatoes, but saving seeds for next season can feel overwhelming. Many people struggle with figuring out the best way to preserve those precious seeds to ensure healthy plants year after year.
If you’re looking to become more self-sufficient and enjoy fresh tomatoes, you’re not alone—that’s a common goal among gardeners.
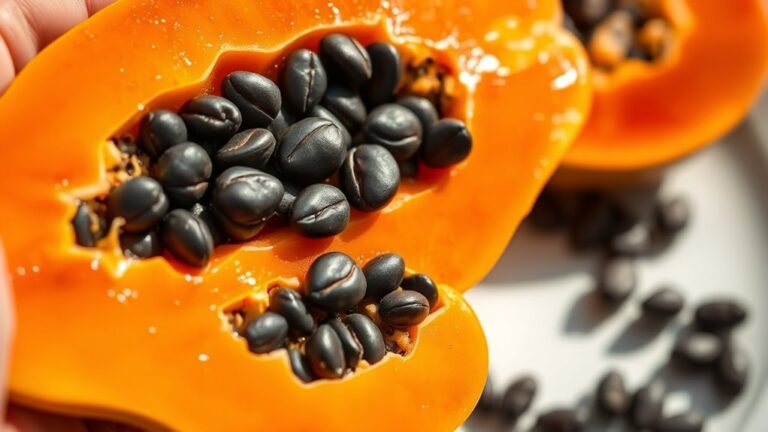
To save tomato seeds for next season, start by choosing fully ripe, healthy fruits with vibrant color and no signs of disease. Scoop out the seeds and pulp, then rinse thoroughly to remove debris.
Allow seeds to dry completely in a well-ventilated area. Store them in airtight containers, label clearly, and keep in a cool, dark place. Properly stored seeds can last years and give you healthy plants.
Keep exploring for more detailed tips to guarantee success.
Key Takeaways
- Pick fully ripe, healthy tomatoes that have vibrant color and firm skin for your seed extraction.
- Scoop out the seeds and pulp into a container, then rinse thoroughly to get rid of any debris.
- Let the seeds ferment for 3-4 days, stirring daily to clean them and prevent mold from forming.
- Rinse the seeds once more, then spread them on a paper towel to dry completely in a well-ventilated spot.
- Store the dried seeds in labeled, airtight containers in a cool, dark place until you’re ready to plant again.
Why Save Tomato Seeds for Next Season?
Saving tomato seeds for next season is a smart way to keep your favorite varieties without constantly buying new seeds. It’s a simple way to preserve heirloom varieties that might not be available in stores anymore. This way, you can keep those unique flavors and traits alive in your garden.
Seed saving also helps maintain genetic diversity, which makes plants more resilient. They can better handle pests, diseases, and changing weather conditions. When you save seeds from your healthiest and most productive tomatoes, you’re creating a seed stock that’s suited to your local environment.
Plus, saving seeds fosters a sense of self-sufficiency and cuts down on the need to buy new ones every year. It also deepens your connection to your garden as you learn more about plant genetics and heirloom traits. Overall, it’s a cost-effective and eco-friendly way to keep your garden full of diverse, strong tomato plants.
How to Select the Best Tomatoes for Seed Saving
When you’re picking out tomatoes to save seeds from, it’s best to go for ones that are fully ripe. You want them to have that rich color and full flavor—that’s a good sign they’ve reached their peak.
Also, take a good look at the fruits and make sure they’re free from any diseases or blemishes. Healthy tomatoes tend to produce better, more viable seeds.
Choosing the right ones now means you’ll have strong, healthy seeds for your next planting season.
Ripeness Indicators to Watch
Choosing the right tomatoes for seed saving depends on spotting key ripeness signs. Look for color changes—ripe tomatoes often turn deep red, purple, or orange, depending on the variety.
Texture is also a clue—ripe tomatoes feel firm but slightly soft when you gently press them. When the flavor is full and sweet, the seeds inside are mature and ready.
You’ll also notice seed size increases as the fruit ripens. Fully ripe tomatoes have larger, more developed seeds, which means better germination.
Avoid underripe tomatoes because their seeds might not be viable. Overripe ones can spoil easily. By paying attention to these signs, you’ll pick the best tomatoes for healthy, viable seeds.
Disease-Free Tomato Criteria
To ensure you get healthy and vigorous tomato seeds, choose fruits that are free from disease. Look for tomatoes with intact skin, no spots, mold, or blemishes, as these can be signs of potential problems.
Opt for disease-resistant varieties whenever possible. Picking fruits from plants that show strong disease resistance traits can boost seed viability and promote healthier plants in the future.
When selecting seeds, avoid tomatoes with wilting leaves or signs of rot, which can spread pathogens. Use the table below to spot the key indicators of healthy fruit and signs to watch out for:
| Healthy Tomato Traits | Disease Signs to Avoid |
|---|---|
| Firm, smooth skin | Soft, wrinkled, or discolored areas |
| Bright, uniform color | Dark spots or mold |
| No blemishes | Visible mold or rot |
| Strong stem attachment | Wilting or limp stems |
| No cracks or splits | Cracks that harbor bacteria |
Choosing healthy fruits this way helps ensure your seeds are resilient and ready for the next planting season.
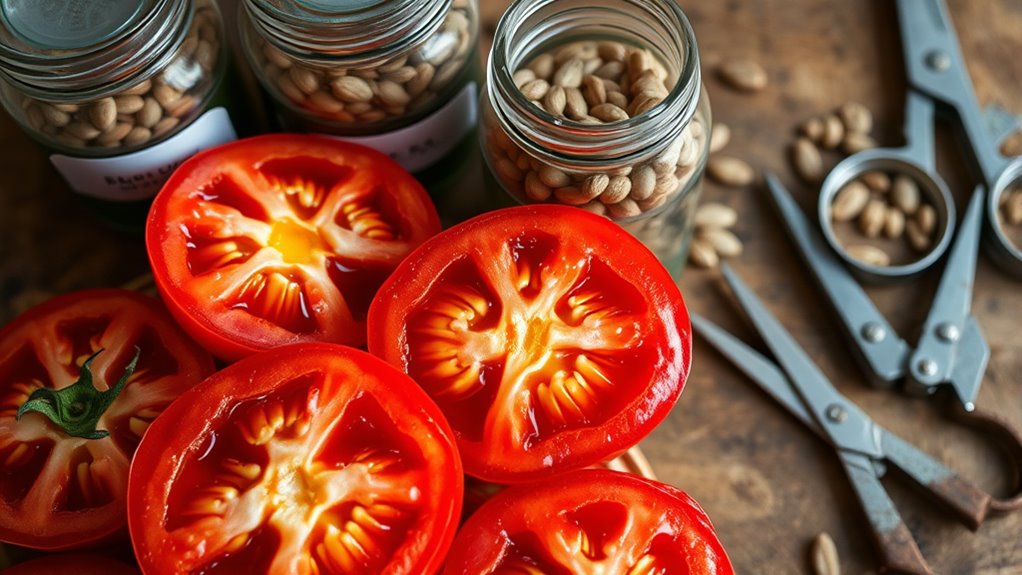
Extracting and Cleaning Tomato Seeds the Right Way
Start by scooping out the ripe, juicy tomato seeds along with the surrounding gel into a bowl. Use your hands or a spoon to separate the seeds from the pulp.
Once the seeds and gel are in the bowl, fill it with water and gently stir to loosen any remaining pulp and debris. Let it sit for a few minutes, then swirl again.
The healthy seeds will sink to the bottom, while the pulp and debris float. Carefully pour off the top, leaving the seeds behind.
Rinse the seeds thoroughly with clean water to remove any residual gel. Repeat this process if needed until the seeds are clean.
Proper cleaning helps remove all pulp, which can cause mold or spoilage during storage. This step is essential for healthy seed preservation and successful planting next season.
How to Dry and Prepare Tomato Seeds for Storage
Once you’ve pulled out your tomato seeds and given them a good clean, the next step is to ferment them. Fermentation helps boost their chances of sprouting and gets rid of any leftover pulp. It’s a simple step, but it makes a big difference in how healthy your seeds will be later on.
After the fermentation, it’s really important to dry the seeds carefully. You want to use the right techniques to make sure they don’t get moldy or spoil. A good way is to spread them out on a paper towel or a screen in a well-ventilated spot, and let them dry completely. Once they’re dry and crispy, you can store them safely for the long haul, ready for planting when the time comes.
Extracting Seed Material
Begin by scooping out the tomato seeds along with their surrounding gel into a bowl. This step is essential for effective seed extraction, which directly impacts seed quality.
Once in the bowl, gently rinse the seeds to remove excess pulp and gel, preventing mold during storage.
To help you understand the process better, here’s a quick overview:
| Step | Action | Tip |
|---|---|---|
| Collect seeds | Scoop out seeds with gel | Use a spoon or hands |
| Rinse | Wash seeds under water | Remove pulp thoroughly |
| Fermentation (optional) | Let seeds ferment briefly | Improves seed purity |
| Drying | Spread seeds on paper towel | Guarantee even drying |
| Storage | Store in labeled envelope or jar | Keep in cool, dry place |
Following these steps guarantees high seed extraction quality, ready for next season.
Fermentation Process Benefits
Fermentation is an essential step that can greatly improve the quality of your tomato seeds for storage. The benefits include breaking down the gel surrounding the seeds, which helps prevent diseases and boost seed viability.
During fermentation, natural enzymes activate, helping to preserve seeds by eliminating mold and bacteria. This process also ensures that only healthy seeds remain, increasing germination rates.
Fermentation also makes it easier to separate the seeds from the pulp, simplifying the drying process. Proper fermentation extends seed longevity and viability, giving you a better chance of successful planting next season.
It’s a simple, natural step that improves seed quality without using chemicals. By fermenting your tomato seeds correctly, you can be confident your saved seeds are healthy and ready for future planting.
Proper Drying Techniques
After fermentation has broken down the gel surrounding your tomato seeds, the next step is to dry them properly for long-term storage. You can do this by spreading the seeds on a paper towel or a fine mesh screen in a well-ventilated area.
Make sure the seeds are spread out in a single layer to promote even drying. Avoid direct sunlight, as it can damage seed viability. It’s important to let the seeds dry completely, usually for a week or more, until they’re hard and no moisture remains.
Proper drying helps prevent mold and rot during storage. Once they’re thoroughly dry, store the seeds in airtight containers in a cool, dark place to keep them viable for next season.
Choosing the Best Storage Containers for Tomato Seeds
Choosing the right storage containers is key to keeping your tomato seeds viable and ready for next season’s planting. You want containers that are airtight, moisture-proof, and durable to prevent mold and spoilage.
Consider options like glass jars, plastic containers, or metal tins—each has its own perks. Glass jars are transparent, so you can easily check your seeds, and they’re reusable.
Glass jars are transparent and reusable, making it easy to check your seeds and environmentally friendly.
Plastic containers are lightweight and budget-friendly, making them a convenient choice. Metal tins are sturdy and often airtight, though they might corrode over time.
You can also use zip-lock bags for space-saving and portability. Ceramic jars look elegant and are moisture-proof, but make sure they’re also airtight.
Choose containers that are clean, airtight, and resistant to temperature changes to keep your seeds fresh and in good shape.
How Long Do Tomato Seeds Last? Tips for Storage Longevity
Proper storage containers help maintain the viability of your tomato seeds, but knowing how long they remain viable is just as important for planning your planting schedule.
Seed lifespan depends on storage conditions, with properly dried and stored seeds lasting longer. Under ideal conditions—cool, dark, and dry—you can expect tomato seeds to remain viable for 4 to 6 years.
Poor storage, like exposure to humidity or fluctuating temperatures, can greatly reduce seed longevity and germination rates. To get the most out of your seeds, keep them in airtight containers such as glass jars or vacuum-sealed bags.
Store your seeds in a cool, consistent environment, and regularly check for signs of moisture or mold. Make sure the storage area stays dry to maximize their lifespan.
Labeling and Organizing Your Tomato Seeds Effectively
Organizing and labeling your tomato seeds is key to keeping track of different varieties and planting dates. This helps ensure a smooth gardening season. Clear labels make it easy to identify each type quickly.
Use waterproof markers to write variety names and harvest dates on your labels. Store seeds in small, labeled envelopes or containers to prevent mix-ups. This keeps everything accessible and tidy.
Consider using simple methods like color-coding for different categories or planting times. For example:
| Variety | Planting Date | Storage Method | Notes |
|---|---|---|---|
| Cherry Tomato | March 15 | Envelope A | Early harvest |
| Beefsteak | April 1 | Envelope B | Longer grower |
This table helps you see important details at a glance. Good labeling and organization save you time and reduce confusion during planting. Proper methods ensure you plant the right seeds at the right time.
Troubleshooting Common Problems When Saving Tomato Seeds
Sometimes, when you’re saving tomato seeds, you might run into problems like fermentation or seeds not staying viable. These issues can really impact how well your seeds germinate later on.
But don’t worry—by knowing what to look out for and how to fix these problems, you can make sure your seeds stay healthy and reliable. A little bit of know-how goes a long way in giving your tomato plants the best start!
Fermentation Issues
Fermentation issues are common pitfalls when saving tomato seeds, and addressing them promptly can make the difference between viable seeds and spoiled ones. Proper fermentation timing is essential; leave the seeds in the mixture too long, and mold may develop, ruining seed quality.
Typically, fermentation should last about 3 to 4 days—just enough to loosen the seeds from the pulp without inviting mold. Keep the mixture in a warm but not hot place and stir daily to prevent mold growth and ensure even fermentation.
If you notice mold or a foul smell, discard the batch immediately. Correct fermentation helps break down the gel coating around the seeds, improving germination.
Managing fermentation carefully preserves seed quality and sets the stage for healthy, vigorous plants next season.
Seed Viability Concerns
Making sure your saved tomato seeds stay viable can sometimes be tricky, especially if you run into common issues that affect germination. Poor seed longevity or bad storage conditions can lower your chances of successful sprouting, which can be disappointing.
To get better results, keep an eye out for these problems:
- Exposure to moisture: Too much humidity can cause mold and make seeds less likely to sprout.
- Temperature fluctuations: Changes in temperature can hurt seed longevity and reduce germination rates.
- Extended storage time: Seeds that sit too long may lose their vigor, making them less reliable to grow.
Fixing these issues helps keep your seeds healthy and increases the chances they’ll sprout next season. Proper drying, airtight containers, and planting them on time are key to maintaining good, viable tomato seeds.
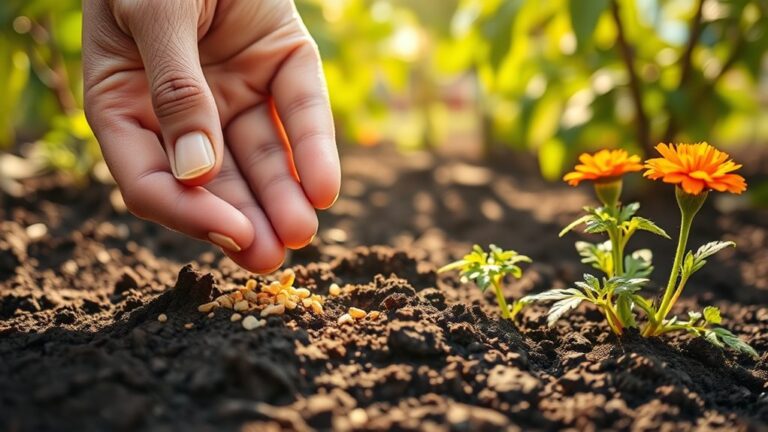
Growing Healthy Tomatoes From Saved Seeds
Growing healthy tomatoes from saved seeds starts with choosing the best specimens from your previous harvest. Focus on heirloom varieties known for their flavor and disease resistance.
When planting, make sure your soil is healthy by adding compost and practicing crop rotation. This helps prevent plant diseases and keeps your soil rich.
Understanding the seasonal timing is key so your tomatoes mature properly and you can avoid pest problems. It’s all about planting at the right time.
Incorporate companion plants like basil or marigolds to naturally manage pests and encourage growth. They’re great partners in the garden.
Pay close attention to your plants’ nutrient needs by providing balanced fertilizer during key growth stages. Healthy plants are more resistant to problems.
Regular pest management is important to keep pests at bay without harming beneficial insects. Stay vigilant and act early if you see trouble.
Proper garden planning gives your plants enough space to grow strong and helps reduce the spread of disease. Good spacing makes a big difference.
By combining these practices, you give your saved seeds the best chance to grow into vigorous, productive plants. Consistent care makes all the difference.
With attention to soil, pests, and timing, you’ll enjoy a thriving tomato crop from your carefully selected seeds. Happy gardening!
Tips for Ensuring Organic, Viable Seeds for Future Gardens
To keep your seeds organic and viable for future gardens, start by selecting healthy, disease-free fruits from your best plants. Choosing the right seed variety guarantees you preserve the qualities you love, whether it’s flavor, size, or resilience.
Select healthy, disease-free fruits from top plants to ensure organic, viable seeds for future gardening success.
Heirloom benefits shine when you save seeds from traditional varieties, offering unique flavors and genetic diversity. Follow organic practices by avoiding chemical sprays and opting for natural pest control.
When saving techniques, focus on fermenting seeds properly to remove pulp and prevent mold, securing high germination rates. Here are key tips to confirm your seeds remain viable:
- Select the ripest, healthiest fruits from your best plants to maintain seed quality.
- Use heirloom varieties to preserve genetic diversity and unique traits.
- Ferment and clean seeds thoroughly to eliminate any disease-causing pathogens and improve viability.
These steps help you produce strong, organic seeds that thrive in your future gardens.
Frequently Asked Questions
Can I Save Seeds From Hybrid Tomato Varieties?
You can save seeds from hybrid tomato varieties, but keep in mind they often retain hybrid characteristics. This means the plants might not be exactly like the parent plants.
To improve your chances, pick seeds from the healthiest, most vigorous fruits, which usually have better seed quality. But remember, the plants that grow might differ in size, taste, or yield.
If you want more consistent results, it’s better to save seeds from open-pollinated or heirloom tomatoes.
Do All Tomato Seeds Germinate Equally?
Like a roll of the dice, not all tomato seeds germinate uniformly. Seed germination depends on factors like seed quality, age, and storage conditions.
Heirloom seeds tend to have higher germination rates than hybrid seeds, which may be less reliable because hybrids are bred for specific traits.
To improve your chances, choose healthy, ripe tomatoes and store seeds properly. Keep in mind that not every seed will sprout perfectly.
How Do I Prevent Seed Contamination From Other Plants?
To prevent seed contamination from other plants, practice seed isolation by keeping your tomato plants away from different varieties.
Use proper plant spacing to reduce cross-pollination, ideally at least 10 feet apart or with physical barriers like row covers.
Hand-pollination can also help ensure your seeds come from the desired plant.
These steps keep your seeds true to the parent and prevent unwanted mixing.
Is It Necessary to Ferment Tomato Seeds Before Drying?
You don’t have to ferment tomato seeds before drying, but fermentation offers benefits like removing the gel coating and reducing disease risks.
This process improves seed preservation by enhancing germination rates and preventing mold.
If you choose to ferment, scoop out seeds into a jar with water, let it sit for a few days, then rinse and dry thoroughly.
This step helps guarantee healthy, viable seeds for next season’s planting.
What Are Signs of Seed Spoilage or Viability Decline?
You’ll notice seed spoilage if seeds become moldy, discolored, or emit a sour smell during seed storage.
Viability decline shows in seeds that are hard, shriveled, or won’t sprout when tested.
To keep seeds viable longer, store them in a cool, dry, airtight container away from sunlight.
Check your stored seeds regularly for these signs, and toss out any that seem compromised.
Doing this helps ensure successful germination next season.
Conclusion
Saving your tomato seeds is a simple way to guarantee a year’s worth of future harvests. Did you know that heirloom tomato seeds can remain viable for up to 10 years if stored properly?
By following these steps, you’ll not only save money but also preserve the unique flavors of your favorite varieties. With a little care, you’ll enjoy healthy, organic tomatoes season after season.
This way, you can make your garden truly your own and enjoy the fruits of your labor year after year. Saving tomato seeds is an easy trick to ensure a steady supply of delicious, homegrown tomatoes.