How to Start Seeds in a Windowsill for a Healthy Garden
Starting seeds in a windowsill is one of the simplest and most effective ways to get a jump on your gardening season. By placing seeds in a well-lit, warm spot like a sunny windowsill, you can create ideal conditions for germination and early growth without needing complex equipment.
This method matters because it allows gardeners with limited space or colder climates to raise seedlings year-round. The natural sunlight helps young plants develop sturdy stems and rich green leaves, increasing their chances of thriving after transplanting outdoors.
This article will guide you through everything from choosing the right seeds and containers to proper watering, light requirements, and troubleshooting common issues. Whether you’re a beginner or seasoned grower, you’ll find practical tips for starting seeds on your windowsill successfully.
Choosing Seeds and Containers for Windowsill Seed Starting

Selecting Suitable Seeds for Indoor Germination
Not all seeds perform equally well when started indoors on a windowsill. Hardy vegetables like tomatoes, peppers, lettuce, and herbs such as basil and cilantro are ideal candidates because they thrive in indoor conditions and can handle transplanting.
Conversely, root vegetables like carrots or radishes tend to do better sown directly in soil outside due to their delicate taproots. Starting with seeds labeled as 'easy to germinate' helps ensure success for first-time windowsill gardeners.
- Tomatoes
- Peppers
- Lettuce
- Herbs (basil, cilantro)
Best Indoor Seed Starting Containers
Choosing the right container impacts drainage, seed spacing, and transplant ease. Seed trays with drainage holes, biodegradable peat pots, or repurposed containers like egg cartons work well for windowsill setups.
Avoid deep pots that retain too much moisture and small containers that dry out quickly. Using clear plastic domes or covers can help maintain humidity and warmth for germination.
- Plastic seed trays with drainage
- Biodegradable peat pots
- Egg cartons or yogurt cups
- Plastic humidity domes
Preparing and Planting Seeds on Your Windowsill

Preparing Seed Starting Mix and Containers
Use a light, well-draining seed starting mix rather than garden soil. This mix holds moisture without becoming soggy and provides enough aeration for delicate seedlings.
Moisten the soil before planting seeds, ensuring it is damp but not soaked. Fill containers up to about ¾ full to leave room for watering without spillage.
- Light seed starting mix
- Moisten before planting
- Fill containers ¾ full
Correct Planting Depth and Spacing
Seeds require planting at a depth roughly twice their diameter for successful germination. Check seed packet instructions for specifics because some seeds are light-sensitive and need surface sowing.
Space seeds to avoid overcrowding—this allows airflow and reduces fungal problems. Thin seedlings after germination when they develop their first true leaves.
- Depth about twice seed size
- Surface sow light-sensitive seeds
- Thin seedlings after germination
Light and Temperature Needs for Windowsill Seed Starting

Providing Adequate Natural Light
Windowsills facing south or southeast typically offer the most sunlight, giving seedlings 10 to 12 hours of light daily which is crucial for healthy growth and preventing leggy stems.
If natural light is insufficient, supplement with full-spectrum LED grow lights positioned a few inches above seedlings to mimic sunlight intensity.
- South or southeast-facing windows best
- 10-12 hours natural light daily
- Use LED grow lights if needed
For more on this, see our related guide: How to Store Cannabis Seeds for Maximum Longevity and Viability.
Maintaining Ideal Temperature Conditions
Most seeds germinate optimally between 65°F and 75°F. Keeping containers away from drafty windows or cold surfaces helps maintain consistent warmth.
A heat mat under the seed tray can accelerate germination for warmth-loving plants but should be used cautiously to avoid overheating.
- Ideal temperature 65-75°F
- Avoid cold drafts
- Optional use of heat mats
Watering and Humidity Control for Seedlings

Proper Watering Techniques
Seedlings need consistently moist soil but are vulnerable to being waterlogged, which encourages rot. Use a spray bottle to mist soil gently or water from below by placing containers in shallow trays.
Check moisture daily and adjust watering based on surface dryness to balance moisture and airflow.
- Keep soil moist, not soggy
- Mist or water from bottom
- Monitor moisture daily
Managing Humidity for Healthy Growth
Using covers such as plastic domes helps retain humidity necessary for germination. Once seedlings emerge, remove covers gradually to acclimate them, reducing fungal risks.
Avoid excessive humidity after sprouting by ensuring good ventilation and using fans if possible.
- Start with humidity domes
- Remove gradually after sprouting
- Provide ventilation to prevent fungus
Troubleshooting Common Seed Starting Problems

Dealing with Damping-Off Disease
Damping-off causes seedlings to wilt and die due to fungal infections favored by overly moist, stagnant conditions. To prevent this, avoid overwatering and provide good airflow.
Sterilize containers before use and use fresh seed starting mix. Remove affected seedlings immediately to protect healthy ones.
- Prevent overwatering
- Ensure airflow
- Sterilize containers
- Remove infected seedlings
For more on this, see our related guide: Best Seeds to Grow a Thriving Garden in 2026.
Correcting Leggy Seedlings
Leggy seedlings become tall and weak with long stems due to insufficient light. Increase light duration by relocating trays to a brighter windowsill or adding grow lights.
Keep seedlings closer to light sources and avoid overheating to maintain compact growth.
- Increase light intensity and duration
- Use grow lights if needed
- Maintain cooler temperatures
Transplanting and Hardening Off Seedlings
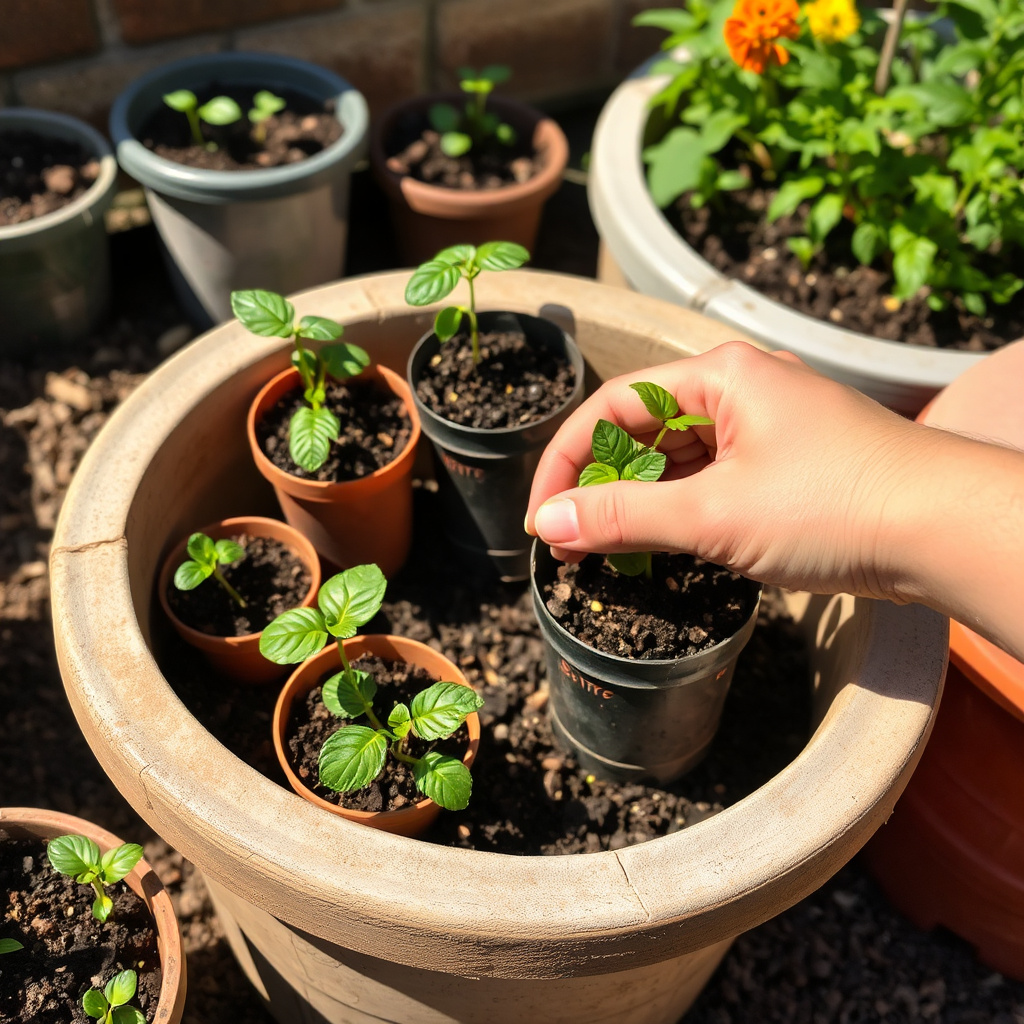
When and How to Transplant Seedlings
Seedlings are ready for transplantation once they have at least two sets of true leaves and a well-developed root system. Handle seedlings by their leaves rather than stems to avoid damage.
Prepare planting spots with well-amended soil and transplant carefully to minimize shock.
- Wait for two true leaves
- Handle leaves, not stems
- Prepare nutrient-rich soil
For a more detailed explanation of seed germination and starting methods, the Seed starting on Wikipedia page offers well-referenced information. Seed starting on Wikipedia.
Hardening Off: Preparing Seedlings for Outdoor Life
Before planting outdoors permanently, seedlings should be acclimated gradually to outdoor conditions. Start by placing them outside for a few hours daily in sheltered spots, increasing time and exposure over 7-10 days.
This process reduces transplant shock and strengthens plants for sun, wind, and variable temperatures.
- Begin with short outdoor exposure
- Gradually increase over 1-2 weeks
- Shelter from harsh weather initially
Seed Starting Container Options Comparison
Here’s a comparison of popular seed starting container types, highlighting their pros and cons for your windowsill garden setup.
| Container Type | Drainage | Reuse Potential | Cost | Ease of Transplanting |
|---|---|---|---|---|
| Plastic seed trays | Excellent with holes | Reusable | $10-$15 per tray | Moderate |
| Biodegradable peat pots | Good, slow drainage | Single-use | $8-$12 for 50 pots | Easy, plantable in ground |
| Egg cartons | Poor | Single-use | Free or low-cost | Challenging, must remove seedlings |
| Yogurt cups | Depends on holes added | Reusable or single-use | Free | Moderate, transplant with care |
Frequently Asked Questions
How much sunlight do seedlings need on a windowsill?
Seedlings require about 10 to 12 hours of bright, indirect sunlight daily to grow strong and healthy on a windowsill.
Can I reuse seed starting soil for multiple seasons?
It’s best not to reuse seed starting mix, as nutrients deplete and pathogens may build up; fresh mix enhances germination success.
How do I prevent my seedlings from getting leggy?
Providing sufficient light, keeping seedlings close to the light source, and avoiding overheating helps prevent leggy, weak stems.
When should I move seedlings outside permanently?
After seedlings develop at least two sets of true leaves and grow sturdy, harden them off gradually before planting outdoors.
Is it necessary to use a heat mat for windowsill seed starting?
Heat mats speed germination for warmth-loving seeds but are not essential if your windowsill stays consistently warm.
Key Takeaways
- Choose seeds that perform well indoors like tomatoes and herbs for windowsill starting.
- Use well-draining containers and a light seed starting mix for best results.
- Provide 10-12 hours of bright light and maintain 65-75°F for healthy seedlings.
- Water carefully, avoid overwatering, and gradually harden off seedlings before transplanting.
Conclusion
Starting seeds in a windowsill offers gardeners a simple but effective way to begin their growing season indoors. By selecting appropriate seeds and containers, carefully managing moisture and light, and paying attention to temperature, you can nurture strong, healthy seedlings ready for transplanting. Taking deliberate steps like using a suitable seed starting mix and preventing common problems such as damping-off will increase your success rate and satisfaction with home gardening.
For gardeners aiming at maximizing early harvests or those lacking outdoor sowing space, reliable seed starting on a windowsill brings significant advantages. Warm-season vegetables such as tomatoes and peppers benefit especially, while herbs propagate easily in indoor conditions. Choosing containers like biodegradable peat pots may simplify transplanting, or plastic trays serve well for controlled moisture and reuse. Supplementing with grow lights can boost growth in lower light scenarios, making this method very versatile through seasons and climates.
Your next step is to gather quality seeds, pick containers that suit your space and budget, and set up a sunny windowsill spot. Monitor moisture level closely early on and adjust light as seedlings develop for the best outcomes. With patience, you’ll enjoy witnessing tiny seeds transforming into thriving plants ready to strengthen your garden landscape. Planting seeds on a windowsill is an accessible, rewarding way to cultivate green life from indoors.