10 Simple Steps to Perfectly Soak Chia Seeds
If you’re into healthy eating or looking to add more superfoods to your diet, you’ve probably heard about soaking chia seeds. Many people struggle with getting the perfect texture or consistency, and it can be frustrating to get it just right. You’re not alone—perfectly soaking chia seeds is a common challenge, but it’s easier than you think.
To perfectly soak chia seeds, gather a bowl, measuring spoon, stirring tool, and an airtight container. Use a ratio of 1 part seeds to 4 or 6 parts liquid, depending on your desired consistency.
Stir well, cover, and refrigerate for at least 15-20 minutes or overnight. Look for a gel-like coating to guarantee proper soaking.
To master this process and explore flavor ideas, continue examining these simple steps.
Key Takeaways
- Use a 1:4 or 1:6 seed-to-liquid ratio depending on how thick or runny you want it.
- Stir the seeds well into the liquid so they don’t clump up.
- Cover the container and refrigerate for at least 15 minutes, but overnight is best.
- Look for a gel-like coating or pudding-like texture to know they’re properly soaked.
- You can tweak the soaking time and liquid amount to get the texture and flavor just right.
Gather Materials and Tools for Soaking Chia Seeds
To start soaking chia seeds, you’ll need a few simple materials and tools. First, check your tools checklist: a bowl or jar, a measuring spoon, and a stirring utensil. These basics make the process straightforward.
When selecting seed varieties, go for organic chia seeds to ensure quality and purity. Different seed types might have slight variations in soaking times or texture, but chia seeds are generally pretty uniform.
You might also want a fine mesh strainer if you need to rinse the seeds beforehand. Keep a glass or plastic container ready for soaking, and consider having a lid if you want to store the soaked seeds in the fridge.
Gather these items in advance so you can start without delays. Having the right tools and seed varieties on hand makes the process easier and helps you get perfectly soaked chia seeds every time.
What Are the Best Ratios for Soaking Chia Seeds?
Finding the right ratio of chia seeds to liquid is key to getting the perfect soak. Usually, a 1:4 ratio works well—one part seeds to four parts liquid. This helps the seeds hydrate properly without making the mixture too thick or too runny.
For example, if you’re soaking 3 tablespoons of seeds, add about half a cup of water, milk, or juice. You can tweak the amount slightly if you prefer a thicker or more liquid consistency.
Just keep in mind that using too many seeds for the liquid can cause clumping or uneven hydration, while too few might make the mixture too thin. The goal is to give the seeds enough liquid to fully swell and absorb.
Experiment with different ratios to find what feels best for your preferred texture and recipe. Consistent hydration is key to making smooth, gel-like chia pudding or other dishes.
How to Soak Chia Seeds in Water, Milk, or Juice
So, you’re thinking about soaking chia seeds? Great choice! The first step is to pick your preferred liquid—water, milk, or juice—whatever suits your taste buds and dietary needs.
Once you’ve got that sorted, the trick is to stir the seeds well into the liquid. Give them a good mix so they’re evenly distributed. Then, just let them sit for a bit until they turn into a gel-like consistency. This way, the seeds soak up all that liquid properly and are ready to be added to your favorite recipes. Easy peasy!
Choosing Your Liquid Base
Choosing the right liquid base is essential for preparing chia seeds, as it influences both texture and flavor. The liquid types you select—water, milk, or juice—offer different flavor profiles and nutritional benefits.
Water is neutral and allows the natural taste of chia to shine, making it a versatile choice. Milk, whether dairy or plant-based, adds creaminess and richness, enhancing the overall texture.
Juice introduces a sweet or tangy flavor, making your chia mixture more vibrant and appealing, especially in smoothies or breakfast bowls. Consider your taste preferences and dietary needs when choosing your liquid base.
Each option impacts the final dish’s flavor profile, so pick the one that best complements your recipe and personal taste for ideal results.
Proper Soaking Techniques
Soaking chia seeds properly is straightforward, but paying attention to technique guarantees you get the best texture and consistency. To maximize soaking benefits and keep the chia nutrition intact, follow these steps:
- Pick your liquid—water, milk, or juice—based on your flavor preference and dietary needs.
- Use a 1 to 4 ratio of chia seeds to liquid for a thick, pudding-like texture.
- Stir the mixture well right after combining to prevent clumping.
- Cover it and let it soak in the fridge for at least 2 hours or overnight for the best softening.
This method ensures even hydration, helps chia digest better, and unlocks its full nutritional potential. Proper soaking makes your chia seeds more enjoyable and nutritious.
How to Achieve the Perfect Chia Seed Gel Consistency
Ever wondered how to get that perfectly smooth and thick chia seed gel? Achieving the ideal texture depends on the right soaking process.
Use a 1:6 ratio of chia seeds to liquid, whether water, milk, or a plant-based alternative. Stir the seeds thoroughly at the start to prevent clumping, then let them soak for at least 15-20 minutes or overnight for a thicker consistency.
The soaking helps create a gel that’s smooth, cohesive, and easy to mix into recipes or snacks. If your gel is too runny, add a few more chia seeds and let it sit longer.
If it’s too thick, just stir in a splash of liquid until you get your preferred consistency. Remember, stirring during the first few minutes helps avoid clumping and ensures even gel formation.
With a little practice, you’ll master the perfect chia seed gel every time.
Flavor Ideas and Add-Ins for Your Soaked Chia Seeds
Adding fruit mix-ins, like fresh berries or chopped mango, can really brighten up your soaked chia seeds and add some natural sweetness. You might also try tossing in a handful of nuts or seeds on top for that satisfying crunch and extra nutrients.
And don’t forget about flavor boosters—think a splash of vanilla extract, a sprinkle of cinnamon, or even a drizzle of honey. These little touches can take your chia seed snack from simple to super tasty. Feel free to experiment with different combinations until you find your favorite flavor combo!
Fruit Mix-Ins
Incorporating fresh or dried fruits into your soaked chia seeds not only boosts flavor but also adds natural sweetness and texture. Feel free to experiment with different fruit combinations to create exciting flavor profiles.
For example, try berries with lemon zest for a tart, juicy burst. Mango and pineapple bring tropical sweetness and vibrant color.
Apple chunks with cinnamon give you a cozy, familiar taste. Dried apricots or cranberries add chewy texture variations.
These fruit mix-ins elevate the overall experience by providing contrasting textures and invigorating flavors. The variety of options lets you customize your chia seed dish to match your mood or dietary needs.
With each addition, your chia pudding or overnight soak becomes more delicious and satisfying.
Nut and Seed Toppings
You can effortlessly improve the texture and flavor of your soaked chia seeds by topping them with different nuts and seeds. A handful of nuts like almonds, walnuts, or pecans adds a satisfying crunch and makes the dish more enjoyable.
Mixing in various seed varieties such as sunflower, pumpkin, or flax seeds not only boosts the nutritional value but also adds interesting textures. Nut and seed toppings also make your chia dish more visually appealing and inviting.
Choosing a range of seed types and nuts ensures a richer flavor profile and a variety of health benefits. Whether you prefer a light sprinkle or a generous handful, these toppings are simple ways to enhance your chia seed recipes effortlessly.
Flavor Enhancers
Improving the flavor of your soaked chia seeds can turn a simple dish into a delicious treat. To add some excitement, try these flavor enhancers:
Mix in herbal infusions like mint or basil for fresh, aromatic notes.
Incorporate citrus zest or a splash of vanilla extract to boost sweetness and aroma.
Try pairing flavors with chocolate or drizzling honey as sweeteners.
Adding spices like cinnamon or ginger can create layering and depth of flavor.
Experiment with these options to find your favorite combo.
Combining herbal infusions with citrus zest, or vanilla with chocolate, can make basic soaked chia seeds into a delightful, flavorful experience.
How to Store Soaked Chia Seeds for Freshness
To keep soaked chia seeds fresh and maintain their texture, store them in an airtight container in the fridge. Proper storage helps extend their shelf life and prevents spoilage. Use quality containers that seal tightly to control moisture and keep out odors.
Refrigeration tips include keeping the container upright and away from the fridge door for consistent temperature. Label the container with the soaking date so you can easily track freshness.
For longer storage, freezing works well; transfer chia seeds to a freezer-safe bag or container. When you’re ready to use them, portion out what you need to avoid repeated thawing.
Proper storage minimizes moisture exposure, which can cause mold or spoilage. Here’s a quick guide:
| Storage Tip | Benefit |
|---|---|
| Airtight containers | Prevents moisture and odors |
| Label dates | Tracks freshness |
| Freezing options | Extends shelf life |
| Portion control | Maintains quality |
| Moisture control | Prevents spoilage |
Troubleshooting Common Chia Seed Soaking Problems
Even when stored properly, you might run into some common issues with soaked chia seeds. These problems usually happen because of incorrect soaking techniques or simple mistakes.
To troubleshoot, check for consistency issues. If your seeds aren’t absorbing enough liquid, try soaking them longer or adjusting the water-to-seed ratio.
Check your soaking time and water ratio to ensure your chia seeds absorb enough liquid.
If the flavor is bland or too bitter, it’s often due to not balancing the taste properly. Add natural sweeteners or a splash of lemon juice to improve the flavor.
To improve the texture, stir the seeds more often during soaking or consider using finer chia seed varieties. This helps prevent sliminess or clumping.
Lastly, to get the most nutritional benefits, make sure you’re soaking the seeds long enough for full hydration. This not only boosts nutrition but also makes the seeds easier to digest.
How Long Should You Soak Chia Seeds? Timing Tips
You’ll want to soak chia seeds for around 15 to 20 minutes. During this time, they’ll absorb the liquid and turn into that nice, gel-like consistency we’re after. When they’re properly soaked, they’ll look plump and have a smooth, thick texture—kind of like a pudding.
If the seeds still seem watery or haven’t fully absorbed the liquid, just give them a bit more time. Sometimes they need a little extra soaking to reach that perfect, gooey texture.
Ideal Soaking Duration
The ideal soaking time for chia seeds usually ranges from 15 minutes to two hours, depending on how you want them to turn out. Shorter soaking keeps the seeds more al dente, while longer soaking creates a gel-like texture perfect for smoothies and puddings.
Here’s a quick guide:
- 15-30 minutes: Seeds soak up liquid fairly fast, giving you a firmer bite with some benefits.
- 30-60 minutes: Seeds soften a bit more, great for smoothies or puddings.
- 1-2 hours: Seeds reach maximum hydration, forming a thick, gel-like consistency.
- Overnight: For ultra-soft seeds, soaking overnight ensures they fully hydrate for a smooth, even texture.
Adjust the soaking time based on your preferred texture and what you’re making!
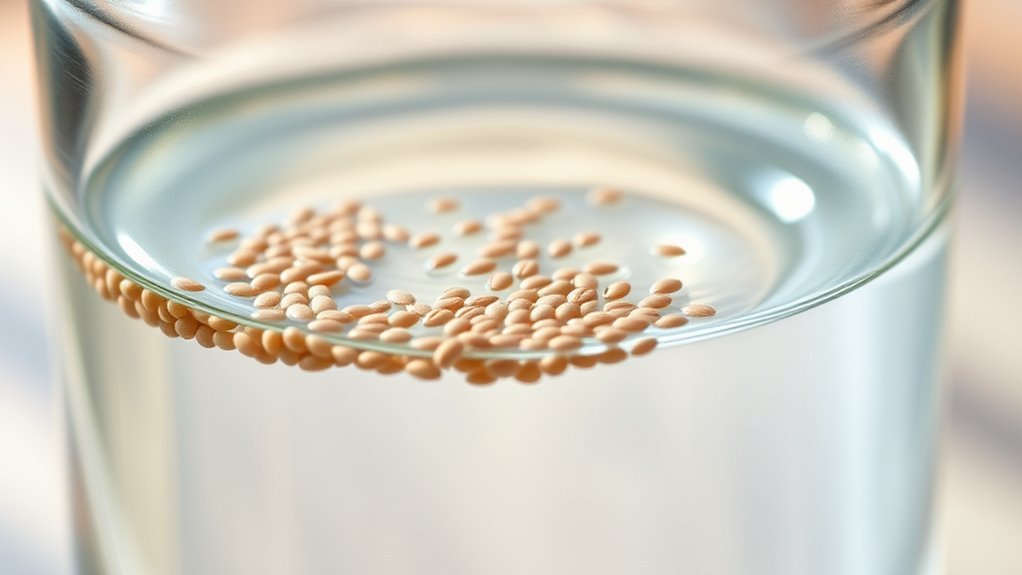
Signs of Proper Soaking
When soaking chia seeds, noticing the right signs can help you see if they’ve absorbed enough liquid. A key indicator is when the seeds develop a gel-like coating, showing they’ve taken in enough liquid. This gel makes the seeds easier to digest and reveals their nutrition.
If the mixture looks thick and pudding-like, your seeds are properly soaked. If they stay dry or float on top, they probably need more time. Proper soaking helps you get the most nutritional benefits and the right texture.
Be careful not to over-soak, as it can cause the seeds to clump together. Aim for the right consistency within the recommended soaking time. Recognizing these signs will help you enjoy the full benefits of your chia seeds.
Incorporate Soaked Chia Seeds Into Smoothies, Puddings, and Oatmeal
Soaking chia seeds before adding them to smoothies, puddings, or oatmeal makes their texture better and helps you absorb more nutrients. Once soaked, it’s easy to upgrade your favorite breakfast ideas and snacks. Here’s how:
Soaking chia seeds enhances texture and nutrient absorption for smoothies, puddings, and oatmeal.
- Mix into smoothie combinations for a thicker, nutrient-packed drink that gives you energy and works well in vegan recipes.
- Add to pudding varieties to create a creamy texture and boost fiber, making your desserts more filling.
- Stir into oatmeal flavors for a gel-like consistency that enhances health benefits and pairs nicely with both classic and flavored oats.
- Use as a topping on yogurt or fruit bowls to make them look appealing and add extra nutrition, perfect for quick breakfasts or healthy snacks.
FAQs: Top Questions About Soaking Chia Seeds
Have questions about soaking chia seeds? You’re not alone. Many wonder how soaking affects their nutritional benefits and what exactly chia gel is. Soaking chia seeds *releases* their full potential by creating a gel that’s easy to digest and packed with nutrients.
This chia gel retains the seeds’ nutritional benefits, including omega-3 fatty acids, fiber, and antioxidants. It makes these nutrients more bioavailable, so your body can absorb them better.
People often ask how long to soak the seeds—generally, 15 minutes to overnight works well. If you want a smoother texture or plan to use the seeds in recipes, longer soaking helps.
Concerned about the seeds absorbing too much liquid? Rest assured, they only absorb as much as needed to form the gel. Soaking is simple, effective, and *improves* the nutritional benefits, ensuring you get the most out of your chia seeds every time.
Frequently Asked Questions
Can I Reuse Soaked Chia Seeds for Multiple Recipes?
Yes, you can reuse soaked chia seeds for multiple recipes, but it’s best to store them properly. Keep the soaked seeds in an airtight container in the fridge to stay fresh and prevent spoilage.
Reusing them works well for different recipes like smoothies, puddings, or toppings. Just keep in mind that their texture and flavor might change over time.
Always check for any signs of spoilage before using them again.
Are There Any Health Risks in Consuming Soaked Chia Seeds?
Sure, soaking chia seeds isn’t a health hazard—unless you’re secretly a superhero allergic to mild fiber. Consuming soaked seeds offers great nutritional benefits like omega-3s and fiber, but watch out for digestive concerns if you eat too much at once.
Overdoing it might cause bloating or discomfort. So, enjoy your chia seeds, but keep moderation in mind to avoid any digestive pitfalls.
How Do I Prevent Clumping When Soaking Chia Seeds?
To prevent clumping when soaking chia seeds, try stirring frequently during the soaking process or using a blender to mix them evenly.
You can also add the seeds gradually into the liquid while whisking or shake the mixture in a jar.
These steps help distribute the seeds evenly, reducing clumps and creating a smooth, gel-like consistency perfect for your recipes.
Can Soaked Chia Seeds Be Frozen for Later Use?
Yes, soaked chia seeds can be frozen for later use, just like turning a garden into a winter wonderland. Transfer your chia gel into an airtight container or ice cube tray, then label it with the date and pop it in the freezer.
Use frozen chia for smoothies or puddings, knowing you have a handy supply ready to go. Just follow storage tips to keep it fresh and avoid freezer burn so your chia stays good whenever you need it.
What’s the Best Way to Rinse Soaked Chia Seeds?
To rinse soaked chia seeds effectively, use gentle rinsing techniques under cold running water.
After soaking for the recommended time, drain the seeds in a fine mesh sieve. Rinse them thoroughly to remove any residual gel or hulls.
Swirl the seeds with your fingers or a spoon while rinsing to make sure all residue is washed away.
This process helps keep the seeds fresh and ready for your next recipe.
Conclusion
Think of soaking chia seeds like tending to a tiny garden. They need patience, the right amount of water, and a little creativity.
As you nurture them, they turn into a nourishing gel, ready to enhance your meals. It’s a simple process that pays off in big, healthy ways.
With each step you follow, you’re building a foundation for versatile, wholesome recipes. Welcome the process and watch your chia garden flourish.
Enjoy the energy and health benefits that come with perfectly soaked chia seeds in every spoonful.