10 Steps to Roast Pumpkin Seeds in the Oven Perfectly
Many people love snacking on crunchy pumpkin seeds, especially during fall. But getting them just right—crispy, flavorful, and evenly roasted—can be tricky. You’re not alone; perfecting this takes a bit of practice and know-how.
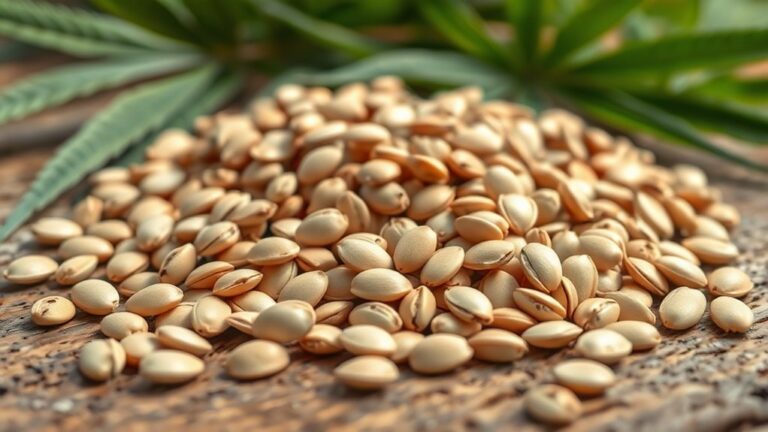
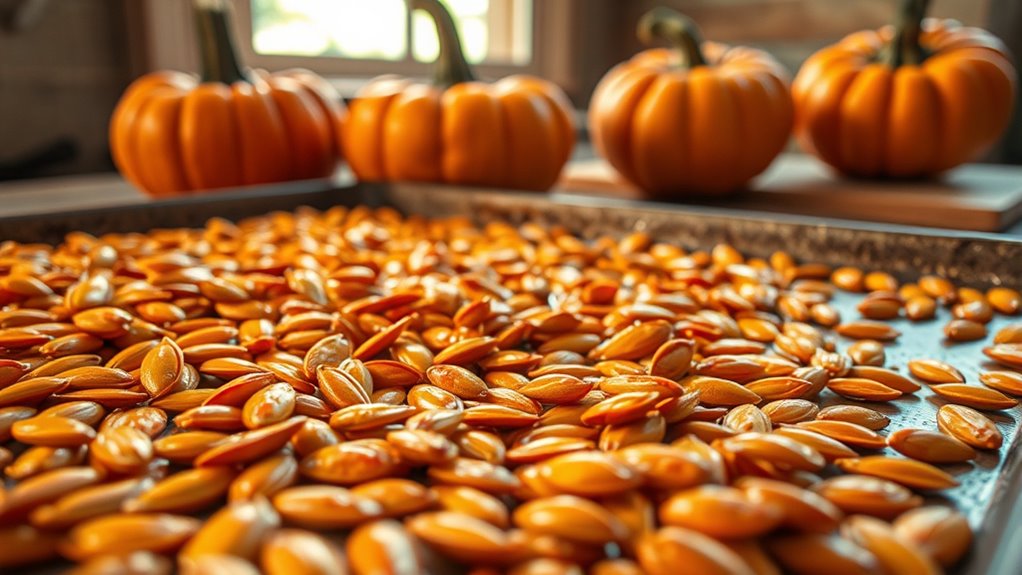
To roast pumpkin seeds perfectly, start by cleaning and thoroughly drying them. Toss them with your favorite seasonings, then spread them in a single layer on a baking sheet.
Bake at 325°F to 350°F, shaking or stirring halfway through to guarantee even browning. Keep an eye on their color and aroma to avoid burning.
Store leftovers properly, and if issues arise, adjustments in timing or temperature can help. For more tips and flavor ideas, investigate further.
Key Takeaways
- Rinse and thoroughly dry pumpkin seeds to remove pulp and strings for better flavor and crunch.
- Spread the seeds in a single layer on a baking sheet, making sure they’re evenly spaced for uniform roasting.
- Roast at 300°F to 350°F, shaking or stirring halfway through, until they’re golden-brown and fragrant.
- Keep an eye on them after 10 minutes, and take them out when they’re crispy with a nutty aroma.
- Store in airtight containers in a cool, dark place to keep them fresh and crunchy.
How to Prepare Pumpkin Seeds for Roasting
To prepare pumpkin seeds for roasting, start by removing them from the pumpkin and rinsing off any remaining pulp and strings. This step ensures your seeds are clean and ready for roasting.
Once rinsed, spread the seeds out on a towel or paper towel to dry thoroughly. Proper drying helps the seeds become crispy when roasted.
Pumpkin seed benefits include being rich in magnesium, zinc, and healthy fats, making them a nutritious snack option.
Pumpkin seeds are packed with magnesium, zinc, and healthy fats for a nutritious snack.
Once dry, you can decide whether to soak them briefly for a softer texture or go straight to roasting.
Removing any remaining pulp from the seeds improves their flavor and texture, making your pumpkin seed snacks more enjoyable.
Preparing the seeds correctly is key to achieving a tasty, crunchy treat. Clean, dry seeds are the foundation for delicious roasted pumpkin seeds that maximize their health benefits and satisfy your snack cravings.
Choosing the Best Seasonings for Flavorful Pumpkin Seeds
Once your pumpkin seeds are clean and dry, the next step is choosing seasonings that bring out their best flavor. Think about spice pairings that complement the natural nuttiness of the seeds.
For a savory profile, try salt, garlic powder, or smoked paprika, which add depth and warmth. If you like some heat, cayenne or chili powder work well, creating a spicy kick.
If you prefer a touch of sweetness, cinnamon and nutmeg can give your seeds a warm, cozy flavor. Herbal options like rosemary or thyme add a fresh, aromatic note.
When selecting seasonings, consider the overall flavor profile you want—whether smoky, spicy, sweet, or savory—and choose spices that enhance those qualities. Keep in mind that some seasonings can overpower, so start with a small amount and adjust to taste.
The right spice pairings will lift your roasted pumpkin seeds into a flavorful, irresistible snack.
How to Season Pumpkin Seeds to Suit Your Taste
Seasoning pumpkin seeds to match your taste is all about customizing flavors to suit your preferences. You can improve their flavor while considering pumpkin seed health benefits and seasonal variations. To create the perfect mix, try these options:
Customize pumpkin seed flavors to enhance taste and health, perfect for any season or occasion.
- Savory: Toss seeds with sea salt, garlic powder, and a pinch of paprika for a classic, savory snack. It’s simple and always a hit.
- Sweet: Mix in cinnamon, honey, and a sprinkle of brown sugar for a sweet treat. Great for fall or winter snacking.
- Spicy: Add chili powder, cayenne, and cumin for a bold, spicy flavor. Perfect for summer barbecues or when you want some heat.
- Herbal: Combine dried herbs like rosemary or thyme with olive oil for a fresh, aromatic touch. It’s especially nice in spring.
Adjust seasoning amounts based on seasonal variations and your taste preferences. Properly seasoned seeds not only taste better but also support pumpkin seed health by avoiding too much salt or sugar.
What Oven Settings Work Best for Roasting Pumpkin Seeds
To get those pumpkin seeds roasted just right, try setting your oven somewhere between 300°F and 350°F. That range helps them brown evenly and get that nice crunch. If you’re using a convection oven, it can really help make the seeds extra crispy, but you might want to lower the temperature a bit—say, by 25°F—to prevent burning.
And don’t forget—since every oven is a little different, it’s a good idea to keep an eye on your seeds as they roast. Check on them periodically and adjust the time and temperature if needed. That way, you’ll get perfectly roasted pumpkin seeds every time!
Optimal Temperature Range
For perfectly roasted pumpkin seeds, setting your oven between 325°F and 375°F is ideal. This range ensures they roast well without burning. The exact temperature depends on the seed variety and your preferred crunch.
Consider these tips:
- Use 325°F for delicate or thinner seeds to prevent burning.
- Opt for 350°F for a balanced roast, suitable for most types.
- Increase to 375°F for a crunchier texture or thicker seeds.
Adjust based on your oven’s performance and the seed size. Keep a close eye to avoid over-roasting. This temperature range helps you get flavorful, crispy pumpkin seeds while keeping their natural taste. Proper temperature control is key to great results.
Using Convection Settings
Using the convection setting on your oven can really improve the roasting process by promoting even heat distribution and faster cooking. The convection benefits include more consistent roasting and preventing hot spots that can burn your pumpkin seeds.
When using convection, you should lower your oven temperature slightly—about 25°F less than traditional baking—to avoid overcooking. The circulating air helps the seeds crisp evenly on all sides, giving you a nice golden-brown finish.
Keep a close eye on your seeds to prevent burning, especially since convection speeds up the process. Using convection is an efficient way to get crunchy, evenly roasted pumpkin seeds with less time and effort. Just remember to monitor your seeds for the best results.
Adjusting for Oven Variability
Ovens can vary quite a bit in how they heat, so it’s important to adjust your settings when roasting pumpkin seeds. To get even results, start by checking your oven’s temperature accuracy with an oven thermometer.
Since moisture affects roasting time, make sure your seeds are dry before baking. Here are four tips to help you adjust for oven differences:
- Use an oven thermometer to confirm your oven’s actual temperature.
- Roast at 350°F (177°C) as a starting point, then tweak up or down by 25°F based on how it turns out.
- Rotate the baking sheet halfway through to promote even roasting.
- Keep an eye on seed moisture; if they’re too moist, give them a little extra time in the oven.
Spreading Seeds Evenly for Crispy, Uniform Roasting
To get perfectly crispy, evenly roasted pumpkin seeds, spreading them out in a single, even layer on your baking sheet is key. Make sure each seed has enough space to prevent overcrowding, which can lead to uneven roasting.
Keep the seeds roughly the same thickness by removing any overly large or damaged ones, since inconsistent seed size affects how heat distributes. Gently shake or lift the baking sheet once or twice during spreading to avoid clumping.
If you’re using a bowl, toss the seeds with a spoon to distribute them evenly before transferring them onto the sheet. A thin, even layer helps heat circulate around each seed, resulting in consistent crispiness.
How to Monitor and Time Your Pumpkin Seeds for Perfect Crispiness
To get those pumpkin seeds just right and super crispy, it’s all about keeping a close eye on them while they roast. Stay attentive to the timer and watch for that beautiful golden-brown hue—that’s your sign they’re ready to come out.
And don’t be afraid to adjust the cooking time a bit if you need to. You want to make sure they don’t get overcooked or stay underdone, so a little extra attention can really make a difference in getting that perfect crunch.
Timing for Crispiness
Monitoring the timing of your pumpkin seeds is key to getting that perfect crispy texture. Proper timing helps you enjoy all the benefits without burning or under-roasting.
Check the seeds after 10-12 minutes, then every 2 minutes to avoid over-roasting. Look for golden-brown edges—they’re a good visual cue for crispiness.
Shake or stir the seeds halfway through so they roast evenly. Remove them when they smell fragrant and are crisp, since residual heat will keep cooking them a bit.
Monitoring During Roasting
Keeping a close eye on your pumpkin seeds as they roast ensures they reach that perfect level of crispiness without burning. During roasting, check the seeds often, especially near the end of the recommended time.
Different seed varieties and roasting methods can change how fast they cook, so feel free to adjust your timing. Lightly shake the baking sheet or stir the seeds every 5-10 minutes to help them roast evenly.
Watch for changes in color—golden or slightly darker means they’re ready. Stay attentive so you don’t overcook them, which can cause burnt seeds. While a timer helps, visual cues are really the key.
How to Check When Pumpkin Seeds Are Fully Roasted
How can you tell when pumpkin seeds are fully roasted? You’ll notice specific signs that show they’re ready, making sure they’re perfectly crisp and flavorful.
First, look for a golden-brown color. This visual cue tells you they’re properly roasted. Second, listen for a slight crunch when you bite into one—that’s a good sign they’ve developed the right texture.
Look for a golden-brown color and a slight crunch to know your pumpkin seeds are perfectly roasted.
Next, check the aroma. A nutty, roasted scent indicates they’re done. Finally, taste a seed; it should be flavorful, with a satisfying crunch and balanced seasoning.
Keep in mind, over-roasting can make them bitter, while under-roasting leaves them softer. When you see these signs, you’ll know your pumpkin seeds are perfectly roasted and ready to enjoy.
Storing Roasted Pumpkin Seeds to Keep Them Fresh
Once your pumpkin seeds are perfectly roasted and cooled, storing them properly is key to keeping them fresh and crunchy. To stay crispy, use airtight containers that keep moisture out. Glass jars with tight lids or resealable plastic bags work really well.
For extra freshness, you can add a silica gel packet or a piece of bread inside the container—these help absorb excess moisture. Keep the seeds in a cool, dark spot away from direct sunlight because heat and light can make them go stale faster.
Avoid storing roasted seeds in the fridge unless you plan to keep them for several weeks. Condensation can form and make them less crispy. Proper storage can keep your pumpkin seeds crunchy and flavorful for up to two weeks.
Remember to label your containers with the date so you can enjoy them at their best.
Troubleshooting Common Pumpkin Seed Roasting Problems
Even with careful preparation, you might run into some common issues when roasting pumpkin seeds. Here are some solutions to help you get perfect results:
- Burnt seeds: Roast at a lower temperature and keep a close eye in the final minutes. Stir regularly to prevent uneven browning.
- Soggy seeds: Make sure seeds are thoroughly dried before roasting. Spread them in a single layer and avoid overcrowding on the baking sheet.
- Uneven roasting: Toss seeds halfway through roasting to promote uniform heat distribution. This helps prevent some seeds from burning while others stay undercooked.
- Seasoning failures and moisture retention: Apply dry seasonings after roasting. This prevents moisture from being trapped, which can cause sogginess or seasoning clumping.
Fixing these issues will help you achieve perfectly roasted pumpkin seeds with the right crunch, flavor, and appearance.
Creative Ways to Flavor and Serve Your Pumpkin Seeds
You can really have fun with pumpkin seed flavors by mixing up some unique spice blends or trying out sweet and savory glazes. It’s all about experimenting and discovering what tastes best to you, making your seeds more exciting and personalized. Once you’ve flavored them, think about creative ways to serve them—like tossing them on salads for a crunchy topping or filling cute treat jars to share as thoughtful gifts.
Unique Spice Combinations
Experimenting with unique spice combinations can turn plain pumpkin seeds into a flavor-packed snack. Feel free to mix and match seasonings to suit your taste buds.
Here are some ideas to get you started:
- Pumpkin spice with a hint of cinnamon sugar for a sweet, warm flavor.
- Barbecue blend combined with chili lime for a smoky, tangy kick.
- Curry powder mixed with garlic herb for an exotic, savory twist.
- A simple sprinkle of chili lime for a spicy, citrusy punch.
Don’t hesitate to experiment or create your own combos. These spice blends add variety and excitement to your roasted pumpkin seeds, making them perfect for snacking or sharing.
Sweet and Savory Glazes
Sweet and savory glazes give roasted pumpkin seeds a tasty boost by adding a layer of flavor that balances richness with a hint of indulgence.
A sweet glaze, like honey or maple syrup, creates a caramelized coating that’s both crunchy and flavorful. Toss your seeds in a mixture of your chosen sweetener and a pinch of salt before roasting.
For a savory glaze, mix soy sauce, spices, or herbs for a savory kick. Brushing the seeds with a savory glaze during the last few minutes of roasting helps develop a slightly crispy, savory exterior.
Both types of glazes make your pumpkin seeds more exciting, perfect for snacking or adding flavor and crunch to salads and soups. Feel free to experiment and find your favorite flavor combo.
Creative Serving Ideas
Once you’ve perfected your roasted pumpkin seeds with flavorful glazes, the next step is exploring creative ways to serve them that boost their appeal. To add variety, consider these gourmet serving ideas:
Sprinkle pumpkin seed toppings over salads or roasted vegetables for extra crunch and flavor. It’s a simple way to elevate your dishes and add a satisfying texture.
Mix them into yogurt or oatmeal for a nutritious, textured boost. It’s a tasty way to make your breakfast more interesting.
Use them as a topping for soups like butternut squash or pumpkin. They add visual appeal and a nice crunch that complements the creamy soup.
Incorporate them into trail mixes or homemade snack bars for a savory touch. It’s a great way to turn a simple snack into something special.
These ideas not only enhance the flavor but also turn your pumpkin seeds into a standout part of any meal, making your snacks feel more gourmet.
Frequently Asked Questions
Can I Roast Pumpkin Seeds Without Oil?
Yes, you can roast pumpkin seeds without oil by using alternative methods. Just rinse and dry the seeds thoroughly, then toss them with your favorite seasonings or simply salt.
Spread the seeds on a baking sheet and roast at 350°F. Stir them occasionally until they’re crispy.
Roasting this way keeps the pumpkin seed benefits, like healthy fats and nutrients, intact. Plus, it gives you a tasty, oil-free snack.
How Long Do Roasted Pumpkin Seeds Stay Fresh?
Roasted pumpkin seeds stay fresh for about a week when stored properly. Think of them as treasure chests—best kept sealed and cool.
To maximize freshness, use airtight containers and store them in a dark, dry place. Keep them away from humidity and direct sunlight for the best results.
If you want them to last longer, try freezing them in airtight bags. Your seeds will stay delicious for months that way!
Is It Better to Roast Pumpkin Seeds at a High or Low Temperature?
Roasting pumpkin seeds at a high temperature gives you some perks, like cooking them faster and making them crunchier sooner. But watch out, because it can also lead to burning if you’re not careful.
On the flip side, roasting at a lower temperature helps prevent burning, but it takes longer and might not give you that perfect crispy texture.
Can I Reuse Roasted Pumpkin Seed Shells for Other Recipes?
Like the phoenix rising from ashes, you can reuse roasted pumpkin seed shells for creative uses, turning waste into treasure.
Seed shell benefits include adding crunch and nutrition to recipes or composting for garden richness.
Incorporate shells into trail mixes, grind them into flour, or use them in craft projects.
Reusing shells reduces waste, boosts your culinary creativity, and honors nature’s cycle.
Making each part of the pumpkin a source of value is both eco-friendly and rewarding.
Are Pumpkin Seeds Safe to Eat Raw Versus Roasted?
Yes, pumpkin seeds are safe to eat raw, but roasting them can make them taste better and have a better texture. Raw seeds keep their nutritional benefits like healthy fats, magnesium, and zinc, but roasting can help your body digest these nutrients more easily.
Keep in mind, raw seeds might contain antinutrients, so it’s best to enjoy them in moderation. Roasting not only boosts their flavor but also reduces the chance of bacteria, making your pumpkin seeds both tasty and safe to eat.
Conclusion
Now that you’re armed with these ten steps, roasting pumpkin seeds becomes as easy as pie—no more half-baked attempts! With a little patience and the right techniques, you’ll turn simple seeds into crispy, flavorful bites that could steal the show at any snack table.
Think of your oven as a magic wand, transforming humble pumpkin seeds into a golden, crunchy treasure. Happy roasting—your perfect batch of roasted pumpkin seeds awaits!