How to Transplant Seedlings Outdoors Successfully: A Step-by-Step Guide
Transplanting seedlings outdoors involves moving young plants from their indoor pots or seed trays into your garden or outdoor containers. The key to success is timing, gentle handling, and preparing the seedlings for the new environment properly to avoid transplant shock. Follow specific techniques to minimize stress and encourage healthy growth.
This process matters because seedlings grown indoors are vulnerable when exposed suddenly to outdoor conditions, including sunlight, wind, and temperature variations. Transplant shock can stunt growth or even kill your plants if done improperly, so a careful approach preserves your investment in your seedlings and leads to a thriving garden.
In this article, you will find detailed advice on the best time to transplant seedlings, how to prepare both your seedlings and the planting site, step-by-step transplanting techniques, and tips for post-transplant care to ensure your outdoor plants establish strong roots and flourish.
Determining the Best Time to Transplant Seedlings Outdoors
Assessing Seedling Maturity
Seedlings are typically ready to move outdoors once they have developed at least two to three sets of true leaves and appear sturdy. Their roots should be well-formed but not root-bound in containers, indicating they can support themselves in garden soil.
Signs of readiness also include resilient stems and darker green foliage. Avoid transplanting seedlings that look leggy or weak, as those are less likely to survive the shock of outdoor conditions.
- Two to three sets of true leaves
- Healthy, dark green foliage
- Sturdy stems and developed roots
Choosing the Right Weather and Season
The best time to transplant seedlings outdoors is after the danger of frost has passed. Soil temperatures should be warm enough to promote root growth—typically above 50°F (10°C) for most vegetables and flowers.
Mild, overcast, or partially cloudy days help reduce heat stress. Windy or hot days increase the risk of drying out young plants, so choose calm and cooler parts of the day for transplanting.
- After last frost date in your region
- Soil temperature above 50°F (10°C)
- Preferably cloudy or early morning transplanting
Preparing Seedlings for Outdoor Transplant

Hardening Off Seedlings
Hardening off is the gradual acclimation of indoor seedlings to outdoor conditions. Begin by placing the seedlings outside in a shaded, protected area for a few hours a day and gradually increase exposure to sun, wind, and cooler temperatures over one to two weeks.
This process strengthens leaves and stems, reduces stress during transplanting, and helps seedlings adjust to fluctuating outdoor temperatures.
- Start with 1–2 hours daily in shade
- Increase exposure by 1–2 hours each day
- Avoid strong sun and wind initially
For more on this, see our related guide: How to Transplant Seedlings Without Stressing Your Plants.
Watering and Soil Preparation
Water seedlings thoroughly a few hours before transplanting to keep roots moist and reduce shock. Prepare the transplant site by loosening soil, removing weeds, and amending with compost or fertilizer to provide nutrients.
Ensure soil drainage is adequate because soggy soil can cause root rot. Creating holes or furrows matching pot size allows easy planting and root expansion.
- Water seedlings deeply before transplant
- Loosen and enrich soil in planting beds
- Check for good soil drainage
Techniques for Transplanting Seedlings Outdoors
Removing Seedlings from Containers
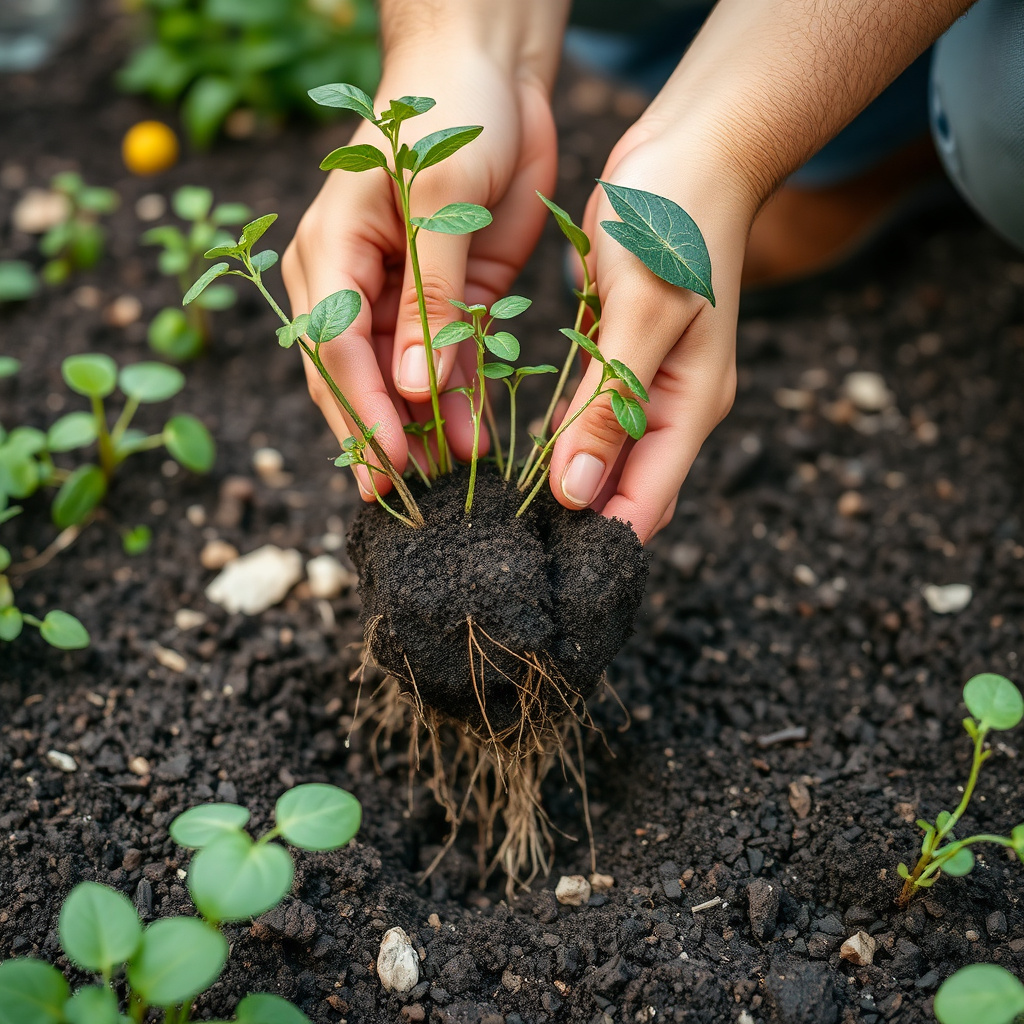
Turn seedling pots gently upside down, supporting the plant base with your fingers, and tap or squeeze to free the root ball without damaging the roots. For seedlings in trays, use a spoon or small trowel to carefully lift plants from below.
Handle seedlings by the leaves or root ball rather than the stem to prevent crushing or breaking the plants.
- Support root ball when lifting
- Avoid handling stems
- Use tools for tray seedlings
Planting and Firming Soil
Place seedlings in pre-dug holes at the same depth they were growing indoors. Backfill around roots gently, firming the soil lightly to remove air pockets without compacting it too much.
Water the newly planted seedlings immediately after transplanting to settle the soil and provide moisture to roots.
- Plant at original soil level
- Firm soil around roots gently
- Water immediately after planting
Post-Transplant Care for Seedlings

Watering and Monitoring
Keep soil consistently moist but avoid overwatering, which can suffocate roots. Use a fine spray to prevent washing away soil. Check seedlings daily for signs of wilting or stress and adjust watering accordingly.
Mulching around plants helps retain moisture, regulate soil temperature, and reduce weeds.
- Use gentle watering methods
- Monitor soil moisture daily
- Apply mulch around plants
For more on this, see our related guide: How to Care for Seedlings: Essential Tips for Healthy Plant Growth.
Protecting from Pests and Extreme Weather
Shield seedlings from pests using netting or organic sprays when necessary. Temporary shade cloth or cloches can protect from harsh sun, wind, and late frosts during early outdoor establishment.
Regular inspection helps catch problems early and supports seedling survival during the vulnerable transition phase.
- Use pest netting or organic controls
- Provide shade or windbreaks as needed
- Inspect seedlings regularly
Common Challenges and Troubleshooting
Identifying and Addressing Transplant Shock
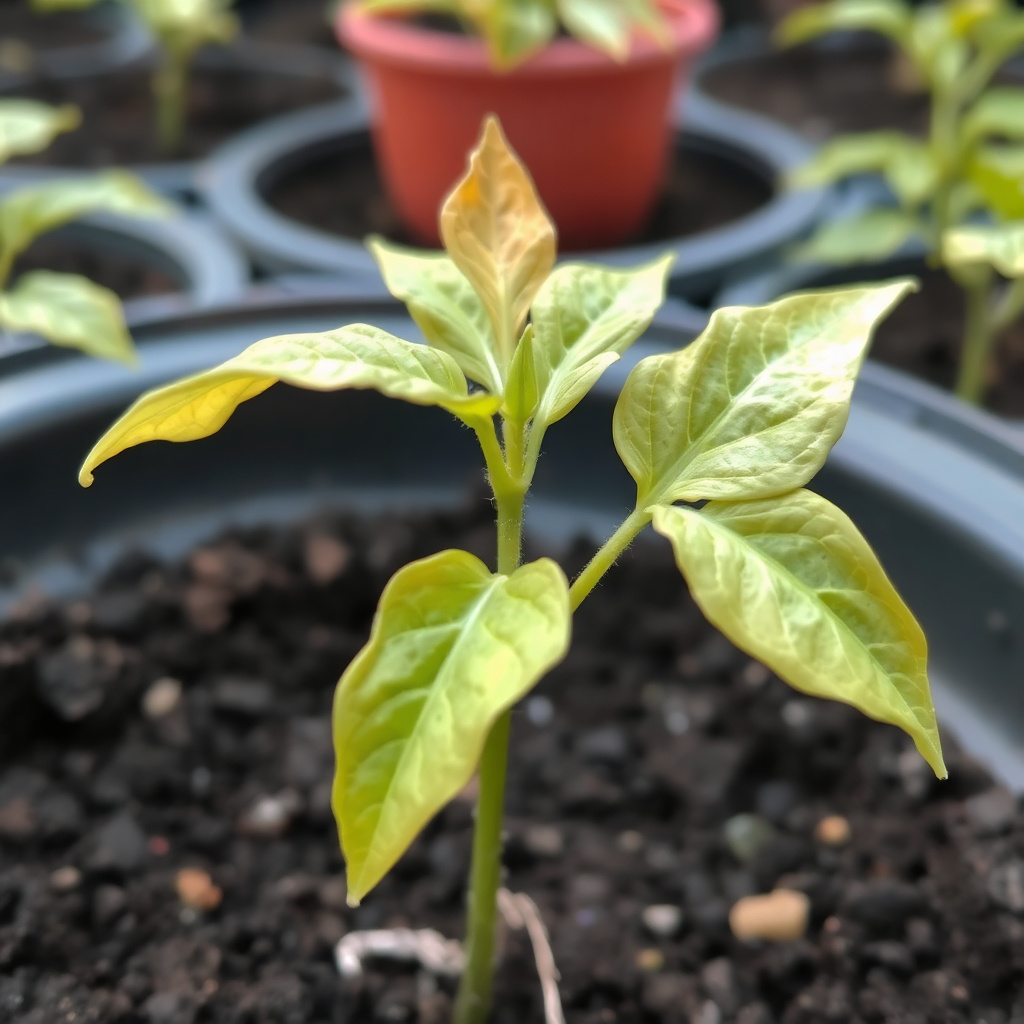
Transplant shock symptoms include wilting, yellowing leaves, slow growth, or leaf drop. It typically occurs when seedlings face abrupt environmental changes or root damage during transplanting.
To reduce shock, keep seedlings shaded, water properly, and avoid disturbing roots excessively during planting.
- Watch for wilting and discoloration
- Maintain consistent moisture
- Minimize root disturbance
For additional details on transplanting techniques and plant care, see this comprehensive guide on transplanting seedlings. transplanting seedlings.
Preventing Common Diseases After Transplanting
Damping off and root rot are common issues if seedlings remain too wet or soil is contaminated. Use sterilized soil, avoid overwatering, and provide good airflow to prevent fungal growth.
Remove any infected seedlings promptly to protect others.
- Use clean planting materials
- Ensure proper watering and drainage
- Improve air circulation around plants
Seedling Transplanting Methods Comparison
Here’s a comparison of common methods for transplanting seedlings outdoors, highlighting their advantages and ideal use cases.
| Method | Advantages | Best For | Drawbacks |
|---|---|---|---|
| Direct Root Ball Transfer | Minimizes root disturbance; quick | Hardy plants and small seedlings | Requires careful handling; risk of damage if rushed |
| Using Biodegradable Pots | No root disturbance; easy planting | Containers grown seedlings; eco-friendly | Slower root penetration if pots are thick |
| Transplanting Bare-root Seedlings | Economical; stimulates root growth | Certain trees and shrubs | High risk of shock; needs precise timing |
| Cell Trays or Plug Plants | Uniform root systems; easy spacing | Vegetables and flowers started indoors | Can dry quickly; requires gentle handling |
Frequently Asked Questions
How long should I wait after hardening off before transplanting?
You should harden off seedlings over 7 to 14 days, gradually increasing outdoor exposure before transplanting to outdoor beds or containers.
Can I transplant seedlings at night or during cloudy weather?
Yes, transplanting on overcast days or cooler parts of the day reduces stress from sun and heat, improving survival rates.
How do I know if my seedlings are suffering from transplant shock?
Symptoms include wilting, yellow leaves, or slowed growth. Prompt watering and shade can help seedlings recover.
Is it better to transplant seedlings deeper than they were in pots?
Generally, plant seedlings at the same soil depth they grew in containers to protect stems and avoid rot.
Should I fertilize seedlings immediately after transplanting outdoors?
It's best to wait a week or two after transplanting before fertilizing to let roots settle and avoid burning sensitive roots.
Key Takeaways
- Transplant seedlings outdoors after they develop sturdy leaves and roots.
- Harden off seedlings gradually over 1-2 weeks to prepare them for outdoor conditions.
- Handle seedlings gently to avoid damaging stems and roots during transplanting.
- Provide consistent moisture and protection post-transplant to reduce stress and pests.
Conclusion
Deciding when and how to transplant seedlings outdoors depends on understanding both the plant’s growth stage and environmental conditions. Prioritizing seedling maturity—such as sufficient true leaves and root development—and waiting until after the last frost helps establish strong plants. Handling seedlings with care during transplanting minimizes root damage and reduces transplant shock, which is key to successful outdoor growth. Preparing your garden soil by loosening, enriching, and ensuring good drainage provides your seedlings with the best start in their new location.
For gardeners aiming to transplant seedlings, gradually hardening off plants outdoors exposes them to the elements safely, significantly improving survival rates. Techniques like transferring intact root balls or using biodegradable pots reduce root disturbance, accommodating different plant types and seeds started indoors. After transplanting, attentive watering, mulching, and pest protection help seedlings overcome stress and thrive. Gardeners working in cooler climates might benefit from cloches or shade covering seedlings during the initial days after transplanting to avoid extreme temperature fluctuations.
Ultimately, taking a systematic approach based on specific plant needs and conditions ensures your efforts lead to a flourishing garden. Begin with assessing your seedlings’ readiness, proceed with gentle transplanting methods, and monitor carefully afterward. This practical approach to how to transplant seedlings outdoors will help both novice and experienced gardeners create healthy, productive outdoor plants and a beautiful garden space.