How to Germinate Seeds in a Jiffy Pellet: A Step-by-Step Guide
Germinating seeds in a Jiffy pellet is a straightforward and effective method to start plants indoors. By soaking the pellet until it swells and planting a seed in its center, you create a moist, nutrient-rich environment that encourages strong root development. This technique simplifies seed starting and increases germination success rates.
Using Jiffy pellets matters because they provide a uniform medium that holds moisture evenly, reduces transplant shock, and minimizes mess compared to traditional soil. Gardeners benefit from their compact size and convenient handling, which make them ideal for growers with limited space or those wanting to propagate seeds early in the season.
This guide will walk you through the process of preparing Jiffy pellets, sowing seeds correctly, maintaining ideal humidity and temperature, and transplanting seedlings with minimal disturbance. Along the way, you'll find tips for optimizing germination and troubleshooting common issues to help your seeds thrive from start to finish.
Preparing Jiffy Pellets for Seed Germination

Hydrating the Pellets Properly
Start by placing dry Jiffy pellets in a bowl or tray and adding warm water to soak them. Within minutes, the compressed peat moss expands into spongy, soil-filled pods that retain moisture well. It's important to add enough water so pellets fully expand but do not float excessively, as oversaturation can reduce oxygen for seeds.
Once fully hydrated—usually after about 10-15 minutes—gently drain any excess water to avoid overly soggy conditions. Proper moisture balance in the pellet is key for healthy seed germination since too dry or too wet environments can inhibit sprouting.
- Use warm water around 70°F (21°C) for faster expansion
- Allow pellets to soak for about 10-15 minutes
- Drain excess water after swelling
Choosing the Right Containers
After hydrating, place the expanded pellets in seed trays, flats, or any shallow containers that allow drainage and airflow. Using structured seed starting trays helps keep pellets upright and contained, preventing damage to seedlings during growth.
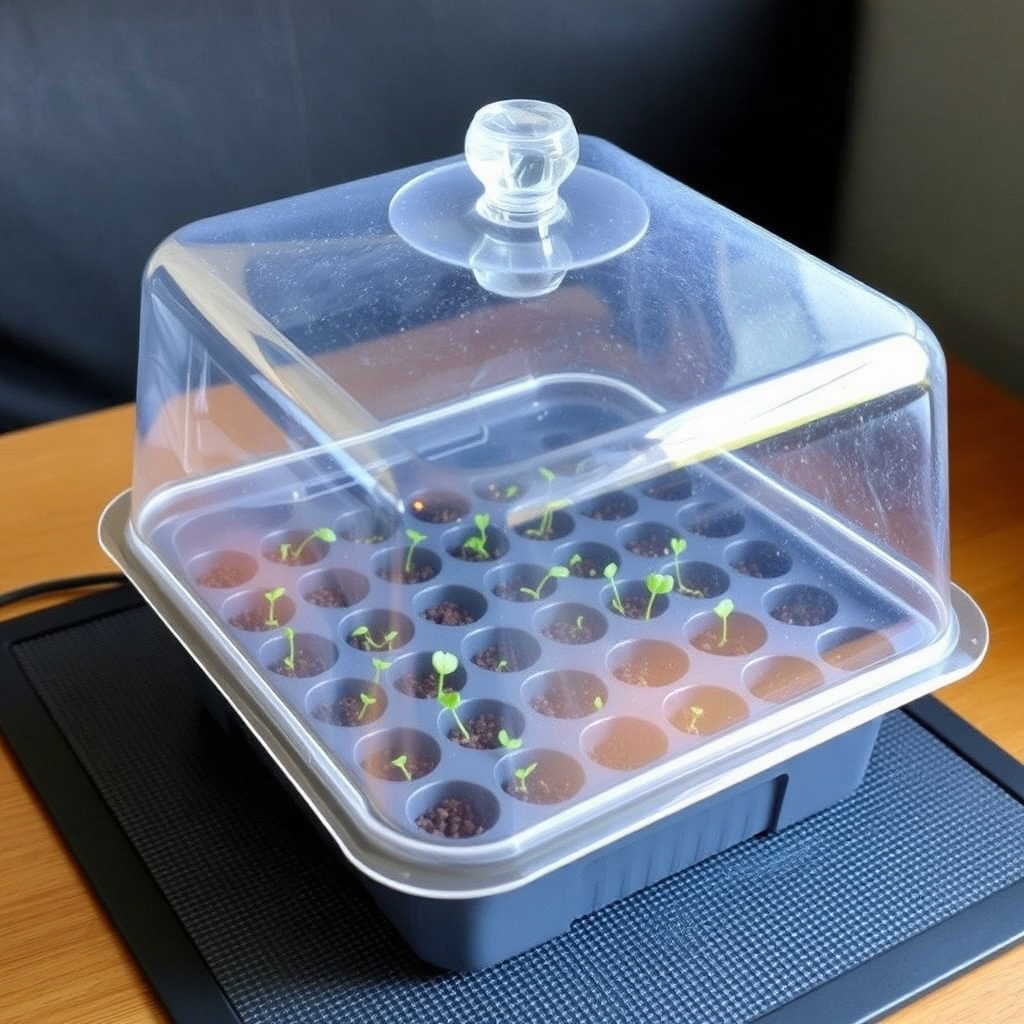
Make sure containers are clean and free from pathogens to reduce the chance of damping-off disease. Using transparent humidity domes over trays can help maintain moisture but remove periodically to prevent fungal growth.
- Select trays with drainage holes
- Use humidity domes to retain moisture
- Keep containers clean and pathogen-free
Sowing Seeds into Jiffy Pellets

Planting Seeds at the Correct Depth
Each seed has an optimal planting depth usually about two to three times its size. For Jiffy pellets, use the indentation on top as a planting spot. Place one seed carefully in the center and cover lightly with the peat surrounding the pellet to keep it moist and insulated.
Avoid planting multiple seeds too close together in one pellet to minimize competition and transplant shock later. Label each pellet or tray section to keep track of seed varieties.
- Understand the seed’s depth requirements
- Use the pellet’s top indentation for seed placement
- Plant one seed per pellet to encourage robust growth
Tips for Handling Delicate Seeds
For tiny or fragile seeds, use tweezers or a seed transfer spoon to gently place seeds in the pellet without damage. Avoid pressing seeds too hard, which can impair emergence. Some gardeners moisten their fingers slightly or use a small brush to place seeds more precisely.
Soaking very small seeds briefly before sowing can help speed germination, but check seed packet instructions carefully, as some seeds require dry sowing.
- Use tweezers or brushes for precise placement
- Handle seeds gently to avoid damage
- Consult seed-specific requirements before pre-soaking
Maintaining Optimal Conditions for Germination
Controlling Temperature and Light
Most seeds germinate best between 65°F and 75°F (18°C to 24°C). Using a seedling heat mat can provide consistent warmth, especially in cooler environments. Once seeds sprout, exposing them to bright, indirect light helps strengthen seedlings and prevents legginess.
Avoid placing trays in direct sunlight during germination to prevent drying out and overheating. Progressive exposure to light after emergence encourages healthy stem and leaf development.
- Maintain 65-75°F during germination
- Use seedling heat mats if necessary
- Provide bright, indirect light after sprouting
For more on this, see our related guide: Best Way to Germinate Cannabis Seeds for High Success Rates.
Humidity and Watering Practices
Humidity domes or plastic covers help retain moisture in the early stages but should be ventilated regularly to prevent fungal diseases. Keep Jiffy pellets moist but never waterlogged by misting or adding small amounts of water as needed.
Overwatering is a common mistake; pellets must breathe to allow oxygen to roots. Checking pellet moisture daily ensures seeds remain in ideal conditions to promote vigorous germination.
- Use humidity domes with periodic ventilation
- Mist pellets to maintain moisture
- Avoid waterlogging to prevent rot
Transplanting Seedlings from Jiffy Pellets
When to Transplant Seedlings
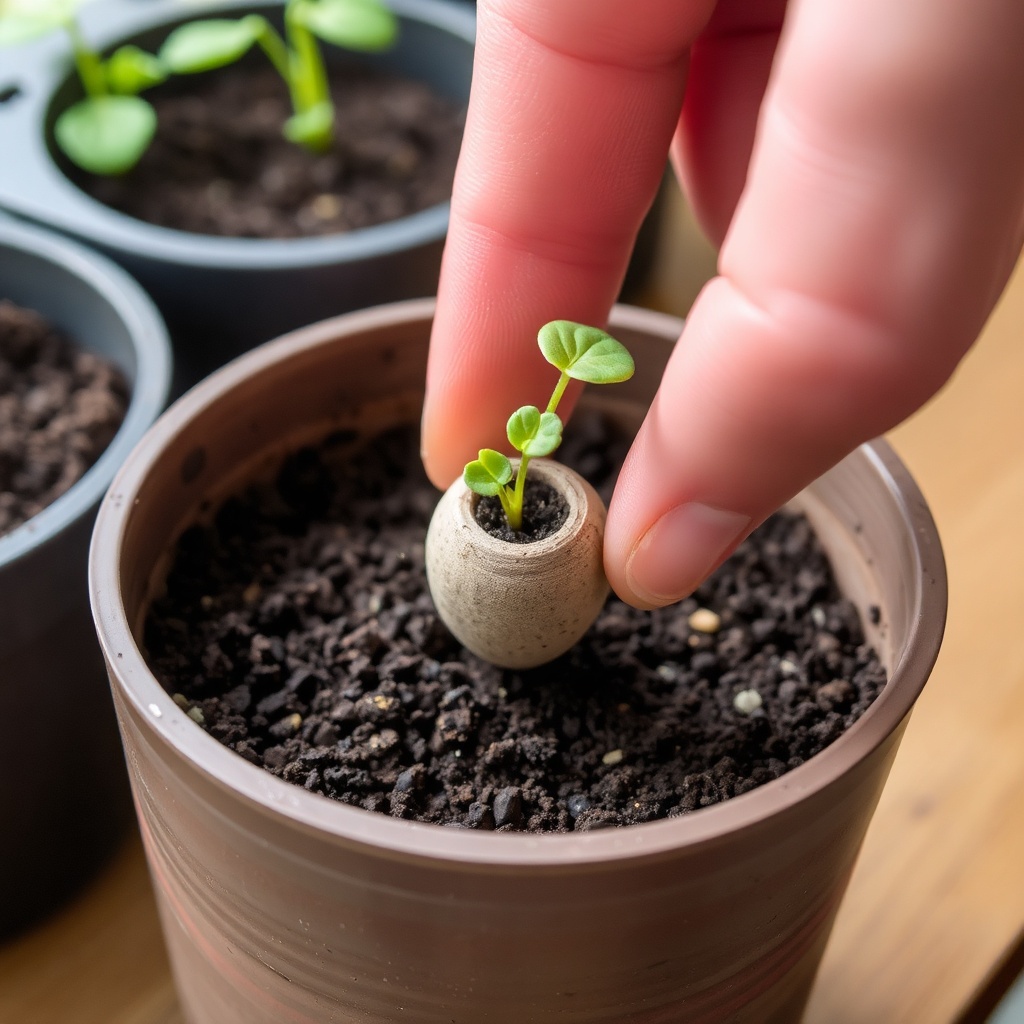
Seedlings are ready to transplant once they develop their first true leaves and sufficient root growth inside the pellet is visible. This stage typically occurs 2-4 weeks after germination depending on species.
Carefully check that roots have extended through the peat pellet without becoming root-bound, which could hinder further growth if transplanting is delayed.
- Transplant at first true leaf stage
- Ensure healthy root development before moving
- Avoid waiting too long to prevent root crowding
Techniques for Minimizing Transplant Shock
Jiffy pellets allow transplanting without disturbing roots by planting the entire pellet into larger pots or garden soil. This reduces shock since roots remain intact.
Hardening off seedlings by gradually exposing them to outdoor conditions over a week before transplanting in the garden can improve survival significantly.
- Plant pellet directly to avoid root disturbance
- Gradually acclimate seedlings to outside conditions
- Handle seedlings gently during transplanting
Troubleshooting Common Germination Issues

Identifying and Preventing Mold and Damping-Off
Excess moisture and poor airflow can cause mold growth or damping-off disease, killing young seedlings. Using sterile equipment and spacing pellets appropriately can reduce this risk.
If mold appears, increasing ventilation and removing affected seedlings can prevent spread. Avoid overwatering and use well-maintained humidity control to keep conditions balanced.
- Use clean seed trays and tools
- Space pellets for ventilation
- Reduce watering if mold appears
Dealing with Poor or Uneven Germination
Seeds may fail to sprout due to low viability, incorrect planting depth, or unsuitable temperature and moisture levels. Always source fresh, high-quality seeds and follow recommended sowing instructions closely.
Using seed starting pods like Jiffy pellets helps provide uniform conditions but monitoring environmental factors daily supports even germination rates.
- Use fresh, viable seeds
- Observe recommended depth and temperature
- Maintain consistent moisture levels
Enhancing Growth After Germination in Jiffy Pellets

Light Requirements for Seedling Development
After seeds sprout, providing 12-16 hours of supplemental light daily using fluorescent or LED grow lights promotes strong, compact growth. Position lights close to seedlings without causing heat stress to avoid leggy stems.
Adjust light height as seedlings grow and rotate trays occasionally to ensure even distribution and balanced development across all plants.
- Use fluorescent or LED grow lights
- Provide 12-16 hours of light daily
- Adjust light distance to avoid overheating
For more in-depth background about seed starting techniques including peat pellets, visit this resource. Jiffy peat pellet information.
Feeding and Watering Seedlings
Young seedlings require mild feeding once their first true leaves appear. Using diluted, balanced fertilizer suitable for seedlings can encourage healthy growth.
Water seedlings carefully to avoid washing out nutrients or over-saturating pellets. Jiffy seed starting pods retain moisture efficiently but still need regular monitoring.
- Feed with diluted seedling fertilizer after first leaves
- Avoid overwatering the peat pellets
- Monitor moisture levels daily
Comparison of Seed Starting Methods Using Jiffy Pellets and Alternatives
Here is a comparison of Jiffy pellets with other popular seed starting media to highlight their unique benefits and limitations.
| Method | Moisture Retention | Ease of Transplanting | Cost | Space Efficiency |
|---|---|---|---|---|
| Jiffy Pellets | High – retains moisture well | Excellent – transplant pellet intact | Moderate – more expensive than soil | High – compact and portable |
| Traditional Potting Soil | Variable – depends on soil mix | Moderate – can disturb roots | Low – inexpensive | Moderate – requires trays/pots |
| Seed Starting Trays with Peat | Moderate – can dry out quicker | Good – seedling root plug | Low to moderate | High – tray organized |
| Coconut Coir Pods | High – retains water well | Excellent – minimal root disturbance | Moderate | High – lightweight and compact |
Frequently Asked Questions
Can I reuse Jiffy pellets after harvesting seedlings?
Reusing Jiffy pellets is not recommended since nutrient levels decrease and the peat structure breaks down. For best results, use fresh pellets each season.
How long do Jiffy pellets stay moist?
When kept covered with a humidity dome and misted regularly, Jiffy pellets typically retain adequate moisture for about 7-10 days before needing additional watering.
Are Jiffy pellets suitable for all seed types?
Jiffy pellets work well for most common vegetable and flower seeds, but very large seeds or those requiring special conditions might need alternative starting methods.
Do I need to add fertilizer when using Jiffy pellets?
Jiffy pellets contain minimal nutrients initially, so feeding seedlings with a diluted fertilizer after they develop true leaves is important for healthy growth.
What causes seeds not to sprout in Jiffy pellets?
Common causes include incorrect moisture levels, inappropriate temperature, old or non-viable seeds, and planting seeds too deep or too shallow in the pellet.
Key Takeaways
- Hydrate Jiffy pellets thoroughly but avoid over-saturation for ideal moisture balance
- Plant seeds individually at proper depth within the pellet’s indentation
- Maintain warm temperature and controlled humidity for best germination results
- Transplant seedlings by placing the entire pellet to reduce root disturbance
Conclusion
Germinating seeds in a Jiffy pellet offers a reliable and clean way to start plants indoors with minimal fuss and good outcomes. By preparing the pellets correctly, placing seeds at the right depth, and maintaining consistent moisture and temperature, gardeners can encourage fast and healthy seedling development. This method simplifies the early growth stage and helps reduce common problems like root shock during transplanting.
For gardeners seeking easy seed starting options, Jiffy pellets stand out particularly compared to traditional soil or seed starting pods because of their excellent moisture retention and streamlined transplanting process. Beginners can benefit from their compactness and mess-free setup, while experienced growers may appreciate the uniform environment they provide for delicate seeds. Alternatives like coconut coir pods and peat trays also merit consideration depending on your budget and space.
Your next step is to select good quality seeds suited for your climate and goals, soak and set up your Jiffy pellets following the outlined steps, and monitor seedlings closely through germination. With patience and the right conditions, you’ll soon have vigorous plants ready to thrive outdoors or in larger containers.