7 Simple Steps for Germinating Weed Seeds Successfully
Starting your weed-growing journey can be exciting, but many people struggle with germinating seeds successfully. It’s frustrating to invest time and resources only to see seeds fail to sprout. Don’t worry—you’re not alone, and with the right approach, you can improve your success rate.
To successfully germinate weed seeds, start with high-quality, fresh seeds from a reputable source. Store them in a cool, dry place, labeling containers for easy tracking.
Keep the environment warm (70-85°F) and moist, using methods like the paper towel technique or soaking seeds briefly.
Once seeds sprout, carefully transplant seedlings and gradually introduce nutrients. Address issues promptly by adjusting moisture, temperature, or light—keeping conditions just right.
For full details, keep exploring these essential steps.
Key Takeaways
- Use fresh, high-quality seeds stored in a cool, dry, airtight container for the best chance of success.
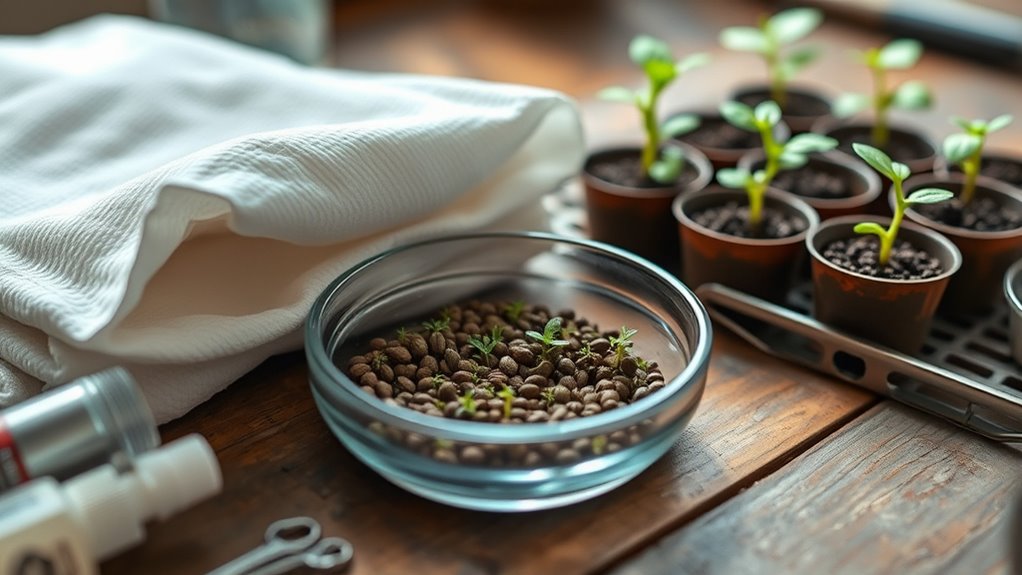
- Soak seeds in water or try the paper towel method to help them sprout faster.
- Keep the seeds in a dark, warm spot with consistent moisture and good humidity.
- When germinated, transplant the seeds carefully into soil, making sure not to damage the roots.
- Provide enough light, keep an eye on environmental conditions, and slowly add nutrients as the plants grow.
How to Choose High-Quality Weed Seeds for Better Germination
Choosing high-quality weed seeds is important if you want better germination rates. The genetics play a big role because healthier, well-bred seeds are more likely to sprout successfully and grow strong plants.
Look for seeds from reputable sources that focus on quality and genetic stability. Good seeds often look darker, glossy, and are free from mold or damage.
Proper seed storage also matters; keep your seeds in a cool, dark, and dry place to help them stay viable over time. Avoid exposing seeds to extreme heat or humidity, which can lower their chances of germinating.
When choosing seeds, think about strains that match your growing environment and goals. Investing in quality genetics and storing seeds properly gives you a better start, increasing the chances of successful germination and healthy growth.
Understanding How Weed Seeds Germinate and What Affects Success
Understanding how weed seeds germinate is key to giving your plants a strong start. Seed viability, or the seed’s ability to sprout, can vary and affects how successful germination will be.
Knowing how weed seeds germinate helps ensure healthy, strong plants from the start.
Several factors influence germination, like moisture, temperature, light, and soil conditions. If any of these aren’t just right, your seeds might not sprout or could grow weak plants.
To boost your chances, focus on a few important points:
- Keep moisture levels just right to kickstart the seed’s metabolic processes
- Make sure the temperature matches the needs of your weed species
- Provide proper light exposure if the seeds need light to germinate
- Use well-draining soil to avoid rot and ensure oxygen gets to the seeds
Preparing the Perfect Environment for Seed Germination
Creating the ideal environment for seed germination requires paying close attention to several key conditions. First, confirm your seeds are stored properly; keep them in a cool, dark, and dry place to maintain viability. Proper seed storage prevents premature sprouting or deterioration.
When you’re ready to germinate, focus on light requirements—most weed seeds need minimal or indirect light during the initial stages. A dark environment mimics natural soil conditions, encouraging germination.
Once seeds sprout, they’ll need light to grow strong, so be prepared to provide appropriate lighting. Maintain consistent moisture in your germination medium, but avoid overwatering, which can cause mold or rot.
Temperature control is also essential; keep the environment warm, around 70-85°F. By managing seed storage, light exposure, moisture, and temperature, you create the perfect environment that promotes healthy and successful seed germination.
The Best Techniques to Start Your Cannabis Seeds
To give your cannabis seeds the best start, focus on tried-and-true techniques that promote strong germination. Proper seed storage is essential; keep seeds in a cool, dark place until you’re ready to plant.
When starting your seeds, make sure they are placed in a warm environment, ideally between 70-85°F, to encourage sprouting. Light requirements are minimal during germination, so avoid exposing seeds to direct sunlight initially.
Once seeds sprout, they’ll need ample light to grow healthy leaves. Here are the best techniques to start your cannabis seeds:
- Store seeds in a dark, cool container until planting
- Use a moist paper towel or seed-starting medium
- Maintain warm temperatures between 70-85°F for germination
- Keep light requirements in mind: minimal light needed until sprouting, then provide plenty of light afterward
Following these steps maximizes your chances of successful germination and healthy seedlings.
Keeping Your Seeds Moist and Conditions Just Right
Maintaining the right moisture level is key for successful seed germination. Seeds need consistent dampness but shouldn’t be waterlogged. Proper moisture helps keep seeds viable and encourages healthy sprouting.
Focus on managing humidity and temperature control, both of which are critical for germination. Keep your seeds in a stable environment with consistent temperature and humidity, and avoid fluctuations that could slow down progress.
Light exposure should be minimal until seedlings emerge. Too much light can dry out the seeds too early. Water your seeds carefully—too often can drown them, while infrequent watering can dry them out.
Use a tray with a lid or plastic wrap to help maintain environmental stability. This keeps moisture levels steady and creates a good environment for germination.
| Aspect | Ideal Conditions |
|---|---|
| Humidity levels | 70-80% humidity |
| Temperature control | 70-85°F (21-29°C) |
| Light exposure | Minimal until germination occurs |
| Watering frequency | Keep germination medium moist, not soaked |
Safely Transplanting Seedlings Into Your Grow Space
When it’s time to transplant your seedlings, it’s really important to do it at the right stage. If you do it too early or too late, it can stress the plants out. So, keep an eye on their growth and wait until they’re just the right size.
When you’re ready, handle each seedling gently. Support the roots carefully and avoid any damage. Taking your time and being gentle makes a big difference. With the right timing and careful technique, your plants will settle in quickly and start thriving in their new space.
Proper Transplant Timing
Timing is key when transplanting your seedlings; doing it too early or too late can stress the plants or stunt their growth. Transplant at the right time to help your plants reach their full potential with minimal stress.
Wait until your seedlings have at least two to three true leaves and their roots are well-established. This shows they’re strong enough to handle the move.
Look for sturdy, healthy stems and leaves, and avoid transplanting during extreme heat or cold. Make sure the soil is moist but not waterlogged.
Prepare your grow space ahead of time so you can do the transplant quickly and smoothly. Proper timing helps prevent stress and promotes healthy development.
This gives your plants the best start to thrive from the very beginning.
Gentle Handling Techniques
Transplanting seedlings carefully is key to helping them get established in their new space. Handle them gently to avoid damaging their delicate roots or stems.
When transplanting, hold seedlings by their leaves or root ball, not the stem, to prevent breakage. Be mindful of moisture—wait until they are strong enough and have a good root system before moving them.
Use clean tools and don’t rush the process. If needed, gently loosen the seedling from its container and create a soft, supportive environment in the new space.
This careful approach reduces stress and boosts their chances of survival. With patience and a gentle touch, your seedlings will adjust quickly and thrive in their new home.
Troubleshooting Seed Germination Problems and How to Fix Them
Troubleshooting seed germination issues often involves figuring out what’s going wrong and making some adjustments. Common problems include poor seed viability, environmental issues, or bad seed storage that can stop seeds from sprouting.
First, check if your seeds are fresh and viable before planting. Make sure your environment has the right moisture, temperature, and light conditions. If the conditions are off, it can really slow down or stop germination.
Also, proper seed storage is key. Keep seeds in a cool, dry place to help preserve their quality and viability.
Here are some tips to troubleshoot:
- Test seed viability using a damp paper towel method
- Adjust things like temperature and moisture as needed
- Use fresh seeds instead of old or expired ones
- Store seeds properly to avoid damage and loss of viability
Fixing these issues can really improve your chances of successfully germinating your weed seeds.
Frequently Asked Questions
How Long Does It Typically Take for Weed Seeds to Germinate?
Generally, weed seeds take about 24 to 72 hours to germinate, but this depends on seed types and germination temperatures.
Fast-germinating seeds like sativa may sprout quicker, while indica seeds might take a bit longer. Keep your environment warm around 70-85°F and moist to encourage germination.
If conditions are right, you’ll see sprouts within a few days. Otherwise, it could take up to a week or more.
Can You Accelerate the Germination Process Safely?
Yes, you can safely speed up germination by soaking your seeds in water for 12-24 hours. This helps break dormancy and gets things started.
Make sure your seeds are stored properly and keep the humidity high in your germination area. That encourages faster sprouting.
Keep the seeds warm and moist, but don’t overwater. Too much water can lead to rot and harm your seeds.
Following these steps can help you get faster germination while keeping your seeds healthy and protected.
What Are Common Signs of Poor Seed Viability?
You’ll notice poor seed viability if seeds don’t sprout within the expected time frame or if they fail to produce healthy seedlings. Seeds stored improperly or kept too long often lose their genetic quality, which reduces germination success.
Discoloration, mold, or a hard outer shell can also be signs of low viability. Always store your seeds in a cool, dark place to keep their genetic quality intact and give yourself a better chance of successful germination.
How Do Environmental Factors Influence Germination Success?
Imagine your seeds cradled in cozy soil, waiting to sprout. Light exposure and soil temperature play vital roles here.
Too much light can dry out the seeds, while too little can hinder growth. Ideally, keep soil warm, around 70-85°F, for best germination.
Consistent moisture and proper light exposure create the perfect environment, ensuring your seeds break through the soil and reach toward the sun with healthy vigor.
Is It Necessary to Pre-Soak Seeds Before Planting?
Pre-soaking seeds isn’t strictly necessary, but seed preparation techniques like soaking can boost germination rates.
Soaking helps by softening the seed coat, which allows water to penetrate more easily and speeds up sprouting.
If you decide to soak, do it for 12-24 hours in room temperature water.
This simple step can give your seeds a better start and increase the chances of successful germination and healthy plant growth.
Conclusion
Starting your weed seeds might seem tricky, but with these simple steps, you’ll set yourself up for success. Don’t worry if some seeds don’t sprout right away—patience is key, and even experienced growers face setbacks.
Keep your environment consistent, and you’ll see those little sprouts break through in no time. Trust the process, stay attentive, and enjoy watching your plants grow.
By following these tips, you’ll be well on your way to a thriving garden with healthy weed plants.