How to Make Chia Seed Pudding in 7 Simple Steps
Many people struggle with creating the perfect chia seed pudding that’s both delicious and easy to make. You’re not alone—getting that ideal texture can be tricky, but with a few simple steps, you’ll be a pro in no time.
To make chia seed pudding in 7 simple steps, start by gathering your ingredients and tools.
Mix 3-4 tablespoons of chia seeds with your chosen liquid, like milk or a plant-based option, and stir thoroughly to prevent clumps.
Let the mixture sit in the fridge for at least 30 minutes or overnight for the best texture.
Customize your pudding with sweeteners, fruits, or spices to suit your taste.
And if you encounter any issues, don’t worry—learning how to troubleshoot will help you achieve perfect results every time.
Key Takeaways
- Before you start, gather your chia seeds, liquid, sweeteners, flavorings, and the tools you’ll need.
- Measure 3-4 tablespoons of chia seeds for each cup of room-temperature liquid, then mix everything well.
- Keep stirring until the mixture is smooth and no lumps remain, then pop it in the fridge for 30 minutes or overnight.
- Feel free to add sweeteners, fruits, spices, or nuts to make it tastier and give it the perfect texture.
- Once done, store it in airtight containers, chill for 2-4 hours or overnight, and give it a good stir before serving.
Gather Your Ingredients and Tools for Chia Pudding
Before you start making chia seed pudding, gather all the ingredients and tools you’ll need. Chia seeds are packed with benefits, including high fiber, omega-3 fatty acids, and protein, making them a healthy choice. Knowing their nutritional value helps you appreciate why this pudding is a nutritious snack or breakfast.
Gather ingredients and tools to enjoy a nutritious, stress-free chia pudding experience.
You’ll need a few simple ingredients: chia seeds, a liquid like milk or a plant-based alternative, and optional sweeteners or flavorings. For tools, grab a mixing bowl, a spoon or whisk, and a jar or container for setting the pudding. Having everything ready ensures a smooth process and prevents interruptions.
Measuring cups and spoons are helpful for getting the right proportions, which maximize chia seed benefits and give the pudding the perfect texture. By organizing your ingredients and tools beforehand, you set yourself up for an easy, efficient prep. This makes the whole process more enjoyable and stress-free.
Prepare Your Chia Seeds and Liquid Base
To prepare your chia seeds and liquid base, start by measuring out the desired amount of chia seeds. Usually, about 3 to 4 tablespoons per cup of liquid works well.
Chia seed varieties differ in size and flavor, so pick one that matches your taste, whether plain or flavored. For the liquid, you can go with traditional options like almond milk, coconut milk, or dairy milk.
If you want plant-based or dairy-free options, there are plenty of choices like oat milk, soy milk, or even fruit juices. Make sure the liquid is at room temperature or slightly warm so the seeds absorb it evenly.
Stir the chia seeds into the liquid thoroughly to prevent clumping. This step creates the base for a smooth, creamy pudding.
Mix to Achieve the Perfect Creamy Texture
Once you’ve thoroughly stirred the chia seeds into your liquid, focus on blending the mixture until it reaches a smooth, creamy consistency. Use a whisk or fork to break up any clumps, making sure the seeds are evenly spread out.
Stir vigorously for a couple of minutes to activate the seeds’ gel-like properties, which helps create that luscious texture you’re after. If the mixture feels too thin, just add a bit more chia seeds and mix well.
Vigorously stir for a few minutes to activate the chia seeds’ gel and achieve a smooth, luscious texture.
If it’s too thick, add a splash of milk or your preferred liquid to loosen it up. For the best texture, refrigerate the mixture for at least 30 minutes and give it a quick stir before serving.
This step lets the chia seeds fully expand and develop that creamy, velvety consistency you want. Getting the texture right is key to a satisfying pudding—smooth, velvety, and just the right thickness.
Flavor and Customize Your Chia Pudding
Adding flavor and customizing your chia pudding lets you tailor it to your taste and make it more enjoyable. You can try different flavor variations by adding sweet toppings like honey, maple syrup, or agave.
Incorporate nut butters such as almond or peanut for richness and extra health benefits. Fruit combinations like berries, mango, or banana bring natural sweetness and vibrant color.
Spice things up with cinnamon, cardamom, or vanilla extract to add depth and aroma. Using dairy alternatives like almond milk, coconut milk, or oat milk makes your pudding vegan and suitable for various diets.
Seasonal ingredients like pumpkin, apple, or pomegranate keep your pudding fresh and exciting all year round. To add interesting texture contrasts, consider chopped nuts or granola.
These customizations help you enjoy a personalized, nutritious treat that suits your flavor preferences and supports a healthy lifestyle.
Let Your Pudding Set and Chill
After mixing your chia pudding ingredients thoroughly, transfer the mixture to a jar or container with a lid. Now, it’s time to let your pudding set and chill.
The ideal setting time is usually 2 to 4 hours, but overnight chilling gives the best results. Chilling helps create a smoother texture and better flavor integration, making each spoonful more enjoyable.
During this time, the chia seeds absorb liquid and swell, which refines the pudding’s consistency. Keep the container refrigerated to prevent spoilage and ensure proper setting.
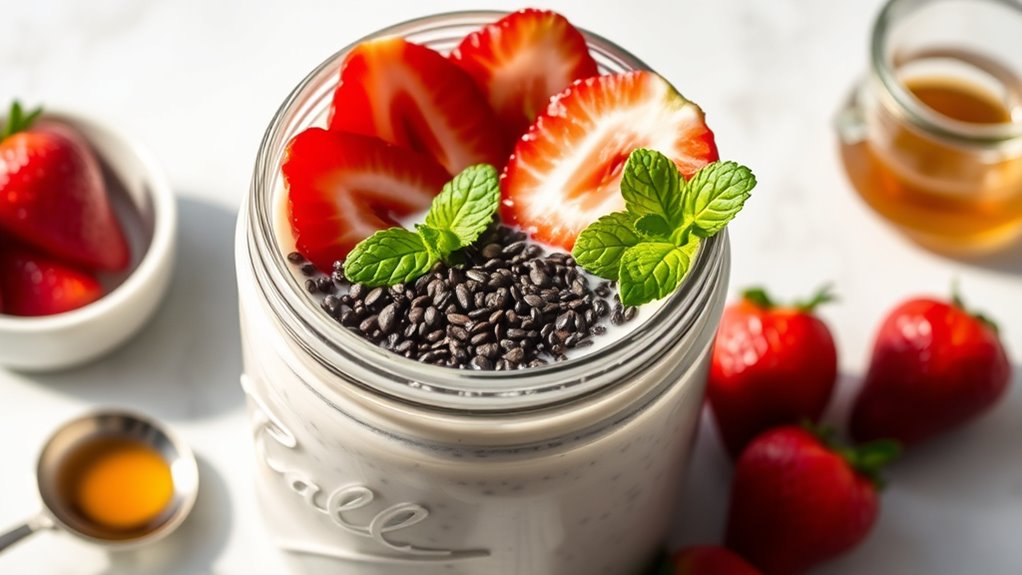
Before serving, give the pudding a quick stir to break up any clumps. You can also add fresh fruit or toppings after chilling to enhance flavor and presentation.
Patience pays off here—allowing your chia seed pudding to rest and chill results in a creamier, more cohesive dessert with improved texture and taste.
Serve and Store Your Chia Seed Pudding
When you’re storing your chia seed pudding, it’s best to use airtight containers. That way, it stays fresh for longer and doesn’t absorb any unwanted odors from the fridge.
And don’t forget to keep it at a cool, steady temperature—this helps keep the texture and flavor just right. After you’ve enjoyed some, make sure to cover it up and pop it back into the fridge quickly. That way, it stays delicious and ready for your next snack or breakfast!
Proper Storage Containers
Have you chosen the right container to store your chia seed pudding? Glass jars with airtight lids work perfectly because they keep your pudding fresh and prevent spills.
They’re also great for portion control, making it easy to grab a single serving or multiple portions for meal prep. Look for containers that stack easily to save space in your fridge and keep your kitchen organized.
Consider eco-friendly options like reusable glass or BPA-free plastic containers to reduce waste. Make sure your container is leak-proof to avoid messes and keep your pudding fresh.
Using the right storage options not only preserves the pudding’s texture and flavor but also makes your prep process more efficient. Proper containers are a simple yet essential step for enjoying chia seed pudding at its best.
Optimal Serving Temperature
Once you’ve picked the right container for your chia seed pudding, paying attention to its serving temperature helps you enjoy it at its best. The ideal temperature varies based on your preferences, but most people prefer it cold for a refreshing experience.
To get the most flavor and texture, try these serving tips: Serve it chilled straight from the fridge for a cool, creamy treat. If you like it a bit softer, let it sit at room temperature for 5-10 minutes.
Choose a glass or bowl that keeps it cold longer. Add toppings just before serving so they stay fresh. And remember, you can adjust the temperature to your liking—some prefer it colder, others warmer.
Freshness Preservation Tips
To keep your chia seed pudding fresh and delicious, proper storage is key. Follow these tips to maintain its flavor and texture. Always store it in an airtight container to prevent moisture loss and contamination.
Refrigerate your pudding quickly, ideally within two hours of making it, to slow bacterial growth. Before serving, give it a quick stir to bring back its creamy consistency. If you have leftovers, cover tightly and enjoy within 3-4 days for the best freshness.
| Freshness Tips | Storage Techniques |
|---|---|
| Use airtight containers | Keep refrigerated at all times |
| Seal tightly after each use | Store in the main fridge section |
| Consume within 3-4 days | Avoid door storage to maintain temperature stability |
| Stir before serving | Keep away from strong-smelling foods |
| Keep at consistent cold temps | Label with date for freshness |
Following these simple tips will ensure your chia pudding stays tasty and fresh for longer.
Troubleshoot Common Chia Pudding Issues
Are your chia seed puddings turning out too watery or lumpy? This usually happens because the seeds clump together or don’t absorb the liquid evenly. To fix a watery pudding, try stirring in a few more chia seeds and letting it sit longer so it can soak up the liquid better.
If your pudding is lumpy, it’s probably because the seeds didn’t hydrate evenly or they clumped together. To prevent this, whisk the mixture thoroughly before putting it in the fridge. This helps break up clumps and creates a smoother pudding.
Here are some tips to troubleshoot common issues:
- Stir well to break up any clumps before refrigerating.
- Use enough liquid to make sure the seeds can absorb it properly.
- Let the mixture sit for at least 30 minutes or overnight for a better texture.
- Shake or whisk the pudding now and then if it seems uneven.
- Add the seeds gradually instead of all at once to prevent clumping.
Following these steps will help you get a creamy, well-textured chia pudding every time.
Frequently Asked Questions
Can I Use Honey or Other Sweeteners Instead of Maple Syrup?
Yes, you can use honey or other sweetener alternatives instead of maple syrup. These options add different flavor variations and natural sweetness to your chia seed pudding. Honey provides a rich, floral taste, while agave or coconut nectar work well too.
Just adjust the amount to suit your preferred level of sweetness. Experimenting with sweetener alternatives lets you customize your pudding’s flavor and enjoy a delicious, healthier treat.
How Long Does Chia Pudding Typically Last in the Refrigerator?
Chia pudding usually stays fresh for about 4 to 5 days in the refrigerator. To keep it tasting its best, store it in an airtight container and give it a good stir before putting it away.
Check for signs of freshness like a nice aroma and a thickened texture. After a few days, it might develop a sour smell or become watery, which means it’s time to toss it out for safety.
Can I Make Chia Pudding Without Soaking the Seeds Overnight?
Yes, you can make chia pudding without soaking the seeds overnight by doing a quick soak. Just mix the chia seeds with your liquid of choice and let them sit for about 15-30 minutes, stirring occasionally.
If you prefer seed alternatives like flaxseed or hemp seeds, keep in mind they may need different soaking times or textures. This method is a faster way to enjoy nutritious chia pudding.
Are There Vegan Alternatives to Traditional Dairy Liquids?
Yes, you can definitely use vegan alternatives like coconut milk, almond milk, oat milk, or soy milk instead of traditional dairy liquids. These plant-based options work well in chia seed pudding, giving it a creamy texture and subtle flavor.
Just swap out dairy milk for your favorite vegan milk, mix it with chia seeds, and let it soak. It’s a simple switch that creates a delicious, dairy-free pudding perfect for vegans and anyone with dairy allergies.
How Do I Prevent Clumping of Chia Seeds During Mixing?
Did you know that improper mixing causes over 60% of chia seed clumping?
To prevent clumping, stir the seeds thoroughly with your liquid right after adding them.
Use a whisk or fork for even distribution, and consider blending the mixture in a blender for smoother results.
Regularly stirring during the first few minutes helps break up clumps and ensures the seeds disperse evenly, giving you a smooth, creamy pudding.
Conclusion
Now that you’ve mastered making chia seed pudding, think of it as planting a seed that blossoms into a delightful treat. With patience and a little creativity, your pudding will grow into a nourishing, delicious masterpiece.
Keep experimenting with flavors and toppings, and you’ll always have a tasty, healthy option ready to enjoy. Remember, each batch is a new garden full of potential and waiting to be enjoyed!