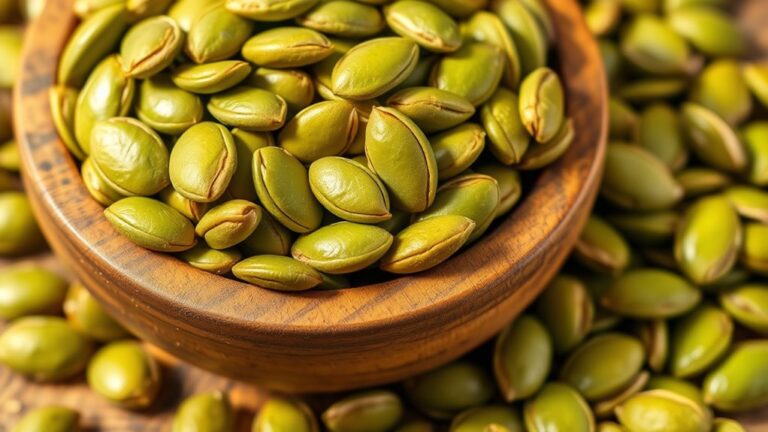
7 Simple Steps to Cook Perfect Pumpkin Seeds
Many people love pumpkin seeds, but getting them just right can be tricky. If you’ve ever struggled to achieve that perfect crunch and flavor, you’re not alone.
Luckily, with a few simple steps, you can make irresistibly crispy pumpkin seeds at home.
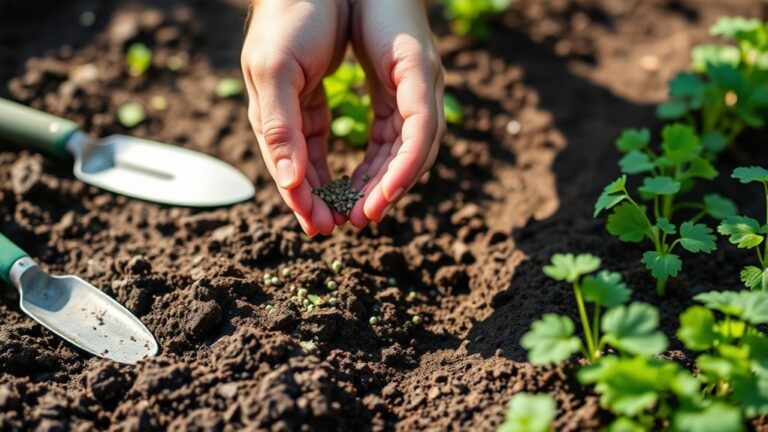
To cook perfect pumpkin seeds, start by removing seeds from the pumpkin and soaking them in water for 10-15 minutes. This helps loosen the flesh and enhances their flavor.
Rinse thoroughly and pat dry before tossing with your favorite seasonings.
Spread the seeds evenly on a baking sheet, then roast at 350°F for 15-20 minutes. Stir occasionally until they turn golden and crispy.
Store in an airtight container for maximum freshness.
Keep going to uncover even more tips for flavorful, crisp pumpkin seeds.
Key Takeaways
- Remove the pumpkin seeds from the pumpkin and soak them in water for 10-15 minutes. This helps loosen any flesh and makes it easier for flavors to soak in.
- Rinse the seeds well and dry them thoroughly. Good drying ensures they roast evenly and stick better with seasonings.
- Toss the seeds with your favorite seasonings and a little oil so they get a nice, even coating.
- Spread the seeds in a single layer on a baking sheet. Roast at 350°F, stirring now and then to keep them cooking evenly.
- Keep an eye on them, and take them out when they’re golden brown and crispy. Store in an airtight container to keep them fresh.
Preparing Your Pumpkin Seeds for Roasting
To prepare your pumpkin seeds for roasting, start by removing them from the pumpkin and placing them in a bowl of water. Soaking seeds helps loosen any remaining pumpkin flesh and makes them easier to clean.
Plus, soaking can improve flavor infusion, allowing seasonings to better stick during roasting. Let the seeds sit in water for about 10 to 15 minutes, which softens the outer shell and gets them ready for the next steps.
Soaking enhances flavor absorption and softens shells for easier, tastier roasting.
During this time, you can add herbs or spices to the soaking water if you want to infuse subtle flavors. Once soaked, drain the seeds and give them a gentle rinse to remove any residual pumpkin bits.
This initial step guarantees your seeds are clean, ready for seasoning, and primed for even roasting. Taking the time to soak your seeds now can make a noticeable difference in texture and taste later.
Cleaning, Drying, and Seasoning Pumpkin Seeds
Once you’ve taken out all the pumpkin pulp, make sure to give your seeds a good rinse to get rid of any leftover bits. It’s important to wash them thoroughly so they’re clean and ready to go. After washing, pat them dry with a towel—this helps them cook evenly and also helps the seasonings stick better.
When it’s time to add your seasonings, toss the seeds around well. That way, every seed gets coated evenly, and you’ll get the most flavor in every bite!
Removing Residual Pulp
Begin by rinsing the pumpkin seeds thoroughly under cold water to remove any remaining pulp. Use gentle rubbing with your fingers or a soft brush to dislodge stubborn bits.
Effective scraping methods, like using a small spoon or your fingernail, can help lift leftover pulp without damaging the seeds. Keep rinsing until the seeds feel clean and free of sticky residue.
Once cleaned, drain the seeds well and spread them out on a towel to dry. Proper drying ensures they’re ready for seasoning and roasting.
Removing residual pulp thoroughly prevents bitterness and guarantees a crisp final product. Take your time with these steps to get clean, pulp-free seeds that will turn out delicious and perfectly prepared.
Achieving Even Seasoning
Ensuring even seasoning starts with properly dried seeds, as moisture can prevent spices from sticking evenly. After cleaning, spread the pumpkin seeds on a towel and let them air dry completely. This step is essential for effective seasoning techniques, as dry seeds absorb flavors better.
Once dried, toss the seeds in a small bowl with your chosen seasonings, making sure each seed gets coated evenly. Use a light hand with your seasoning to maintain a good flavor balance—too much can overpower the natural nutty taste.
For best results, gently massage the spices into the seeds, spreading the flavor uniformly. Finally, spread the seeds in a single layer on a baking sheet to bake or roast, locking in the seasoned flavor and creating a delicious, evenly seasoned snack.
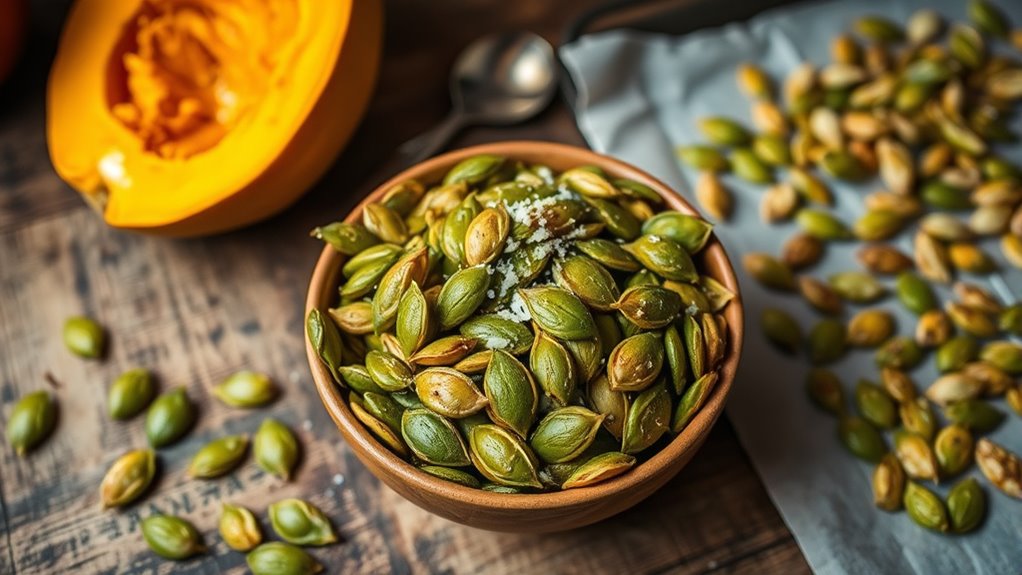
How to Roast Pumpkin Seeds for Maximum Crispiness
To get the crispiest roasted pumpkin seeds, start with clean, dried seeds and season them evenly. Proper prep is key to maximum crunchiness.
Toss the seeds with your favorite spices, making sure every seed is coated well for consistent flavor and texture. When roasting, spread them in a single layer on a baking sheet for even heat.
Preheat your oven to 350°F (175°C) and roast the seeds for 15-20 minutes. Stir occasionally to prevent burning and help them crisp up evenly.
Keep a close eye on them because over-roasting can make the seeds bitter. For extra crispiness, you can dry the seeds thoroughly before roasting or raise the oven temperature slightly at the end.
Knowing When Pumpkin Seeds Are Perfectly Roasted
Knowing when pumpkin seeds are perfectly roasted is key to getting that ideal crunch and flavor. To tell if they’re ready, focus on these main signs:
- Roasting temperature: Keep your oven around 350°F (175°C). When it’s at the right temp, the seeds cook evenly without burning.
- Seed color: Look for a golden brown hue. As they roast, the seeds deepen in color, which shows they’re close to perfect.
- Texture: Take them out when they feel crispy and firm but not burnt or overly dark.
Watch the seeds during the last few minutes because color and texture can change quickly. When they’re evenly golden and crunchy, they’re ready to enjoy. Remember, every oven is a bit different, so trust your eyes and touch to avoid over-roasting.
Storing Pumpkin Seeds to Keep Them Fresh
If you want your pumpkin seeds to stay fresh, it’s best to pick the right storage containers. You’ll want something that keeps air and moisture out, so your seeds stay crunchy and flavorful.
Also, try to store them in a cool, dark spot—light and heat can make them go stale faster. When you do this, you’ll find that your seeds stay fresh for weeks, and their quality is preserved much longer.
Proper Storage Containers
Choosing the right storage container is key to keeping pumpkin seeds fresh and crunchy. To preserve their flavor and texture, go for airtight containers or glass jars with secure lids. These help prevent moisture and air from spoiling your seeds.
Here are three tips to ensure your seeds stay perfect: First, use airtight containers or glass jars to lock in freshness. Second, store them in a cool, dark place away from direct sunlight. Lastly, avoid plastic bags that aren’t sealed tightly, as they can let in air and humidity.
Optimal Storage Conditions
Once you’ve picked the right container, the next step is to focus on the best storage conditions to keep your pumpkin seeds fresh and crispy.
Keep the temperature around 60-70°F and make sure the humidity stays controlled. Too much moisture can lead to mold and sogginess, so store your seeds in a cool, dry place.
Use this table as a quick guide:
| Storage Condition | Recommended Practice |
|---|---|
| Ideal Temperature | 60-70°F |
| Humidity Control | Keep moisture below 60% |
| Light Exposure | Store in a dark place |
| Air Circulation | Use an airtight container |
| Duration | Up to 2 months for best freshness |
Storing pumpkin seeds properly helps keep their crunch and flavor longer.
Shelf Life Tips
Proper storage is essential to keep your pumpkin seeds fresh and crunchy for as long as possible. To maximize shelf life and extend storage duration, consider these tips:
- Store seeds in an airtight container to prevent moisture and air from reducing freshness.
- Keep them in a cool, dark place like a pantry or cupboard, avoiding heat and sunlight that can speed up spoilage.
- For longer shelf life, you can refrigerate or freeze pumpkin seeds, which slows down deterioration.
Following these steps helps preserve flavor and crunchiness, so your seeds stay tasty for weeks or even months. Proper storage not only maintains their quality but also prevents mold or rancidity. Keep these tips in mind to enjoy fresh pumpkin seeds whenever you want.
Flavor Variations and Creative Toppings for Pumpkin Seeds
There are countless ways to boost the flavor of pumpkin seeds with creative toppings and seasonings. Spicy options like chili powder or cayenne give them a fiery kick, while sweet toppings such as cinnamon sugar or honey add a caramelized crunch.
Boost pumpkin seeds with spicy chili or sweet cinnamon sugar for irresistible, flavorful snacks.
Savory blends like garlic, paprika, or Parmesan create a rich, satisfying taste. Herb infusions like rosemary or thyme bring fresh, aromatic notes, making them perfect for gourmet snacks. Seasonal flavors like pumpkin pie spice or maple glaze tie into festive moods.
International twists like curry or soy-based seasonings give your seeds an exotic flair. For added texture, try crushed pretzels, sesame seeds, or crispy bacon bits. Mixing and matching these toppings lets you craft personalized snacks for any craving or occasion.
No matter what flavor you prefer, experimenting with creative toppings turns simple pumpkin seeds into a delicious, memorable treat.
Troubleshooting Common Roasting Issues
Roasting pumpkin seeds can sometimes lead to unexpected issues, like seeds burning or turning out soggy, which can be frustrating. To avoid burnt seeds and uneven texture, keep a close eye on timing and temperature. Here are some common problems and solutions:
- Burnt seeds and overcooked bites happen when roasting time is too long or oven heat is too high. Use a lower temperature and check periodically.
- Soggy results and seasoning clumps occur when seeds aren’t properly dried or seasoned too early. Make sure seeds are dry before roasting and toss them evenly with oil and seasoning.
- Uneven texture or flavor imbalance can happen from inconsistent stirring or improper spacing on the baking sheet. Stir halfway and spread seeds in a single layer for even roasting.
Adjusting these factors helps you get that perfect, crunchy, evenly seasoned pumpkin seed snack.
Frequently Asked Questions
Can I Roast Pumpkin Seeds in a Microwave Instead of an Oven?
Yes, you can roast pumpkin seeds in a microwave using microwave techniques. First, rinse and season your seeds with your favorite seasonings.
Spread them evenly on a microwave-safe plate and microwave in short bursts, about 1-2 minutes, stirring in between. Keep an eye on them to prevent burning.
This method offers a quick alternative to oven roasting, so you can enjoy crispy, flavorful pumpkin seeds with your preferred seasonings.
How Do I Prevent Pumpkin Seeds From Burning During Roasting?
To prevent your pumpkin seeds from burning, you’ve got to watch them like a hawk! Soaking seeds before roasting can help create a buffer, and tossing them with seasoning options keeps them moist and flavorful.
Keep the oven temperature low, around 300°F, and stir or shake the seeds often. This way, they’ll toast evenly without turning into a crunchy, burnt mess—perfection every time!
Are There Health Benefits to Eating Pumpkin Seeds?
You’ll find pumpkin seeds offer great health benefits, especially for your heart health. They’re packed with nutrients like magnesium, zinc, and healthy fats that support your cardiovascular well-being.
Eating pumpkin seeds can help lower blood pressure and improve cholesterol levels. You can enjoy them as a snack or sprinkle them on your meals to boost your overall health.
Adding pumpkin seeds to your diet makes it easy to get their nutritious benefits regularly. They’re a simple, tasty way to support your wellness journey.
What’s the Best Way to Remove the Pumpkin Seed Membrane?
Struggling with stubborn pumpkin seed membrane removal? Soaking the seeds in warm water for about 10 minutes can help. It softens the membrane, making it easier to peel away.
After soaking, gently rub the seeds with your fingers or a clean towel to loosen any remaining bits. This keeps your seeds clean and ready for roasting.
This simple method helps ensure a smoother cooking process and tastier results.
How Long Do Roasted Pumpkin Seeds Stay Fresh?
Roasted pumpkin seeds stay fresh for about 1 to 2 weeks if stored properly. To keep them fresh, store them in an airtight container in a cool, dry place.
You can make them last longer by refrigerating or freezing. Just remember to check for any signs of spoilage, like a weird smell or mold.
Eat them within this timeframe to enjoy their crunch and flavor at their best.
Conclusion
Now that you know how to perfect your pumpkin seeds, the process becomes a simple pleasure rather than a chore. Roasting might seem straightforward, but it’s the small details—seasoning, timing, storage—that make all the difference.
Craftsmanship really shines in those little touches. Whether you’re adding spices or just enjoying them plain, your seeds will stand out.
Like a well-crafted piece of art, your pumpkin seeds will delight your senses and elevate your snack game. Sometimes, the simplest ingredients can become extraordinary with care and creativity.