How to Germinate Seeds in Soil: A Practical Guide for Successful Planting
Germinating seeds in soil involves creating the right environment for seeds to sprout and develop into healthy seedlings. This process starts with selecting quality seeds and preparing soil that holds moisture and provides warmth, then maintaining consistent care such as watering and temperature control to promote successful germination.
Seed germination in soil matters because it mimics natural growing conditions, allowing roots to expand freely and seedlings to establish strong foundations. Proper germination ensures robust plant growth, reduces transplant shock, and increases overall garden success, especially for beginners looking to nurture plants from seed.
This article will cover key steps including soil preparation, seed selection, watering techniques, optimal environmental conditions, common challenges and how to avoid them, plus tips to transition seedlings safely to bigger pots or outdoor planting. By the end, you’ll understand how to start seeds in soil confidently.
Preparing the Soil for Seed Germination
Choosing the Right Soil Mix
Use a light, well-draining soil mix designed for seed starting. Avoid garden soil which can be too dense and may contain pathogens. A mix of peat moss or coconut coir with fine vermiculite or perlite provides moisture retention and aeration critical for seed roots.
Sterilized seed-starting mixes reduce disease risks and improve seedling health. The soil should be neither too wet nor too dry, allowing for easy root penetration while holding small amounts of water.
- Peat moss or coconut coir
- Vermiculite or perlite for aeration
- Avoid heavy garden soil
- Use sterilized seed-starting mix
Preparing Containers and Soil
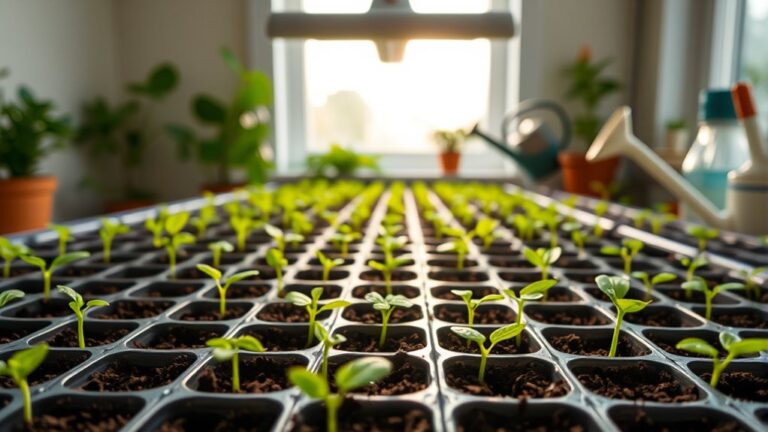
Use clean seed trays or small pots with drainage holes. Fill containers with the prepared seed-starting soil, gently firming it without compacting to keep air pockets intact. Moisten the soil evenly before planting seeds to create a consistent moisture level.
Avoid overwatering at this stage since soggy conditions can rot seeds. A fine mist spray is ideal for maintaining soil moisture without disturbance. Keep trays in a warm, draft-free area as you prepare to sow seeds.
Selecting Seeds and Planting Techniques
Choosing Quality Seeds
Select seeds that are fresh and viable for the best germination rates. Check the packet expiration date and prefer certified organic seeds if possible. Some seeds may require pre-treatment such as soaking or scarification to improve germination success.
Research the specific germination requirements for chosen seeds since depth, spacing, and light exposure needs vary widely among plant types. Following seed packet instructions helps avoid common mistakes.
- Check seed viability and freshness
- Consider seed pre-treatment methods
- Research seed-specific planting depth
- Use instructions on seed packets
Proper Seed Sowing Depth and Spacing
Plant seeds at the recommended depth, usually around twice the seed’s size. This depth allows seeds to sprout without exhausting energy reserves. Crowding seeds may stunt growth; leave enough space to allow air circulation between seedlings once they sprout.
Some seeds require light to germinate and should be placed on the soil surface with gentle pressing, not covered. Monitoring spacing early prevents the need for frequent thinning which can damage roots.
Watering and Moisture Management
Maintaining Consistent Moisture
Seeds need moist but not waterlogged soil to germinate. Use a spray bottle or gentle watering method to keep soil evenly damp. Dry soil slows germination or kills seedlings; overly wet soil causes rot or fungal diseases, so aim for consistent moisture balance.
Using a clear plastic cover or humidity dome over the containers can help retain moisture while allowing some airflow. Remove covers once seedlings emerge to prevent mold growth.
- Keep soil evenly damp
- Avoid waterlogging seeds
- Use humidity covers initially
- Remove covers after sprouts appear
For more on this, see our related guide: How to Use the Paper Towel Method for Cannabis Seeds Germination.
Signs of Overwatering and Underwatering
Yellowing or mold on soil surface indicates too much moisture. Soil that feels soggy increases risk of damping-off disease. Conversely, seeds may fail to sprout or seedlings wilt if soil dries out frequently.
Regularly check soil by touching; it should feel moist but not sticky. Adjust watering frequency based on room temperature and humidity.
Environmental Conditions for Successful Germination
Temperature Requirements for Seeds in Soil
Most seeds germinate best between 65°F and 75°F (18°C–24°C). Soil temperature influences how quickly seeds sprout. Use a seedling heat mat to maintain steady warmth if ambient temperature is too low.
Temperature extremes either delay germination or stop it entirely. Monitor local climate and adjust indoor conditions accordingly to simulate ideal soil warmth.
Light Needs for Seedlings
Light requirements vary: some seeds germinate best in darkness, others need light once planted. After sprouting, seedlings generally need 12–16 hours of moderate light daily to grow strong and avoid leggy stems.
A grow light or location near a bright window can provide needed light intensity. Adjust light height as seedlings grow to prevent burning leaves.
Common Challenges in Seed Germination and How to Overcome Them
Preventing Damping-Off Disease
Damping-off is a fungal problem causing seedlings to collapse. Prevent by using sterilized soil, avoiding overwatering, and ensuring good ventilation. Clean containers and tools regularly to reduce pathogen spread.
If damping-off appears, discard affected seedlings immediately to protect others. Consider applying natural fungicides or cinnamon powder on soil surface as an organic preventative.
- Use sterilized soil
- Avoid overwatering
- Improve airflow
- Keep containers clean
For more on this, see our related guide: Best Way to Germinate Cannabis Seeds for High Success Rates.
Managing Seedling Legginess and Weak Growth
Leggy seedlings are stretched thin due to insufficient light. Provide adequate light source and ensure seedlings get enough hours of bright, indirect sunlight or use grow lights placed close but not too near.
Thin crowded seedlings as soon as possible to reduce competition. Multiply seed trays if you want denser planting but keep individual seedlings healthy.
Transitioning Seedlings from Germination to Growing On
When and How to Thin Seedlings
Thin seedlings once they develop their first true leaves by cutting weaker ones at soil line, leaving the strongest to grow. This prevents overcrowding and competition for nutrients and light.
If multiple seeds were sown in a single small container, transplant individual seedlings carefully to larger pots once roots fill the container to promote healthy growth.
- Wait for first true leaves
- Cut weaker seedlings at soil line
- Transplant when roots fill pots
- Handle seedlings by leaves, not stem
For more detailed seed germination guidelines and species-specific tips, visit the seed germination guidance on USDA. seed germination guidance on USDA.
Hardening Off Seedlings for Outdoor Planting
Before moving seedlings outdoors permanently, gradually expose them to outdoor conditions over 7–10 days. Start with a few hours in shade and gentle wind, then increase time and sunlight incrementally.
Hardening off toughens plants to avoid shock from wind, direct sun, or temperature changes, improving survival rates when planted in garden beds or larger containers.
Seed Germination in Soil: Indoor vs. Outdoor Methods Compared
Here’s a comparison of indoor and outdoor seed germination methods to help you decide which suits your gardening goals and environment.
| Method | Control Over Conditions | Risk of Failure | Time to Germinate | Ease for Beginners |
|---|---|---|---|---|
| Indoor Soil Germination | High – temperature and light controlled | Lower – protected from pests and weather | Fast – stable warmth accelerates sprouting | Good – easier to monitor and adjust conditions |
| Outdoor Soil Germination | Low – dependent on weather and soil | Higher – exposure to pests, rain, fluctuations | Slower – soil temperature varies | Moderate – less equipment but less control |
| Indoor with Seed Starting Mix | Highest control and sterilization | Lowest risk of contamination | Fastest germination times | Best for precise seed needs |
| Direct Outdoor Seeding | Minimal control, soil natural state | High risk of environmental damage | Variable timing based on climate | Great for hardy plants and large areas |
Frequently Asked Questions
How long does it take for seeds to germinate in soil?
Seed germination time varies widely by species but typically ranges from a few days to two weeks. Maintaining consistent moisture and temperature can help speed up this process.
Can I reuse soil for seed germination?
Reusing soil is not recommended because it may contain pathogens or become compacted. Using fresh, sterile seed-starting mix improves germination success and seedling health.
Is direct sunlight necessary during seed germination?
Some seeds need darkness to germinate, while others require light. Generally, seedlings need indirect bright light after sprouting to develop strong stems and leaves.
What temperature is best for germinating seeds in soil?
Most seeds germinate well around 65°F to 75°F (18°C to 24°C). Maintaining stable warmth promotes even sprouting and healthy seedling growth.
How often should I water soil when germinating seeds?
Keep soil moist by watering lightly with a spray bottle as needed. Avoid saturating the soil to prevent rot, but don’t let it dry out during germination.
Key Takeaways
- Use a light, sterile seed-starting soil mix for best germination results.
- Maintain consistent moisture without overwatering to avoid rot and disease.
- Provide appropriate temperature and light conditions based on seed type.
- Gradually transition seedlings outdoors through hardening off for success.
Conclusion
Knowing how to germinate seeds in soil involves balancing soil preparation, seed selection, watering, and environmental control. Each step contributes to fostering healthy seedling development and improving chances of successful plant growth. Approaching seed starting systematically helps gardeners avoid common pitfalls such as damping-off, legginess, or slow germination. Understanding the unique needs of your chosen seeds allows better adaptation of care practices, ensuring a more rewarding gardening experience.
For those growing indoors, using seed-starting mixes combined with heating mats and humidity domes can create optimal conditions quickly. Outdoor direct sowing suits hardier seeds and gardeners with less indoor space but carries more variability due to weather. Intermediate methods like indoor germination followed by outdoor hardening off offer control with gradual acclimation. By focusing on appropriate soil mix, consistent moisture, correct sowing depth, and timely thinning, gardeners can achieve healthy seedlings poised for transplanting.
Starting seeds in soil might seem detailed but breaks down into manageable steps anyone can follow. Begin with quality seeds, prepare your soil carefully, water gently, and monitor temperature and light closely. With patience and close attention, your seedlings will thrive and become the foundation of a flourishing garden. Your next step is to gather the right materials and try germinating a batch of seeds, observing their progress and refining your technique for best results.