Best Time to Plant Marigold Seeds
Many gardening enthusiasts want to grow vibrant marigolds but often feel unsure about the best time to start planting. You’re not alone—timing can be tricky, especially if you’re trying to get the most blooms. Knowing when to plant marigold seeds is key to a beautiful, thriving garden.
To find the best time to plant marigold seeds, wait until the danger of frost has passed and soil temperatures reach about 70°F.
It’s best to start seeds indoors 4-6 weeks before your last frost date or sow directly outdoors once the soil warms up and stays consistently moist.
Keep in mind your local climate and zone for peak growth. If you continue exploring, you’ll uncover more tips to help you plan perfectly.
Key Takeaways
- Plant marigold seeds outdoors after the last frost date in spring, usually when soil temperatures hit around 70°F.
- Start seeds indoors 4-6 weeks before the last expected frost for an earlier bloom.
- Sow seeds directly in the garden once the soil is warm, well-draining, and consistently above 70°F.
- For the best growth, wait until the soil has warmed up and the risk of frost is gone in your area.
- In short, the ideal time is after the last spring frost, typically late spring to early summer depending on where you live.
When Is the Best Time to Plant Marigolds Outdoors?
Wondering when to plant marigolds outdoors? The best time depends on your climate, but generally, you should wait until the danger of frost has passed.
Wait until the danger of frost has passed to plant marigolds outdoors for best growth.
Marigold varieties thrive in warm soil, so planting too early risks cold damage. If you’re unsure, check your local frost dates and plan to start planting about two weeks after the last frost.
When planting outdoors, use proper techniques: space your marigolds 8 to 18 inches apart, depending on the variety, and plant in well-draining soil. Sunlight is essential, so choose a spot that gets full sun for at least six hours daily.
You can start seeds indoors earlier to get a head start, but transplant only when the weather warms up. By paying attention to your local climate and following these tips, you’ll give your marigolds the best chance to flourish throughout the season.
How Climate and Seasons Affect Marigold Planting Timing
Climate and seasonal changes really influence the best time to plant marigolds. Your local weather patterns and seasons affect when these plants will grow their best. Warm temperatures and plenty of sun help them thrive, while cold snaps can stop germination in its tracks. Knowing these patterns helps you avoid planting too early or too late.
Here’s a quick look at how climate and seasons impact planting:
| Climate Effect | Seasonal Variation | Best Planting Time |
|---|---|---|
| Cold temperatures | Frost risk | After the last frost in spring |
| High humidity | Summer heat stress | Early spring or late summer |
| Drought conditions | Water stress | When the soil is moist and well-timed |
| Excess rain | Soil erosion, rot | When the soil drains well |
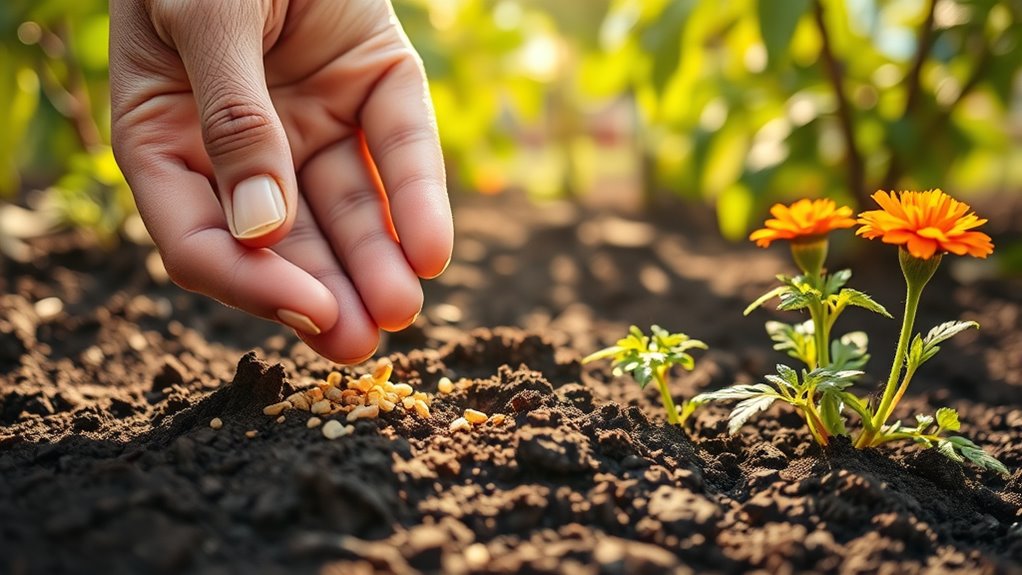
Timing Your Marigold Seeds for Direct Sowing
Timing your marigold seeds for direct sowing depends mostly on when the soil warms enough and the risk of frost has passed. Wait until soil temperatures reach about 70°F (21°C) for the best germination.
When planting, keep these tips in mind: Sow the seeds about ¼ inch deep, making sure they’re lightly covered with soil. Space the seeds roughly 8 to 12 inches apart so each plant has room to grow.
Plant directly into the garden once the danger of frost is gone and the soil is warm enough for germination.
How to Plant Marigolds Based on Your USDA Hardiness Zone
Knowing your USDA Hardiness Zone is a great way to figure out the best time to plant your marigolds. It helps you understand the temperature ranges in your area, so you can plan accordingly.
Once you know your zone, you can also get tips on when to start planting, whether indoors or directly in the garden, and how to protect your marigolds from any unexpected cold snaps.
And don’t forget about your soil! Preparing it properly—adding compost or organic matter—will give your marigolds a healthy start. Just follow these simple guidelines, and your marigolds will be thriving in no time!
Optimal Planting Times
Knowing the best time to plant marigolds depends on your USDA Hardiness Zone, which helps you figure out your region’s typical last frost date. This way, you can choose the right planting window for different marigold varieties.
Generally, you should plant marigolds after the danger of frost has passed. Here are some key tips:
- Identify your last frost date and plan to start seeds 4-6 weeks earlier indoors or directly in your garden after the frost risk is gone.
- Pick the right marigold varieties for your zone, considering how they grow and when they bloom.
- Use good planting techniques, like spacing your seeds evenly and watering regularly, to help your marigolds grow healthy and strong.
Following these simple steps will help your marigolds bloom beautifully and stay safe from frost damage.
Zone-Specific Temperature Tips
Your USDA Hardiness Zone helps you figure out the best way to plant marigolds since temperatures can vary a lot across regions. In warmer zones, you can start planting seeds earlier in the season and make sure they get plenty of sun for healthy growth.
In cooler zones, wait until after the last frost to avoid damaging your seeds. When planting, think about your zone’s typical temperatures and plant seeds a little deeper in colder areas to protect them from temperature swings.
Sun exposure is key — marigolds love direct sunlight, so pick a spot with at least six hours of full sun each day.
Keeping an eye on your zone’s temperature trends helps you time your planting just right. This way, your marigolds will establish well and thrive all season long.
Soil Preparation Strategies
Preparing the soil properly is essential for healthy marigold growth, and the approach varies depending on your USDA Hardiness Zone.
To optimize your soil, focus on these strategies:
- Test your soil pH, aiming for a slightly acidic to neutral range of 6.0 to 7.0, and adjust if necessary.
- Ensure a balanced nutrient profile by adding organic compost or well-rotted manure to boost nutrient availability.
- Improve drainage if your soil is heavy or clayey by mixing in sand or organic matter to prevent waterlogging.
Recognizing Ideal Soil and Temperature Conditions for Marigolds
If you want your marigolds to grow their best, start with soil that’s rich in organic matter and drains well. Think of it like giving them a comfy, well-ventilated home.
And don’t forget about the temperature—marigolds love it when it’s between 70 and 75°F. Keep it too hot or too cold, and they might not do so well. Also, making sure the soil drains properly helps prevent root rot, so your marigolds stay healthy and happy.
Optimal Soil Composition
Marigolds love soil that drains well and is full of nutrients. The key is to get the right mix of moisture and fertility for healthy plants.
Pay attention to soil pH and nutrient levels. Aim for a pH between 6.0 and 7.0 to keep things just right. Make sure the soil has plenty of organic matter and a good balance of nitrogen, phosphorus, and potassium.
To improve your soil, start by testing its pH. If needed, add lime or sulfur to fine-tune it. Next, mix in compost or organic matter to boost fertility. Using a balanced fertilizer will help keep nutrients up.
Following these steps will create the perfect environment for vibrant, thriving marigolds.
Ideal Temperature Range
Understanding the ideal temperature range is key for successful marigold planting because these flowers thrive within specific thermal conditions. Marigolds prefer daytime temperatures between 70°F and 85°F, which support their optimal growth.
Seed temperature also plays a crucial role in germination. For the best results, keep soil temperatures around 70°F to 75°F. When it’s too cold, seeds may have trouble sprouting, which can delay growth.
On the other hand, excessive heat can hinder seed development and stress young plants. To ensure healthy germination and strong growth, keep a close eye on weather and soil conditions.
Maintaining the right temperature range helps you maximize seed success and encourages vibrant, healthy marigolds throughout the season.
Soil Drainage Needs
Proper soil drainage is essential for healthy marigolds, especially since their preferred temperature range supports active growth and flowering. Good drainage ensures roots don’t stay waterlogged, which helps prevent rot and disease.
Knowing your soil type helps you pick the best spot for planting. Well-draining soils promote healthy roots and vibrant blooms.
Here are some key points to consider:
- Loamy soil is ideal for marigolds because it offers balanced drainage and nutrients.
- Sandy soil drains quickly but might need organic matter to hold onto moisture.
- Clay soil drains poorly, so adding compost or sand can improve flow.
Best Practices for Starting Marigolds Indoors and Transplanting
Starting your marigolds indoors gives them a strong start before transplanting them outside. Place your seed trays where they’ll get plenty of indoor light—bright windows or grow lights work great. Consistent light helps healthy seedling growth and keeps them from becoming too leggy.
Keep the soil moist but not soggy, and watch the temperature to stay between 65 and 75°F. When watering, do so gently when the top inch of soil feels dry. Good air circulation is also key to prevent diseases.
As your seedlings grow, thin them out so they have enough space to develop strong roots. When the weather warms up and they’ve got at least two true leaves, you can carefully transplant them outdoors.
Gradually expose your seedlings to outdoor conditions over a week to harden them off. Proper starting techniques and care will help your marigolds develop vibrant blooms once they’re outside.
Seasonal Tips: Planting Marigolds in Spring vs. Summer
Planting marigolds in spring is great because the soil is usually cooler and perfect for strong, healthy growth. When you plant in spring, you’ll often see your marigolds develop faster and with more vigor. It’s like giving them a head start before the heat of summer kicks in.
On the other hand, planting in summer means you’ll need to keep an eye on those higher temperatures. They can be a bit more challenging to manage, but with some extra watering and care, your marigolds can still thrive. Knowing these seasonal differences helps you pick the best time to plant so your marigolds stay vibrant and healthy all season long.
Optimal Planting Conditions
Timing your marigold seeds right can really boost their growth. Just keep in mind three key factors to get it perfect.
First, plant your seeds about ¼ inch deep. If you plant them too deep, it can make germination harder for the seeds.
Next, make sure they get plenty of sunlight. Marigolds love full sun, so pick a spot that gets at least 6 hours of direct sunlight daily.
Finally, wait until the soil warms up to around 70°F (21°C). Warmer soil helps the seeds germinate better and encourages healthy growth.
Growth Rate Differences
Growing marigolds in spring usually means faster germination and more vigorous growth compared to planting in summer. This is mainly because the cooler spring temperatures and gradually warming soil create ideal conditions.
In spring, marigold varieties tend to develop quicker because seed viability is higher when seeds are planted early, before the heat gets extreme. Summer planting often slows growth due to the higher temperatures that can stress young plants and reduce seed viability.
Hot weather can cause seedlings to wilt or become stunted, limiting overall growth. By planting in spring, you give your marigolds a better chance at establishing strong roots and reaching full size faster.
This ensures a healthier, more vibrant display throughout the growing season.
How to Extend Your Marigold Bloom Season
To keep your marigolds blooming longer, you can take proactive steps to extend their flowering period. First, practice deadheading by removing spent blooms regularly to encourage new flowers.
Second, do seasonal pruning to keep your plants healthy and promote continuous flowering. Third, consider planting herbs or vegetables nearby that repel pests, reducing the need for pest control and keeping your marigolds vibrant.
Make sure to use a balanced fertilizer every few weeks to support bloom production. Adjust your watering schedule to prevent stress, as consistent moisture helps your plants stay lively.
Adding a variety of colors can keep your garden lively and visually appealing. Finally, store seeds properly after the season ends so you can replant and enjoy extended blooms next year.
These strategies together will help you enjoy a longer, more colorful marigold display.
Common Mistakes to Avoid When Timing Your Marigold Planting
Even though marigolds are pretty easy to grow, many gardeners make mistakes by planting them at the wrong time, which can lead to poor blooms or weak plants. One common mistake is ignoring planting calendars; planting too early or too late can hold back growth. Always check your local planting calendar to find the best time to start seeds outdoors or indoors.
Another mistake is poor seed selection—using non-adapted or low-quality seeds can affect flowering and plant health. Make sure you’re choosing proven marigold varieties suited for your climate. Avoid rushing into planting just because the weather seems warm; marigolds need consistent, warm soil to thrive.
Failing to follow proper timing can lead to leggy seedlings or no blooms at all. Being mindful of your region’s last frost date and sticking to recommended planting windows will give your marigolds the best start and ensure a vibrant garden.
Final Tips for a Vibrant, Long-Lasting Marigold Garden
Make certain your marigolds thrive all season long by following a few simple yet effective tips. First, practice companion planting—plant marigolds near vegetables like tomatoes and peppers to naturally deter pests. This boosts pest management without using chemicals.
Second, deadhead regularly to promote continuous blooming and keep your garden vibrant. Removing spent flowers encourages new growth and extends the flowering period.
Third, keep an eye out for pests and diseases. Early detection makes it easier to take quick action, whether by handpicking pests or using organic treatments.
Also, ensure proper spacing to improve air circulation, which helps reduce disease risk. Mulching retains soil moisture and keeps weeds at bay, giving your marigolds a strong foundation.
Frequently Asked Questions
Can I Plant Marigolds Year-Round Indoors?
Yes, you can plant marigolds indoors year-round if you provide enough indoor lighting, like grow lights or bright windows, to mimic sunlight.
Use proper seed storage to keep seeds fresh between plantings. Make sure your space stays warm and you water your plants properly.
With the right conditions, your marigolds will thrive indoors all year long, adding color and cheer to your home no matter the season.
How Do Weather Changes Affect Marigold Germination Timing?
Weather changes can really shake up your marigold germination, almost like flipping a switch. Temperature swings can make seeds delay sprouting or stop it completely.
Humidity levels matter too—too little, and your seeds might stay dry; too much, and they could drown. For the best results, keep warmth and humidity steady to help your seeds germinate quickly and healthily.
Stay alert to the weather, and protect your seeds from sudden changes for the best outcome.
What Signs Indicate It’s the Right Time to Plant Marigolds Outdoors?
You’ll know it’s time to plant marigolds outdoors when the soil warms to about 70-75°F, which is perfect for germination.
Wait until the danger of frost has passed and the weather stays consistently warm.
Look for healthy seedlings and vibrant foliage—that’s a good sign your plants are thriving.
These signs let you know your environment is just right, giving your marigolds the best start for a colorful garden.
How Does Soil Preparation Impact Marigold Planting Time?
Ever wonder how soil preparation influences your marigolds? Well, healthy soil packed with nutrients guarantees strong growth, making it the perfect foundation for planting. You should prepare the soil by enriching it with compost and making sure it’s well-drained.
When sowing seeds, plant them at the correct depth—about a quarter inch—so they can sprout easily. Proper soil prep ultimately determines the success of your marigold planting, giving them the best start.
Should I Plant Marigold Seeds in Pots or the Ground First?
You should start marigold seeds in containers first for easier seed starting and better control over soil conditions.
Once seedlings develop strong roots and the weather warms, you can transplant them into your garden or containers.
Container gardening lets you monitor growth closely and protect young plants from pests or harsh weather.
This approach helps ensure healthy marigolds and vibrant blooms, making gardening more successful and enjoyable.
Conclusion
Just as a master painter waits for the perfect light to bring their canvas to life, timing your marigold planting guarantees your garden blooms with vibrant energy. By understanding the seasons, climate, and soil needs, you set the stage for a stunning display that endures.
Remember, patience and knowledge are your most essential tools. Like planting seeds of hope, your careful timing will grow into a garden that’s truly worth the wait. The best time to plant marigold seeds depends on your local climate, but generally, planting after the last frost in spring ensures healthy growth.