Perfectly Crunchy Pumpkin Seeds: How Long to Bake?
Are you tired of bland, soggy pumpkin seeds and frustrated with getting that perfect crunch? You’re not alone—many people struggle to find the right baking time to achieve that ideal crispy texture.
Luckily, with a few simple tips, you can turn out perfectly crunchy pumpkin seeds every time.
To get perfectly crunchy pumpkin seeds, bake them at 350°F for 15 to 20 minutes, stirring occasionally to guarantee even roasting.
Smaller seeds may need less time, while larger ones might require a few extra minutes. Keep an eye on their color—look for a golden hue—and listen for a crispy sound when you tap them.
For more tips on baking and flavor ideas, there’s plenty to uncover below.
Key Takeaways
- Bake pumpkin seeds at 350°F (175°C) for 12-15 minutes, stirring halfway to get that even crunch.
- Use small seeds for 10-12 minutes, medium for 12-15 minutes, and large for 15-17 minutes.
- Look for a golden color and listen for a crackling sound to make sure they’re crispy.
- Make sure the seeds are thoroughly dried before baking to get that perfect crunch.
- Store them in an airtight container and reheat in the oven if you want to keep that crunch.
How Long Should You Bake Pumpkin Seeds for the Perfect Crunch?
How long should you bake pumpkin seeds to achieve that perfect crunch? The key is understanding the right baking techniques and considering seed varieties.
Typically, you should bake pumpkin seeds for 15 to 20 minutes. During this time, stir them occasionally to ensure even roasting.
Bake pumpkin seeds for 15 to 20 minutes, stirring occasionally for an even, crunchy roast.
Different seed varieties like hulled or unhulled may need slight adjustments. Hulled seeds tend to cook quicker and crisp faster.
Keep an eye on their color—aim for a golden hue, which shows they’re perfectly toasted. Using a consistent temperature, usually around 350°F (175°C), helps get uniform results.
Patience is important. Baking too short leaves them chewy, while overbaking can cause burning.
By monitoring the time and adjusting based on your seed variety, you’ll get a satisfying crunch in every batch.
What Is the Best Temperature to Bake Pumpkin Seeds?
The best temperature to bake pumpkin seeds is usually around 350°F (175°C). That way, they get nice and crispy without the risk of burning. Of course, every oven is a little different, so you might want to keep an eye on your seeds as they bake.
And don’t forget—small tweaks can make a big difference. If you find your seeds aren’t as crunchy as you’d like, try a slightly lower temperature or bake them a bit longer. It’s all about finding that perfect balance for your oven and your taste!
Optimal Baking Temperature
Baking pumpkin seeds at the right temperature is key to getting that perfect crunch and flavor. The ideal range is usually between 300°F and 350°F (150°C to 175°C). This helps ensure even cooking and prevents burning, especially with different seed varieties.
Using proper techniques makes a big difference. Preheat your oven for consistent heat, and line your baking sheet with parchment paper for even roasting. Stir the seeds occasionally to get uniform browning.
Keep a close eye on them to avoid burning, especially if you’re working with delicate or oilier seeds. You might need to tweak the temperature slightly depending on seed size and oil content.
Following these simple tips will help you always end up with crispy, delicious pumpkin seeds.
Temperature Effects on Texture
Choosing the right temperature is essential because it directly influences the texture of your pumpkin seeds. Baking at too high a temperature can cause them to burn quickly, leading to a bitter taste and a brittle, overly crunchy texture.
On the other hand, baking at too low a temperature might produce seeds that are underdone, lacking that satisfying crunch. The goal is to find a balance that creates a pleasing texture contrast—crispy on the outside while still holding some moisture inside.
This prevents the seeds from becoming dry or crumbly. Usually, baking around 300°F (150°C) hits that sweet spot, making sure your seeds are perfectly crunchy without losing moisture.
Adjusting the temperature lets you fine-tune the texture, giving you crispy, flavorful pumpkin seeds every time.
Adjusting for Oven Variations
Oven temperature spots can vary a lot, even among models with digital settings. So, it’s important to adjust your baking time accordingly. To make sure your pumpkin seeds turn out perfectly crunchy, try using an oven thermometer to check the actual temperature.
Your choice of baking sheet also makes a difference. Dark, heavy sheets tend to bake faster, while lighter ones might need a slight temperature decrease. Rotating your baking sheet halfway through baking helps promote even roasting.
Keep in mind that oven hot spots can cause uneven cooking, so keep a close eye on your seeds. Adjust the baking time based on how your oven behaves and always check for doneness. Proper calibration and selecting the right baking sheet help you get consistently crunchy pumpkin seeds every time.
How to Prepare Pumpkin Seeds for Baking (Flavor and Texture Tips)
First things first, pick out fresh pumpkin seeds and make sure to clean off any leftover pulp. You want them as clean as possible so they bake up nicely. Once they’re clean, you can start thinking about how you’d like to flavor them—there are so many tasty options!
When it comes to seasoning, don’t be shy—try a sprinkle of salt, some spices like paprika or cayenne for a bit of kick, or even a touch of cinnamon and sugar for a sweet twist. Just a little seasoning can really boost their flavor and give them that perfect crunch you’re after. Small tweaks in your prep can make all the difference, turning plain seeds into a snack everyone will love!
Selecting and Cleaning Seeds
Before you start cleaning your pumpkin seeds, it’s important to pick the best ones for roasting. Look for seed varieties that are plump and intact, and avoid any with mold or discoloration.
Proper cleaning is key to getting that crispy final product. First, rinse the seeds in a bowl of water to remove pumpkin flesh and strings. Use your hands or a colander to separate the seeds from any debris.
For better quality, soak the seeds in salted water for a few hours. This helps get rid of leftover pulp and boosts flavor. Make sure to dry the seeds thoroughly before baking.
Keep an eye on seed size, freshness, and cleanliness because these factors really affect how crunchy and tasty your roasted seeds turn out.
Enhancing Flavor and Texture
To improve the flavor and get that perfect crunch, try experimenting with different seasonings and coating techniques before baking. Flavor infusions like cinnamon and sugar or spicy paprika can add unique tastes, while seasoning blends such as garlic salt or curry powder boost depth.
Toss your cleaned seeds in a small amount of oil to help the seasonings stick better. For a more intense flavor, briefly soak the seeds in seasoned water or spice-infused liquids before drying and baking.
You can also coat seeds with a light layer of honey or maple syrup for added sweetness and crunch. Adjust your seasonings to match your taste, but remember that even a simple coating can improve both flavor and texture during baking.
How to Bake Pumpkin Seeds for Maximum Crispiness
Achieving maximum crispiness in your pumpkin seeds hinges on the right baking technique. To get the most benefits, focus on proper preparation and baking methods.
First, dry the seeds thoroughly after rinsing to remove excess moisture. Use a high oven temperature, around 350°F (175°C), for even crisping.
Dry seeds thoroughly after rinsing for maximum crispiness and even baking at 350°F.
Toss the seeds in a bit of oil and your favorite seasonings to boost flavor and texture. Spread them in a single layer on a baking sheet for even baking.
Keep an eye on them, stirring occasionally, to prevent burning. Bake until they turn golden brown for extra crunch, but don’t overbake to preserve flavor.
Here are key steps to maximize crispiness:
- Use dry seeds for better crunch
- Apply moderate to high heat
- Stir or shake mid-bake
- Avoid overcrowding on the baking sheet
- Let seeds cool completely before eating
Signs Your Pumpkin Seeds Are Fully Baked and Crispy
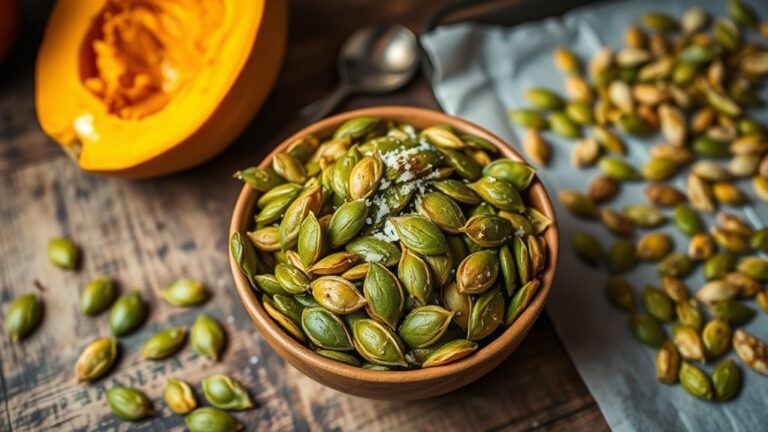
You’ll know your pumpkin seeds are done when they turn a nice golden color—that’s a good sign they’ve baked enough. Give them a gentle tap; if they sound nice and crispy, then you’re all set. And don’t forget to check for any moisture—fully baked seeds should feel dry and crunchy when you touch them.
Golden Color Development
As the pumpkin seeds bake, their color gradually deepens, signaling they’re nearing perfection. The golden hue is a key indicator of doneness and highlights the importance of color when judging if your seeds are ready.
A rich, even golden color shows the seeds are properly roasted and crispy. Watch for signs like a uniform golden hue across all seeds and slightly darker edges without any burnt spots.
Avoid pale or undercooked appearances. The color should stay consistent even after stirring, with a subtle sheen indicating proper roasting.
The main reason color matters is to make sure the seeds aren’t underbaked or overdone. Achieving that perfect golden hue guarantees crispy texture and flavorful taste, making your pumpkin seeds irresistibly snackable.
Crisp Sound Test
Wondering how to tell if your pumpkin seeds are fully baked and crispy? The best way is to listen for sound cues. When you gently shake the baking sheet, you should hear a consistent, crunchy sound—like a light crackling.
This indicates they’ve developed the ideal crunchy texture. Tap a few seeds with a spoon or your finger; they should produce a sharp, crisp noise rather than a dull thud. If they still sound soft or muffled, give them a few more minutes in the oven and check again.
The crisp sound is a reliable sign your pumpkin seeds are perfectly baked and ready to enjoy. Trust your ears—these sound cues are your best indicator for crispy, snack-worthy seeds.
Moisture Absence
Listening for the right sounds is a great way to gauge doneness, but checking for moisture absence offers another reliable sign. Fully baked pumpkin seeds should feel dry to the touch, with no residual moisture. You’ll notice they won’t stick together or feel damp, which means they’ve dried properly.
To ensure even drying, spread the seeds in a single layer and let them cool completely. Look for a matte, non-wet surface and a firm crunch when you bite into them. Proper drying prevents sogginess and guarantees crispness.
Keep in mind, over-drying can make the seeds overly brittle. So, monitor them closely. Once the seeds are dry and crispy, they’re ready to enjoy and store for maximum crunch.
How to Adjust Baking Time for Different Pumpkin Seed Sizes
When adjusting baking times for pumpkin seeds of different sizes, think about how their shapes affect cooking. Larger seeds need more time to get crunchy, while smaller ones can burn quickly if baked too long.
To get even roasting, consider size and use good baking techniques. This helps you avoid overbaking or undercooking.
Here’s a simple guide to help:
| Seed Size | Suggested Baking Time | Notes |
|---|---|---|
| Small | 10-12 minutes | Check often to prevent burning |
| Medium | 12-15 minutes | Stir halfway through |
| Large | 15-17 minutes | Bake a little longer for crunch |
Adjust times based on seed size and keep an eye on them. Using these tips, you’ll get perfectly crunchy pumpkin seeds without overbaking.
Common Baking Mistakes That Can Burn or Make Pumpkin Seeds Chewy
Even a small mistake in your baking process can lead to burnt or chewy pumpkin seeds. Overbaking or uneven heat can cause burnt edges, ruining their appearance and flavor. Conversely, underbaking leaves them soft and chewy, lacking the crunch you want. To avoid these pitfalls, watch your seeds closely during baking.
Common mistakes include not tossing seeds evenly with oil and seasoning, which can lead to uneven browning. Baking at too high a temperature can cause burnt edges. Removing seeds too early results in a chewy texture. Overcrowding the baking sheet prevents proper heat circulation. Ignoring the recommended baking time can cause inconsistent results.
How to Get Even, Crispy Pumpkin Seeds Every Time
Achieving evenly crispy pumpkin seeds starts with proper preparation and attentive baking. To get consistent results, spread your seeds in a single, uniform layer on the baking sheet.
Avoid overcrowding, which can cause uneven heat distribution and soggy spots. Use a light coating of oil and salt, tossing the seeds well so each seed is evenly coated.
This helps promote even crispiness and good flavor. Keep an eye on your oven temperature; if it’s too high, the seeds can burn, and if it’s too low, they might not crisp up evenly.
Stir or shake the seeds halfway through baking to help them brown evenly. Using a preheated oven and a quality baking sheet also helps maintain stable temperatures.
Patience is key—don’t take them out too early. Follow these steps, and you’ll always get crispy, evenly baked pumpkin seeds that are just right.
Flavor Variations and Seasonings for Pumpkin Seeds
Once your pumpkin seeds are perfectly crispy, you can give them a flavor boost with all kinds of seasonings. Whether you like spicy, savory, or sweet, there’s a combo for you.
For a fiery kick, try spicy sriracha or chili lime. If you prefer richness, garlic parmesan or an herb medley will add a savory touch.
Sweet options include cinnamon with a honey drizzle or maple syrup for that caramelized flavor.
For a smoky vibe, smoked paprika works really well, while curry powder adds an exotic twist.
A little lemon zest can brighten up the overall taste and make the seeds feel more invigorating.
Experiment with these seasonings to discover your perfect crunch!
How to Store and Reuse Leftover Pumpkin Seeds
After you’ve enjoyed your crispy pumpkin seeds, proper storage is key to keeping them fresh and crunchy. Use an airtight container or resealable bag to prevent moisture from making them soggy.
Store pumpkin seeds in an airtight container to keep them fresh and crunchy.
Keep the container in a cool, dry place away from direct sunlight. Good storage methods help maintain their crunch and flavor over time.
If you want to enjoy the seeds later, reheating matters. To revive their crunch, spread the seeds on a baking sheet and warm them in a preheated oven at 350°F for 5-10 minutes.
You can also reheat in a skillet over medium heat, stirring frequently until warmed through. Just avoid microwaving, as it can make the seeds chewy.
Frequently Asked Questions
Can I Bake Pumpkin Seeds in a Microwave Instead of an Oven?
You can microwave pumpkin seeds, but they won’t turn out as crispy as oven-baked ones.
For microwave cooking, spread the seeds in a single layer on a microwave-safe plate and microwave in short bursts, stirring often.
Keep in mind, microwave baking might not give you the same crunch for your pumpkin seed recipes.
For the best texture, oven baking is recommended, but microwave cooking is a quick alternative if you’re in a hurry.
Do I Need to Soak Pumpkin Seeds Before Baking?
You don’t need to soak pumpkin seeds before baking, but soaking can make a difference. It helps make the shells easier to peel and boosts the flavor.
About 60% of home cooks find that soaking reduces baking time and makes the seeds crunchier. So, if you want tastier, more manageable seeds, try soaking them in salted water for a few hours or overnight.
After soaking, drain and dry the seeds before baking. This simple step can help you achieve a perfect, crunchy snack.
How Do I Prevent Pumpkin Seeds From Sticking to the Baking Sheet?
To prevent pumpkin seeds from sticking to the baking sheet, start by preparing the sheet properly. Line it with parchment paper or a silicone baking mat for easy release.
Toss your pumpkin seed seasoning evenly on the seeds, then spread them out in a single layer. This helps ensure they don’t stick and bake evenly.
Following these simple steps will give you perfectly crunchy pumpkin seeds every time. Remember, proper prep makes all the difference!
Are Raw or Roasted Pumpkin Seeds Better for Baking?
Raw pumpkin seeds are better for baking because they retain more nutrients and have a milder flavor, which lets you customize seasonings easily. Their raw benefits include higher vitamin content and better control over texture.
When roasting, start by tossing the seeds with oil and your favorite seasonings. Spread them evenly on a baking sheet for even cooking.
Roast at 350°F until they turn golden. Stir occasionally to ensure they get crispy all over. This method boosts flavor and gives you perfectly crunchy pumpkin seeds.
How Long Do Homemade Roasted Pumpkin Seeds Stay Fresh?
Homemade roasted pumpkin seeds stay fresh for about one to two weeks if stored properly. To get the most out of them, keep them in an airtight container in a cool, dry place.
This way, you prevent spoilage and keep their crunch. After a week or two, they’ll start to lose their texture and flavor, so it’s best to enjoy them sooner rather than later.
Proper storage is key to keeping your seeds tasty and tempting!
Conclusion
Now that you know the secrets to perfectly crunchy pumpkin seeds, you’re all set to bake like a pro—no need to summon a wizard or wait for a fairy godmother.
Just keep an eye on the time, aim for even heat, and don’t forget to season to your liking. With these tips, your pumpkin seeds will turn out so crispy, even the most discerning dragon would be impressed.
Happy snacking! And remember, baking pumpkin seeds to the perfect crunch depends on your timing.