What Does a Germinated Seed Look Like? A Clear Visual Guide
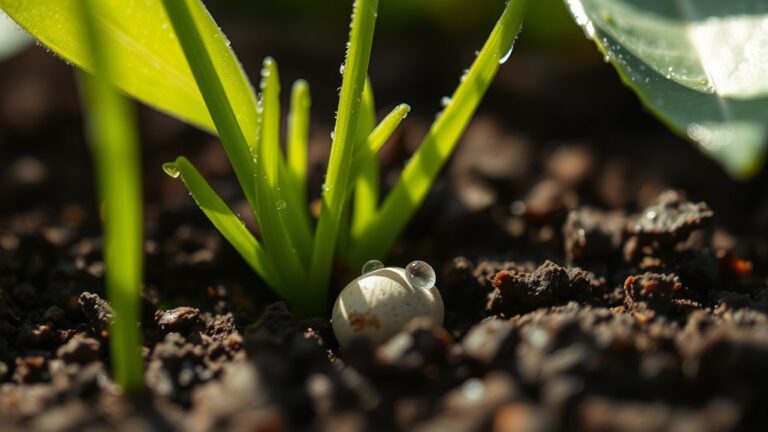
A germinated seed typically shows signs of life by sprouting a small root called the radicle, which emerges first, followed by the appearance of a tiny shoot that will grow upward. The seed coat often splits open as the inner parts expand, revealing the early beginnings of a new plant.
Recognizing what a germinated seed looks like is essential for gardeners and anyone interested in plant biology, as it signals the successful start of growth and development. This visible transformation marks the seed’s transition from dormancy to active life under suitable environmental conditions such as moisture, warmth, and oxygen.
This article will explore the appearance and key stages of germination, from initial root emergence to shoot growth. It will also cover factors influencing the germination process and how to identify healthy versus problematic sprouts.
Understanding Seed Germination Process
Initial Signs of Germination
The first sign of germination is the emergence of the radicle, which is the embryonic root. It pushes through the seed coat and anchors the future plant while absorbing water and nutrients.
This root is delicate and white, and it usually appears within a few days of planting under proper conditions. At this stage, the seed often swells, and the outer shell cracks open.
- Radicle emerges first
- Seed coat cracks open
- Seed swells as it absorbs water
Shoot Development and Seedling Growth
Following the radicle, the shoot or plumule begins to grow upward, aiming for light. This shoot carries the initial leaves called cotyledons that provide nutrients for the seedling until it can photosynthesize.
The cotyledons are usually visible just outside the seed coat, and their color and size can vary depending on the plant species.
- Plumule grows upward
- Cotyledons emerge and open
- Seedling prepares for photosynthesis
Visual Characteristics of Germinated Seeds
Appearance of the Radicle and Root System
The radicle is generally thin, white or pale, and can appear fragile at first. As the seedling develops, tiny root hairs form along the radicle to help with water and nutrient absorption.
The early root structure may look sparse but quickly grows denser as the plant gets established.
- White or pale root color
- Fragile at early stage
- Development of root hairs
Changes in Seed Coat and Cotyledons
During germination, the seed coat often turns softer and splits open to allow the radicle and shoot to emerge. In some seeds, the seed coat remains attached to the cotyledons.
Cotyledons vary in shape and number—some seeds produce one cotyledon (monocots), others two (dicots)—and these serve as the seedling's first leaves.
- Seed coat softens and cracks
- Cotyledons provide initial nutrients
- Cotyledons vary by plant type
Factors Affecting Seed Germination Appearance
Role of Environmental Conditions
Temperature, moisture, oxygen availability, and light influence how quickly and visibly a seed germinates. Optimal moisture causes the seed to swell and break the coat, while extreme conditions can inhibit sprouting or cause abnormal appearance.
Seeds germinating in dark or soil may show different initial shoot characteristics compared to those germinating in light or on surfaces.
- Adequate water softens seed coat
- Suitable temperature speeds growth
- Oxygen is critical for metabolism
For more on this, see our related guide: Can Old Cannabis Seeds Still Germinate? A Practical Guide.
Seed Health and Quality Impact
A healthy seed exhibits uniform swelling, clear radicle emergence, and vigorous shoot growth. Damaged or old seeds may show delayed or incomplete germination, with weak or malformed sprouts.
Visual signs such as mold, discoloration, or shriveled appearance before germination can hint at poor seed viability.
- Healthy seeds swell uniformly
- Damaged seeds show weak sprouts
- Pre-germination seed appearance matters
How to Identify Germinated Seeds in Different Plants
Germinated Seeds in Common Vegetables and Flowers
Bean seeds produce large, broad cotyledons that emerge prominently as the radicle anchors the seedling. Sunflower seeds show similar large cotyledons, often greenish after exposure to light.
Flower seeds tend to have smaller shoots, and some like petunias may have tiny cotyledons that appear almost leaf-like early on.
- Beans: large cotyledons and strong radicles
- Sunflowers: thick shoot and broad leaves
- Flowers: varied cotyledon sizes
Grass and Small Seed Germination
Grass seeds typically produce a narrow radicle and a slender shoot that emerges quickly. Due to their small size, the seed coat may not split widely but can remain attached during early growth.
Identification relies more on the presence of the root and shoot than on visible cotyledons, which may be tiny or embedded within the shoot.
- Small seeds often have less visible seed coat split
- Rapid shoot emergence in grasses
- Cotyledons may be less obvious
Common Problems in Seed Germination Appearance
Signs of Poor Germination or Disease
Seeds that fail to germinate or produce weak sprouts often show discoloration, mold growth, or shriveling. The radicle might appear blackened or misshapen, indicating fungal infections or rot.
Avoiding overly wet conditions and using sterile mediums can help prevent many common seed issues.
- Discolored or black radicle
- Mold or fungal presence
- Shriveled or soft seeds
For more on this, see our related guide: How Long for Grass Seed to Grow?.
Identifying Slow or Uneven Germination
Some seeds germinate more slowly due to dormancy or environmental stress. Visual cues include partial swelling without root emergence or inconsistent sizes and growth rates among seeds planted together.
This variability often requires patience or specific treatments like stratification or scarification.
- Partial seed swelling without radicle
- Uneven seed sprout sizes
- Dormancy requires special handling
Practical Tips For Observing Seed Germination
Best Practices for Monitoring Germinated Seeds
Using clear containers or seedling trays allows easy observation of seed coat splitting and root growth without disturbing the seeds. Regular moisture checks maintain ideal humidity without overwatering.
Labeling different seed types or planting dates aids in tracking stages and spotting any issues promptly.
- Use transparent containers
- Keep moisture consistent
- Label seeds for monitoring
For a detailed scientific explanation of seed germination and its stages, visit seed germination explained on Wikipedia. seed germination explained.
When to Transplant Germinated Seeds
Once the seedling shows healthy cotyledons and a robust root system about 1-2 inches long, it is usually ready for transplanting. Handling should be gentle to avoid damaging tender roots or shoots during soil transfer.
Ensure acclimation to new conditions to reduce transplant shock and encourage steady growth.
- Transplant after cotyledons open
- Avoid damaging roots
- Acclimate seedlings gradually
Germinated Seed Types Category Comparison
Here is a comparison of typical characteristics across common germinated seed types to help you identify them visually and understand their growth.
| Seed Type | Radicle Appearance | Cotyledon Type | Seed Coat Behavior | Typical Germination Time |
|---|---|---|---|---|
| Bean Seeds | Thick, white, sturdy | Large, broad dicotyledons | Seed coat splits widely | 5-7 days |
| Sunflower Seeds | Strong and thick white root | Large green cotyledons | Partially attached seed coat | 7-10 days |
| Grass Seeds | Thin, narrow radicle | Single narrow cotyledon (monocot) | Seed coat may remain intact | 3-5 days |
| Pea Seeds | Robust white radicle | Two broad cotyledons | Seed coat cracks open | 7-12 days |
| Petunia Seeds | Delicate white radicle | Tiny cotyledons | Seed coat often very thin | 10-14 days |
Frequently Asked Questions
How soon after planting can I see a germinated seed?
Most seeds show visible germination within 3 to 14 days depending on species and environmental conditions like temperature and moisture.
Can I tell if a seed is germinated without removing it from the soil?
You can often detect germination by observing soil swelling, seed coat splitting, or tiny shoots emerging above the soil surface, but detailed root growth usually requires gentle excavation or transparent containers.
Why does my seed swell but not sprout?
Swelling indicates water absorption but failure to sprout may be due to dormancy, poor seed viability, or unsuitable conditions such as temperature or oxygen availability.
What does unhealthy germination look like?
Unhealthy germination may include mold growth on seeds, blackened or shriveled radicles, weak or malformed shoots, and slow or uneven sprouting among seeds.
Do seed coat colors change after germination?
The seed coat often softens and may darken or become translucent during germination, but it generally dries out and may fall off as the shoot and roots develop.
Key Takeaways
- A germinated seed first shows the radicle breaking through the seed coat.
- Cotyledons emerge after the root and provide early nutrients to the seedling.
- Environmental factors heavily influence germination appearance and timing.
- Healthy germinated seeds have white roots and split seed coats without mold.
Conclusion
Identifying what a germinated seed looks like involves watching for key visual changes such as the radicle’s emergence, the splitting of the seed coat, and the appearance of cotyledons. These signs confirm that a seed has moved from dormancy to active growth in favorable conditions. Understanding these features helps in monitoring seed health and predicting early plant development stages reliably.
If you are growing beans, sunflowers, or peas, expect to see broad cotyledons and sturdy white roots within the first week or two after planting. Smaller seeds like grasses or flowers will have more delicate radicles and less prominent cotyledons but follow the same pattern of root then shoot development. Adjust your care depending on the seed type to promote strong growth and avoid issues like mold or rot.
To begin observing germination, start with seeds planted in clear or moist conditions and watch closely for radicle emergence. Once seedlings display healthy cotyledons and roots, you can transplant them carefully for continued growth. This hands-on approach not only guides successful gardening but also deepens appreciation for the subtle, vital changes that signal plant life beginning.