How to Transplant Cannabis Seedlings: Step-by-Step Guide for Healthy Growth
Transplanting cannabis seedlings involves carefully moving young plants from their initial containers into larger pots or outdoor soil to support root development and vigorous growth. Doing this correctly minimizes transplant shock and encourages a healthy plant foundation.
This process matters because cannabis seedlings have delicate roots that can be easily damaged. Transplanting at the right time and with gentle techniques helps avoid stunting growth or causing stress that weakens the plant’s potential for yield.
In this article, we’ll cover the optimal timing, the tools and materials you need, detailed transplanting steps, how to care for seedlings post-transplant, and tips for avoiding common pitfalls to ensure your cannabis plants thrive.
When and Why to Transplant Cannabis Seedlings
Ideal Timing for Transplanting
Cannabis seedlings should be transplanted when they have developed at least two to three sets of true leaves and the roots start filling up their starter containers. Usually, this occurs around 2-3 weeks after germination.
Transplanting too early can disturb fragile roots, while waiting too long restricts root space and stunts growth. Keeping an eye on root visibility through drainage holes or gentle container lifting helps identify the right moment.
Benefits of Transplanting at the Right Time
Moving seedlings into bigger containers when needed encourages roots to expand freely, improving nutrient uptake and overall plant vigor. It also prevents root-bound issues and promotes stronger stem development.
Appropriate transplanting supports healthier foliage, faster growth cycles, and better resilience against pests and environmental stress. Undersized pots or overcrowding can cause delayed flowering and reduced yields.
Preparing for Transplant: Tools and Materials
Choosing the Right Pots and Soil
Use pots that are at least 1-3 gallons for transplanting seedlings, depending on the final growth space. Fabric pots or plastic containers with drainage holes work best to avoid root waterlogging.
Select a well-draining soil mix formulated for cannabis or seedling growth. A quality blend should contain peat moss, perlite, and nutrient components to provide a balanced growing medium.
- 1-3 gallon pots with drainage
- Light, fluffy soil with good aeration
- pH-balanced soil mix (6.0-7.0)
Additional Supplies and Setup
Prepare tools such as clean scissors, gloves, and a gentle watering can or spray bottle. Set up your transplanting area on a clean surface with adequate lighting and ventilation.
Moistening the new soil slightly before transplanting reduces root shock and helps seedlings settle quickly in the new environment.
- Clean scissors or knife
- Gloves for hygiene
- Spray bottle or gentle watering can
Step-by-Step Process to Transplant Cannabis Seedlings
Removing the Seedling from its Original Container
Water the seedling an hour before transplanting to ease soil removal. Gently squeeze the sides of the container and tap the bottom to loosen the root ball without pulling on the stem.
If seedlings are in cubes or peat pellets, push slowly from the bottom to maintain root structure intact. Avoid exposing roots to air for extended periods during transfer.
- Water seedling pre-transplant
- Gently loosen soil
- Avoid damaging roots or stem
For more on this, see our related guide: How Deep to Plant Cannabis Seeds for Best Germination Results.
Planting in the New Medium
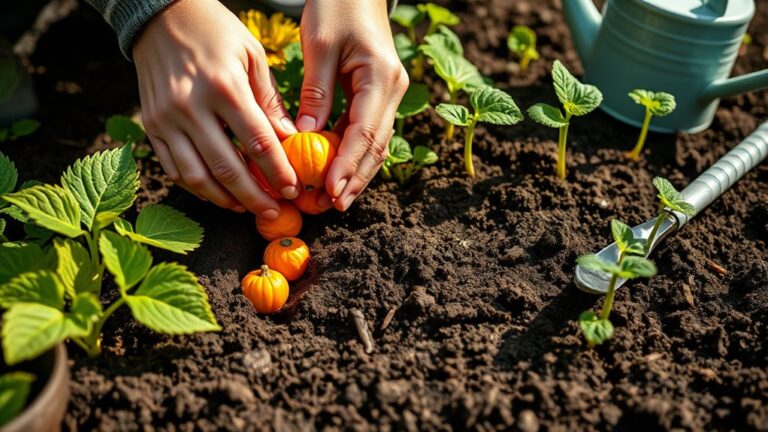
Make a hole in the new soil slightly deeper than the original root ball height. Place the seedling carefully, covering roots fully without burying the stem base.
Firm the soil around the seedling lightly to remove air pockets but don’t compact tightly. Water the transplant gently to settle soil and hydrate the roots.
- Create planting hole
- Set seedling with roots fully covered
- Lightly firm soil and water
Post-Transplant Care for Cannabis Seedlings
Watering and Light Conditions
After transplanting, maintain soil moisture without overwatering. Use a spray bottle or light watering to keep soil damp but not soaked to avoid root rot.
Place seedlings under gentle grow lights or indirect natural sunlight to reduce stress. Avoid intense direct light for the first 2-3 days post-transplant to prevent leaf burn.
- Keep soil consistently moist
- Use indirect light initially
- Gradually increase light intensity after recovery
Monitoring Growth and Adjustments
Watch seedlings for signs of transplant shock like drooping or yellowing leaves. Minor wilting is normal but prolonged stress requires environmental adjustment.
Ensure proper airflow and temperature between 70-75°F (21-24°C) with humidity at 60-70% to support recovery. Avoid fertilizing immediately; wait until new growth appears.
- Observe leaf color and turgor
- Maintain stable environment
- Delay fertilizing until recovery
Common Mistakes to Avoid During Cannabis Seedling Transplanting
Handling the Seedlings Too Roughly
Using excessive force can damage delicate roots and stems, causing transplant shock or death. Always support the root ball and avoid pulling seedlings by the stem.
A clean, gentle approach minimizes stress and preserves vital root hairs necessary for water and nutrient uptake, critical for cannabis seedling care.
For more on this, see our related guide: Cannabis Seed Germination Temperature: How to Get the Best Results.
Transplanting at the Wrong Growth Stage
Transplanting seedlings that are too young or too mature can affect root development and overall plant health. The ideal stage is when true leaves are fully developed but before root bounding occurs.
Delaying transplant increases risk of stunting and pest issues, while transplanting prematurely can cause shock without benefits of more root space.
Advanced Tips for Enhancing Cannabis Seedling Transplant Success
Using Root-Stimulating Additives
Applying microbial inoculants or root-stimulating hormones like auxins during transplant can encourage faster root establishment and stronger growth.
Products containing beneficial fungi or bacteria promote nutrient absorption and disease resistance, giving seedlings a robust start in their new medium.
- Use mycorrhizal fungi inoculants
- Apply rooting hormone gels or powders
- Ensure additives are compatible with soil type
For broader context on cannabis growth cycles and cultivation practices, you can consult cannabis cultivation guidelines at Wikipedia. Cannabis cultivation guidelines at Wikipedia.
Creating Optimal Environmental Conditions
Keep temperature and humidity levels optimal soon after transplant to reduce stress. Using humidity domes or gentle misting helps maintain moisture without overwatering.
Good air circulation and stable lighting schedules support photosynthesis and reduce chances of fungal infections during the vulnerable post-transplant phase.
- Maintain 70-75°F and 60-70% humidity
- Use humidity domes for moisture retention
- Provide gentle airflow to avoid mold
Cannabis Seedling Transplant Pot Types Comparison
Comparing common containers helps choose the best pot for transplanting cannabis seedlings based on drainage, root development, and convenience.
| Pot Type | Drainage | Root Aeration | Reusability | Cost |
|---|---|---|---|---|
| Plastic Pots | Good drainage holes | Limited aeration | Reusable | Low cost |
| Fabric Pots | Excellent drainage | High aeration | Reusable | Moderate cost |
| Peat Pots | Moderate drainage | Moderate aeration | Biodegradable | Low cost |
| Biodegradable Seedling Trays | Varies by material | Moderate aeration | Single use | Low cost |
Frequently Asked Questions
How deep should I plant my cannabis seedling when transplanting?
Plant the seedling so that the root ball is fully covered with soil but keep the stem base just above the soil. Avoid burying the stem to prevent stem rot.
Can I transplant cannabis seedlings directly outdoors?
Yes, but make sure outdoor conditions are stable with warm temperatures and low risk of pests. Harden off seedlings gradually to outdoor light and wind.
How long does transplant shock last for cannabis seedlings?
Typically, transplant shock lasts 3-7 days. During this period, seedlings might wilt or slow growth. Proper care helps speed recovery.
Should I fertilize cannabis seedlings immediately after transplanting?
No, wait until you see new growth, usually after 1-2 weeks, before introducing fertilizers to avoid stressing young roots.
How often should I water cannabis seedlings after transplanting?
Keep soil moist but not soaked. Water lightly when top inch of soil feels dry to maintain adequate moisture without drowning roots.
Key Takeaways
- Transplant cannabis seedlings after 2-3 weeks when roots fill the starter container
- Use well-draining pots and quality soil to support root growth
- Handle seedlings gently to avoid root and stem damage
- Maintain stable moisture and light conditions post-transplant
Conclusion
Understanding when and how to transplant cannabis seedlings is essential to developing strong plants with high yield potential. The key is timing the transplant once your seedlings have established early roots but before they become root-bound. Careful handling, appropriate choice of pots, and favorable post-transplant care help minimize shock and encourage vigorous growth. By closely observing your seedlings and adapting care to their needs, you facilitate a healthy transition from starter containers to larger growing environments, setting the stage for successful cultivation.
For growers focusing on small indoor setups, fabric pots combined with high-quality, balanced soil are advisable for transplanting cannabis seedlings due to their superior aeration and drainage. In contrast, outdoor growers may opt for biodegradable peat pots for easier planting and reduced transplant shock in natural soil beds. Incorporating root stimulants and maintaining steady moisture levels further support seedling establishment. Paying attention to these factors, while avoiding rough handling or premature transplanting, offers tangible benefits for both novice and experienced cultivators.
If you’re preparing to move your cannabis seedlings, start by gathering appropriate containers and fresh soil to suit your grow environment. Then, gently remove each seedling from its starter pot, taking care not to damage roots. Place it in the new container with loosened soil, water lightly, and provide indirect light for a few days. Monitor moisture and plant health closely during this transition phase. With this approach, your seedlings will adapt swiftly and thrive, paving the way for a strong vegetative phase and fruitful harvest.